Saturday, July 27, 2013

Low Carb - Macadamia Nut Cheese Cakes (mini)

Over the last three years I have packed on the pounds, and after creeping up four pants sizes I’ve declared “Enough Is Enough”. I stood on my groaning scale and declared, “I will not buy a size 16 pants”.

So now I’m back on my low carb bandwagon and have sworn off all baked goodie. Ummm scratch that... I’ve sworn off all baked goodies made with sugar and flour. Now that doesn’t sound QUITE so bad.

So what kind of dessert doesn’t contain any flour or sugar? Jello? Pudding?

How about Cheesecake?


I love cheesecake, and these little cheesecake gems are allowed on my diet. With a short list of ingredients (cream cheese, Splenda, egg, and vanilla) they pack only 4.7 carbs per serving. If you add the macadamia nut crust they zoom to 5.5 carbs per serving.

Be still my Low-Carb heart.

The recipe starts out with a nut crust.  I use macadamia nuts nuts because they have the lowest carb count, but you can also use almonds, pecans, cashews, or a combination of all four.  I can never find unsalted macs (at a good price) so I just buy the regular and wash and dry them off before chopping.


I chop the nuts, mixed them with a little butter and Splenda, and then evenly divide the mixture between the 7 cupcake liners (use the aluminum liners because the paper ones will absorb the butter and make a mess in your pan).  Next I press the chopped nuts firmly into the liners.  I have a vitamin  bottle that is the perfect shape for this.  Just wrap it in an aluminum cupcake liner and flatten the nuts against the bottom of the pan. 


Bake the crust for 8 minutes...


And then cover with the filling... 


Just out of the oven they a high and puffy...


But they will deflate as they cool...


Hope you like these as much as I do.  They are a sanity saver when you are on a low-carb diet.  These little bit of sweet, baked goodness keeps me strong and helps me avoid the really bad (really good) stuff.

Enjoy


Low Carb - Mini Macadamia Nut Cheese Cakes
(yield 7 servings; 5.52 carbs per serving)


Crust  (optional) - total carbs: 5.5g; carbs per  serving: 0.79g

2 oz unsalted macadamia nuts , finely chopped;  (net carbs: 4;  8 carbs - 4 fiber) 
1 Tablespoon Butter, melted ( carbs = 0)
1 Tablespoon granulated Splenda (carbs = 1.5)


Filling - total carbs: 33.1; carbs per  serving: 4.73

1 block Regular Cream Cheese (8oz), softened (carbs = 8)
1 cup baking Splenda (carbs = 24)
1 large egg (carbs = 0.6)
1 teaspoon vanilla (carbs = 0.5)

Preheat oven to 350 degrees F.

Crust Directions:
  • In a small bowl blend the chopped nuts, 1 TBL melted butter, and 1 TBL Splenda.
  • Spoon the nut mixture evenly between the 7 cupcake liners.
  • Press/compact the nut mixture firmly into the liner. I use a vitamin bottle wrapped in a foil cupcake liner wrap to compress the nut mixture. The vitamin bottle is the perfect fit for the cupcake pan.
  • Bake the crust for 8 minutes. Note: it may smoke slightly
Filling Directions:
  • While the crust is baking, prepare the filling.
  • Cream the cream cheese and Splenda until light and fluffy. About 3 minutes
  • Add the egg and vanilla, and mix until incorporated
  • Spoon the filling on top of the hot nut crust.
  • Bake 25 minutes until tops are golden brown.
  • Store in the refrigerator or freezer after they cool.


Thursday, January 31, 2013

Martha Stewart’s Meyer Lemon Cupcakes


I still had some Meyer Lemons leftover from my big score at Sam’s Club. Can you believe they were selling 2lb containers of Meyer Lemons for 0.98 cents!!! I’ve made lemon bars, lemon pudding, lemon cookies, lemon pound cake, and still have a few lemons left over.

What to make, what to bake? A final search of the internet turned up one more treat that would use up my last few Meyer Lemons...


Martha Stewart’s Meyer Lemon Cupcakes, which I found on the blog Way More Than 52 CupCakes which in turn came from the recipe book: Martha Stewart’s Cupcakes: 175 Inspired Ideas for Everyone’s Favorite Treat 175 Cupcakes .

The cupcake is in essence white cake with a little lemon curd on top. The pictures on 52 CupCake’s looked delicious and intriguing, but mine looked odd and a little unappetizing. Even my Mom who loves lemon curd gave the cupcakes a funny look. She said it looked like old egg yolk sitting on top of a muffin!

They look a little better once they were sliced open, but I had to do some serious arm twisting to get my family to even taste them.


And sadly even after the taste test, the cupcakes didn’t get rave reviews. Most people said the lemon curd was nice, but the cake was way too dense.


Oh well I guess this proves that sometimes things look better than they taste, or in my case they taste as bad as they look.

Thursday, January 24, 2013

Easy (Meyer) Lemon Pound Cake

I was grazing in Sam’s Club one day (they give out the BEST food samples) when I stumbled across a 2 pound container of Meyer Lemons for 0.98 cent. Yes 0.98 cents. I think someone made a BIG mistake there.

I meekly mentioned my pricing concern to the cashier, but like any 20-year-old he didn’t seem to care. Feeling slightly guilty I handed over my $1.08 and dashed quickly out of the door. I zigzagged a path to my car, slithered into the driver’s seat, and tossed the container onto the floor. Heart pounding, palms sweating, I felt like a sticky-fingered shoplifter.

Returning home I pulled out my Kindle and searched the internet for something to bake with my ill-gotten gains. I found a recipe for Easy Lemon Pound Cake on Food.com. Perfect. I also had a new silicon loaf pan that I wanted to try out so this was like a twofer.

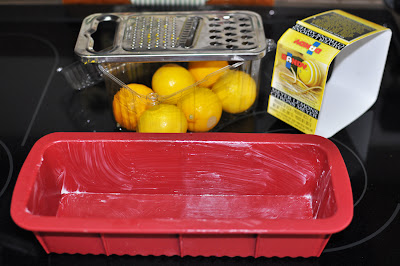
This was the first time using the silicon pan so I followed the instructions and greased it up well.


The Easy Lemon Pound Cake as indeed EASY. 

The batter came together in a matter of minutes. No creaming of butter and sugar. Just stir melted butter and sugar together, throw in all the other ingredients and voila… pound cake. I did make some adjustments to the recipe based on comments associated with the original recipe on Food.com. I used 2 Tablespoons of lemon juice instead of 1, and I added a teaspoon of Meyer Lemon zest.

Yum-meee. Just look at that beautiful lemon batter. Thick and rich with tiny flecks of zest.


And it looked beautiful coming out of the oven too. Golden brown with no burnt and crispy edges. Usually my loaf and Bundt cakes look like someone has taken a blow torch to them, but this one came out just right. The silicon pan is also a little longer and narrower than my metal loaf pan, so that may have promoted more even baking and less burnt edges.


And the cake just popped right out of the pan too. I had never used a silicon pan before, but this single baking experience has made a believer out of me. No more trimming burnt bottoms for me.


So how did it taste? 
Well... it was very lemony.


I’m not a big fan of lemon desserts so for me the extra tablespoon of lemon juice plus the lemon glaze made it a little to lemony for me. But if you like lemons the concentration would be just about perfect.

I also didn’t think the cake was rich and dense enough to be called "pound cake". It was just too light and fluffy, more like lemon cake.

So because the cake was soooo easy I whipped up another batch. This time I used 1 Tablespoon of Meyer Lemon juice, 1/2 tsp of vanilla, and 1/2 teaspoon of almond extract. I also substituted 1/2 cup of heavy whipping cream for the milk. Heavy whipping cream, like butter, makes everything better!


Perfection. On this version I also eliminated the lemon from the glaze and added pecans. Now that is my kind of Easy Lemon Pound Cake.


Easy (less) Lemon Pound Cake - The Bake More

Batter:
1/2 cup butter, melted
1 cup granulated sugar
2 eggs, well beaten
1-2 tablespoon lemon juice (depending on intensity of lemon flavor desired)
1/2 teaspoon vanilla
1/2 teaspoon almond extract
1 teaspoon lemon zest (optional depending on preference)
1/4 teaspoon salt
1-1/2 cups flour
1 teaspoon baking powder
1/2 cup heavy whipping cream

Glaze:
1/3 cup water or lemon juice
1/4 cup powdered sugar

Cake Directions:
• Grease a loaf pan, and preheat the oven to 325°F
• In a small bowl combine flour, salt and baking power.
• In another bowl stir together 1 cup of sugar and melted butter.
• Add beaten eggs to butter/sugar mixture and stir till combined.
• Add lemon juice and extracts.
• Add the dry ingredients to the wet.
• Finally stir in the cream.
• Bake at 325°F in a well-greased loaf pan for 1 hour, or until golden brown.

 Glaze Directions:
• Stir 1/3 cup lemon juice (or water) and ¼ cup powdered sugar
• Use a toothpick to make holes in the top of the warm cake and drizzle the glaze on top of the cake.


Enjoy...

Sunday, November 25, 2012

Fried Egg and Bacon - Cookies!

WOW it has been a while since I posted.

I've still been baking and attempting to decorate, but "life" has all but eliminated my blogging time. But I started a new (less stressful) job a few weeks ago, so hopefully I will have more time to post my successes and failures.

Here are some cookies I baked for Thanksgiving. Not very traditional I know but I saw them at a work luncheon and I had to give them a try....


The egg portion is sugar cookie and the bacon is pretzel sticks. Too cute. Or at least I thought so.

The yoke was the most difficult part to make. I made flattened balls of cookie dough and after baking I dipped them in yellow-orange icing and allowed them to dry. I then used a little icing to glue the yokes to the main cookie and then flooded the main cookie with white icing.


And voila... A sure fire way to get your kids to eat eggs!!!

Tuesday, February 7, 2012

TWD: White Loaves

Hello Tuesday! Tuesday with Dorie that is. Today is the start of a new baking adventure using the world famous book Baking with Julia. This week's TWD selection of White Loaves is brought to you by Laurie and Jules. You can find the recipe on Jules' blog.

So how did my loaves fare? Take a look...

Lovely, puffy, loaves. Loaves so full of yeast I feared they would take over my kitchen.


Just out of the oven. Can't you just smell the aroma of freshly baked bread?


Ah, bread. If it weren't for you I would still fit in my pants!

Monday, October 3, 2011

TWD: Apple Nut Muffin Cake

Dorie had a kitchen emergency and turned her Apple Nut Muffins into cake. I did the reverse and turned Dorie's Apple Nut Muffin Cake into muffins!

Yum. Apples, nuts, raisins, nothing says Fall like apple desserts.


This week's Tuesdays with Dorie selection was made by Katrina of Baking and Boys.

Thanks, Katrina, for a winning selection!

Wednesday, September 21, 2011

TWD: Cocoa Salt and Pepper Shortbread

This week's Tuesday with Dorie selection was made by Tia of Buttercream Barbie. I was intrigued by the thought of salt & pepper in a sweet cookie so I quickly baked up a batch, but...


...I wasn't impressed. The salt & pepper that I sprinkled on top added a surprising kick when you took a bite, but the cookie itself was kinda dull. I ate a couple and thought, "These just aren't worth the calories."

Maybe they needed more sugar (they weren't sweet at all). Or maybe they needed more cocoa. Hard to pin-point the problem, but they were definitely not a "keeper".

Sorry Dorie. This is the first recipe from the book that I didn't care for...

Monday, September 12, 2011

TWD: Clasic Brownies


I tend to prefer cakelike brownies over fudgy brownies, but these fudgy little gems were pretty darn good. Dorie Greenspan in "Baking from My Home to Yours" describe them as "Fudgy but not gooey, intensely chocolaty, dry on top and melty in the middle." That about describes them perfectly.

Many thanks, Anne, of Anne Strawberry for making this week's TWD selection. Go to Anne's web page for the recipe and check out TWD - Tuesdays with Dorie for links to the other "Classic Brownies" renditions.

Sunday, August 28, 2011

Amanda's iPhone Cake

My 10 year old niece wanted an iPhone for her birthday. Her dad said “NO, absolutely positively NO”, so I made her an iPhone cake instead. She got a kick out of it, and her friends did too.


I can't believe it, but this is the first decorated cake that I’ve made in over a year and a half. It has been a rough, rough 18 months. To emotional and upsetting to think about decorating cakes, but I’m hoping and praying that things will get better.

Anyway the cake is half red velvet and half chocolate fudge. I made the app icons out of polymer clay and the rest of the decorations are made from Wilton’s fondant. Yuck!! I think that stuff tastes like flavorless wax, but a kid at the party actually loved the stuff. Weird kid.


Here are the app icons coming together. The assembly wasn't hard, but it was very time consuming. I think I spent about 8 hours making all the 17 app icons. My favorite is the "Map". It has little tiny roads, an interstate sign, and a red push pin. Too cute.


Tuesday, August 23, 2011

TWD: Golden Brioche Loaves

Dorie Greenspan's Golden Brioche Loaves have long been on my baking "to do" list, but it took Margie of Tea and Scones to push it to the top of my baking agenda. Margie selected the recipe for Tuesdays with Dorie's weekly baking assignment. Check out Margie's blog for the recipe and TWD for other version of this French classic.

So how did my first attempt at Brioche go??
Well not too bad, it baked up slightly darker than "golden", but it still had a great taste and light, pillowy texture.

So here it the life cycle of my Brioche (in pictures of course)...

Step 1: Yeast, water, milk, flour, and salt after a few quick pulses.


Step 2: Add the eggs.


Step 3: Add the butter, a little bit at a time. This step took FOREVER. Who would have thought it would take so long to incorporate the butter into the dough.


Step 4: All the butter incorporated into the dough. Beat for about 10 minutes till the dough pulls away from the side of the bowl.


Step 5: Transfer to a bowl, and let the "rising" begin.


Step 6: A few hours later, let the "rising" end.


Step 7: Cut the dough into two (or four) equal pieces. (I didn't have two 8 1/2 x 4 1/2 loaf pans so I used four mini pans. ) Cut each piece of dough into 4 equal pieces and roll into logs.


Step 8: Arrange 4 logs crosswise in the bottom of each pan. Sticky, sticky dough.


Step 9: Leave the dough at room temperature until the dough almost fills the pans. Oops, my loaves rose a little too much.

Step 10: Bake the loaves until golden brown. I cooked mine for about 25 minutes and they came out a bit too brown and a little dry. So next time I would stop at about 20 minutes.


So like I said, a little dry and a little too brown, but not half bad for my first loaf of Golden Brioche!!!