Thursday, September 12, 2013

Marbled Red Velvet Cream Cheese Pound Cake - Yummmm

Red Velvet is my favorite cake flavor, and Pound Cake is my favorite type of cake. Put the two together and you get delicious. Add Cream Cheese and you get sinfully delicious.


I love everything Red Velvet so I have been toying with the idea of compiling all my favorite Red Velvet recipes into an e-book, but a quick search of Amazon found that someone had already done it! Damn, too late again.

Check out Debra Hart's Red Velvet Everything. The book has recipes for Red Velvet Cobbler, Red Velvet Tea Cakes, Red Velvet Fudge, etc, etc. So many choices so little stretch left in my jeans.

For my first Red Velvet Everything baking adventure I decided on Red Velvet Cream Cheese Pound Cake. Just the name makes me drool. The recipe starts as a basic cream cheese pound cake but it gets fancy in the last stage when you split the batter add the Red Velvet “elixir” to one half.


At this point I have one bowl of red batter on one of yellow batter.  Next the recipe instructions tell you to add 1-1/2 cups of flour to the red mix and the remaining 1-1/2 cups to the yellow mix.   Huh???  That step had me worried.  I didn’t think to weigh the bowls of wet batter to ensure that they each had the same amount.  Did I get more batter in one bowl and less in the other?  Would this throw off the ratios and put too much or too little flour in relation to the butter/sugar/eggs?  Would my cake be too wet or too dry?  Would my Red Velvet Cream Cheese Pound Cake be a flop?Oh the horror!!

Well, too late to worry about it now.  But NEXT TIME I will weigh the batter to make sure the amounts are equal,  or better yet mix in the flour before dividing the batter.   That would eliminate any potential screw-ups.

Next the instructions tell you to drop spoonfuls of the batter into the prepared tube pan alternating between the red and the yellow batters.  I bought a new silicon tube pan just for this cake.  For some reason my oven burns every cake I bake in the traditional metal bundt pans, so I wanted to give the silicon pan a try.  The HIC Fluted Pan is a pretty red color, which sadly doesn’t show up well against the red batter of the cake.  Sorry….


So I’m moving along happily filling my pan spoonful by spoonful when I realized I have too much batter and not enough pan.  The recipe didn't list what size pan to use, so naive little me just assumed that the batter would all fit in the pan "I" happened to select.  I’m constantly amazed at how oblivious I can be…

But not to worry.  I greased up some of my mini tube pans, and soon I was spooning again.

In fact the batter shows up much better against the metal pan.


Next you swirl the two colored batters together.  Pretty.


Then bake.  I baked the mini tube pan for about 30 minutes, and the big pan for about 1 hour and 45 minutes.


The mini pan cakes came out perfect.


But the large cake was slightly over baked.  I baked until to toothpick tester came out clean, but next time I would take it out when a few crumbles still clung to the tooth pick.  Better to under baked than over baked.


Next came a simple sugar glaze.  Then the slicing and big reveal.


Too cute.  The red and yellow swirls look amazing.  The colors are still distinct, but they swirl together like young lovers.  So romantic.  Definitely a cake for Valentine’s Day.


The larger cake looks just as swirly and delicious, but I had to add some whipped cream to give it a little moisture.


So all-in-all my first test from the Red Velvet Everything cook book was a great success.  Now I just have to figure out what to bake next.  With 50+ recipes in the book it will be a hard decision to make.

The people at work are going to love/kill me,

Carol


PS: for a similar version of Red Velvet Cream Cheese Pound Cake check out this YouTube video by Cicone.


Red Velvet Cream Cheese Pound Cake

By Debra Hart

From the book: Red Velvet Everything

Ingredients

1-1/2 cups   Unsalted butter, softened

8 oz              Cream Cheese, softened

3 cups          Sugar, granulated

5                    Eggs, large

1-1/2 tsp       Vanilla 

1/4 cup         Buttermilk 

2 TBLS         Cocoa Powder, sifted

1 tsp              Apple Cider Vinegar

1 oz               Red Food Coloring

3 cups          Cake Flour


Directions
  • Preheat oven to 300 degrees F. Grease and flour a tube pan. 
  • Cream butter, cream cheese and sugar together. 
  • Add eggs one at a time, beating well after each addition. 
  • Divide the batter between two bowls. Weigh to ensure that they are divided equally. 
  • In a separate, small bowl combine buttermilk, cocoa, and vinegar. Whisk until smooth. Stir in food coloring. Add the red mixture to one of the bowls of batter. Stir until combined. 
  • Add 1-1/2 cups of flour to each bowl of batter. Beat until just combined. (I just stirred the flour into the creamed mixture, I didn’t bother with the beaters.) 
  • With a large spoon drop spoonfuls of batter into the prepared tube pan alternating between the two colored batters. 
  •  Using a knife, gently swirl the two colors. (Don’t over-swirl. You want the colors to just wrap around each other.) 
  • Bake at 300 degrees F for 1 hour and 35-35 minutes or until a toothpick inserted into the center of the cake comes out (nearly) clean. 
  • Allow to cool for 10 minutes and then gently remove the cake from the pan.

If desired glaze the cake with a powdered sugar glaze.


Tuesday, September 3, 2013

Low-Carb (Chocolate-Chip) Peanut Butter Cookie - Disaster with Isomalt (or maybe not)

I was reading the recipe book: Low Carb Desserts by Martha McBride, and I noticed a lot of the recipes used Isomalt instead of granulated Splenda. The Isomalt is a sugar alcohol which has a lot less (net) carbs than the Splenda.

(Note: some sources believe that sugar alcohol should not be "netted out" and all the carbs from sugar alcohol should be counted in your daily intake.)

I didn’t realize I could bake with Isomalt so I purchased some crystals and immediately mixed up a batch of my yummy Low-Carb (Chocolate-Chip) Peanut Butter Cookies; subbing the granulated Splenda for Isomalt.

From the begining the cookie dough looked strange. The Isomalt crystals were large and were very obvious in the dough. (Note: Later I found that you could get Isomalt Powder. Stupid me.)


But at this point I still had high hopes. I figured the crystals would melt during baking, and my PB cookies would look fine.


Well let’s just say they didn’t look fine. Some of the crystals did melt, but not in the way I expected. After about 8 minutes in the oven I checked the cookies and found each cookie surrounded by a pool of ooey-gooey, bubbling mess. (Sorry I didn’t get a picture. I was too freaked out.) When I pulled the cookies out of the oven the gooey mess hardened and trapped my cookies into an Isomalt candy sheet. (Cool science experiment, but a depressing baking experience.) I roughly cut the cookies out of their Isomalt trap...


And then carefully trimmed the rubbery substance from the edge of each cookie. I wanted to cry. All that beautiful PB wasted.


After I dried my tears I tasted a cookie.   Hmmmm...   Not too bad.  A little chewer than they normally are but still good. I had another, and then a third (and possibly a fourth). Maybe the Isomalt did have a place in my kitchen.

But then the rumbling in my tummy started. My gut started to twist and cramp. It dawned on me that the Isomalt was SUGAR ALCOHOL, and I had eaten four of those little cookies. If any of you have overindulged in sugar-free candy, you know what I was going through. The warning on the bag of Russell Stover's Sugar-Free Candy states: “Excessive consumption may cause a laxative effect.”

Believe you-me, that warning is no lie.

After my gut returned to normal I decided to make another batch just so I could get a picture of the melting Isomalt in action. But guess what?  The cookies baked up fine the second time !#@!


You can  see a little bit of the Isomalt "candy sheet" on the bottom and outer edge, but nothing like the first time.


What was going on????

The only difference with the second batch was that I cut it down in size (1/4 batch), AND I forgot to put the vanilla extract in the mix. Could the vanilla extract have caused the Isomalt to ooze, or was something else at work?  It is a mystery of cosmic proportions. 

But the mystery will have to remain unsolved cause I'm all out of peanut butter, and I have a ton of PB cookies to eat.  But I learned my lesson!!  Only 2 cookies a day.  That sugar alcohol is a killer.
 

Below is my tried-and-true PB cookie recipe.  Substitute Isomalt if you are curious/brave.


Low-Carb (Chocolate-Chip) Peanut Butter Cookies

Makes 30 cookies, 67 g total; 2.2 g carbs each 

Ingredients:

1 cup low sugar peanut butter (I use Simply Jif at 2 net carbs per Tablespoon) -32 g carbs
1 cup granulated Splenda -24 g carbs
1 large egg, beaten - 0.5 g carbs
1 Tablespoon heavy whipping cream - 1 g carbs
1 tsp vanilla - 1.5 g carbs
1/2 cup Hershey's Sugar Free Semi-Sweet Baking Chips (optional) - 8 g net carbs (add 56 g if you don't believe in subtracting out the sugar alcohol)

Directions:
  • Preheat oven to 350 degrees.
  • In a bowl combine peanut butter, Splenda, egg, cream, and vanilla. Stir until combined.
  • Add the chocolate chip and gently stir until evenly mixed.
  • Drop 1 tablespoon of cookie dough onto a parchment lined cookie sheet. Allow two inches between cookies.  (I use a small ice cream scoop to get them all the same size.)
  • Gently flatten the cookie tops..
  • Bake for 12 minutes are until golden brown.

Enjoy...


Sunday, September 1, 2013

Best Ever Banana Cake

Best Ever Banana Cake is a huge name to live up to, but this cake does just that.

It is ultra-moist and filled with the flavors of ripe bananas, nutty pecans, and tangy buttermilk. But it is definitely more cake-like than bread-like. Think Carrot Cake texture and density with bananas instead of carrots.


The recipe begins with, surprise, surprise, BANANAS. Sweet, ripe bananas. The smell of bananas is not subtle in this recipe. It is in-your-face screaming “Here I am.”


Mixing the batter is a little time consuming and messy. It took three bowls in all. One for the bananas, one for the dry, and one for the sugar/butter creaming. 


 And the recipe makes A LOT of batter. This one could easily be cut in half. I wanted to make cupcakes instead of one large cake, and I ended up with 24 cupcakes and 3 mini tube cakes. If I had had the room in my oven I would have 36 cupcakes, but the three trays just wouldn’t fit.  Mama wants a double oven for Christmas.


Here is a link to the "Best Ever Banana Cake" recipe on Food.com and the 1100+ reviews. Read a few pages of reviews before you bake the cake. Base on the reviews I did modify the recipe and reduced the sugar from 2-1/8 cups down to 1-3/4 cups. For me it had the perfect level of sweetness, but if you prefer a more bread-like taste you might want to reduce the amount of sugar even more.

I baked the cupcakes for 21 minutes at 325 degrees, and the moistness was perfect. Not too wet, not too dry. I also skipped the “freezer” step where you take the cake from the oven and pop it into the freezer for 45 minutes. None of the many reviewers thought this improved the cake to any great degree so I didn’t bother rearranging my freezer to accommodate all the pans.

It was my weeks to bring treats for the “Cake Club” at work, so I brought these as my offering. They were a huge hit. Everything was gone in 45 minutes and I got 5 requests for the recipe! 5! That is an all-time record.


This Best Ever Banana Cake sure does live up to its name.  Open wide...


Wednesday, August 28, 2013

One Direction (In Concert) Cake


My niece said she wanted a Niall Horan cake for her birthday.

“Who?” I asked in confusion.

“You know, Niall Horan.  One Direction,” she replied.

“Who?” I asked again still not understanding.

She gave me a look of comic disbelief and proceeded to give me all the details of the most recent boy-band, teenage heart-throbs: Niall, Zayn, Liam, Harry, & Louis. She dragged me to her room and in the week since my last visit she had redecorated her walls. Gone was poor Justin and in his place was Niall.

Ooookayyyyy. That was a fast. But who am I to question tween love.

So I got busy searching the internet for “One Direction” themed cakes and found a few with a concert stage theme that I liked. A lot of the cakes had hand molded band members, but due to limited time and mediocre talent I decided to just buy some One Direction plastic figures to go on top of my cake.

They figures I found are actually very cute. They are only about 3 inches tall and they look like bobble heads, but the heads do not move. But even without the bobble they are still adorable.


To go with the concert stage theme, I decided to include a backdrop that would look like a large silhouette of the band members. I printed out the silhouette and then used the paper copy to make a duplicate version out of Satin Ice Gum Paste.

I later used edible spray paint to color it black. I guess I could have just tinted the gum paste black, but I already had the paint so I figure I would give that method a try. The paint worked okay, but it was delicate and easily smudged. The silhouette was also very fragile so I glued it (with white chocolate) to a piece of square, white gum paste.

I also cut out gum paste British phone booths to be part of the backdrop.  Who remembers Dr. Who and the Tardis (although his' was blue).  The white gum paste phone booths (and a "1D" logo) were sprayed with red edible paint.


The white, cream cheese icing look a little stark, so I painted that silver. Guess I went a little crazy with the spray paint.


Here is the half-finished cake chilling in the refrigerator. The cake is Red Velvet and the frosting is Cream Cheese. I had to keep the cake chilled because of the frosting kept melting.  Gotta love New Orleans in August where temps top 95 and the humidity is 110%.


The multicolored “crowd” in front of the stage is just a paper cutout. I was going to make it out of gum paste, but as usual I ran out of time. Even after all these years decorating cakes I still can’t predicate how long it is going to take to prepare and assemble the decorations. I always seem to run short of time.

Here is the finished product.  I wish I would have put  Niall on the cake with the rest of the guys and tilted the 1D logo up so you could see it better.  But c'est la vie.  That's life.


And sadly this is what happened to all that time and effort. It is frightening that it only takes a few seconds to destroy what took hours to create.


But at least the birthday girl got to keep the little 1D figurines. She added them to the 1D shrine that she calls her bedroom.

Happy Birthday, Amanda.


Tuesday, August 27, 2013

The Mat - Fondant Rolling System - A Review


Disclosure: We are a participant in the Amazon Services LLC Associates Program, an affiliate advertising program designed to provide a means for us to earn fees by linking to Amazon.com and affiliated sites.

I'd been eying “The Mat” by SweetWise for some time now, but I make so few fondant cakes that I couldn’t really justify the expense. What to do? What to do? But then my Wilton mat tore after years of use and abuse, so I took the plunge and bought the Professional Mat.


Oops… should have paid more attention to the size. That thing is huge!!  30 inches doesn’t sound like a lot, but it is almost too big to fit on my round kitchen table. Due to its size it is also a little difficult to handle (especially if you are just rolling out a small amount of fondant). Suggestion #1: If you are a hobby baker, think about the Home version instead of the Professional. The Professional is only a few dollars more than the Home version but sometimes bigger is not always better.

I didn’t have a fondant cake to make so I decided to just do some dummy testing, training and seasoning of my new Mat. But first I watched the video on the Sweet Wise web page (or on YouTube). The Mat itself does not come packaged with instructions, so you MUST watch the video to figure out how to use the dang thing.

The video has lots of tips and tricks, but one of the most important is to get the two vinyl sheets oriented correctly before you start rolling the fondant. Each sheet has a “good” side and a “bad” side. Use the printed instructions on each sheet to get them positioned properly.

The top sheet should point right...


And the bottom sheet should point left...


Next comes the rolling. Easy peasy. The video suggests rolling from the center out instead of all the way across.

Next peel off the top vinyl layer and position the bottom vinyl layer (and rolled out fondant) over the cake.


Release one edged of the fondant from the vinyl and then let the weight of the fondant and gravity pull the rest free.


My first test was with Wilton fondant, and the process worked like a charm. The Wilton fondant released from The Mat and gently rolled onto the “cake”.  Next I tried Satin Ice fondant and it work equally as well.

BUT then I tired the same process with Fondarific fondant. What a disaster.

I had trouble with the Fondarific from step one. While rolling the fondant between the vinyl sheets I noticed lots of pockmarks forming. Next when trying to remove the top sheet, pieces of the Fondarific stuck and formed even bigger pockmarks. Then, like the top sheet, the fondant would not release from the bottom sheet.


I had to pull it loose and I ended up with a huge mess.


But I gave it another try. This time I dusted The Mat with cornstarch and then re-rolled the Fondarific fondant.


It worked a little better, but it still took some effort and consequently the fondant was a little stretched. The pockmarks were also still visible even using the corn strach.


I went online and found that other people were having the same problems. It seems like the “stickier” fondants don’t work as well with The Mat. They seem to, well… stick.

Other reviewer suggested using a little Crisco on The Mat, but I rejected that idea because I didn’t want to have to clean (with soap and water) that monster again. When I first got The Mat I tried to wash it in the sink. What a mess. Water went everywhere, including down the front of my pants. That thing was just too big to wrestle into my kitchen sink.

So what is my final opinion of The Mat?

Well it is GREAT as long as you use the right fondant.

With the right fondant The Mat makes the rolling, positioning, and final placement of the fondant super easy. It keeps the fondant from drying out during the rolling process, and the size guide printed on the vinyl makes rolling out the correct size a snap.

BUT the key to The Mat’s success is using the correct fondant. The dryer fondant like Wilton, Satin Ice, Fondx, etc will work well, but the stickier fondants like Fondarific, Duff, and MMF might give you some problems.

So keep your preferred fondant in mind when considering a purchase of The SweetWise Mat.


Thursday, August 15, 2013

Fondant Comparison - 7 contenders, no clear winner


I'm just a hobby baker, but a friend wanted me, ME- Queen of the Cake Wrecks, to make an elaborate fondant cake for her daughter's engagement party. Yikes. Talk about pressure. I wanted everything to be perfect, but as usual things did not turn out quite as I dreamed. I had lots of technical difficulties, lots of structural issues, lots of tears and gnashing of teeth, but all that drama is for another post.

This post is about FONDANT.  Which fondant tastes the best and which is the easiest to work with (in my inexperienced opinion).


Before this adventure the only fondant I had worked with was Wilton's (which tastes really bad, but is easy to work with) so I decided to get samples of six other popular fondants and do a comparison. My goal was to find a fondant that was easy to work with, and also had a great taste.

Disclosure: We are a participant in the Amazon Services LLC Associates Program, an affiliate advertising program designed to provide a means for us to earn fees by linking to Amazon.com and affiliated sites.

The fondants selected for the test were: 

Elite (Fondx) – Silk White 
Pettinice - White Fondant, Ready-To-Roll
Wilton – White (tested version no longer available)

(( Update 6/2/15: I've added a new fondant to the comparison:Via Roma Bakery.  You can find the blog post here.
Update 2/3/16: I've added another new fondant to the comparison: Cake Craft Fondant.  You can find the blog post here.
Update 9/8/2016: Yet another fondant: Carma Massa Ticcino.  You can find the blog post here.
Update 2/20/2017: Another fondant: Dream by Choco Pan.  You can find the blog post here.
Update 4/9/2017 : Post for the Fat Daddio's Pro Series fondant can be found here.
Update 5/7/2017: Post for the Renshaw fondant can be found here.
Update 7/31/2017: Post for the Fantasia fondant can be found here.
Update 11/19/2017: Post for the Mona Lisa fondant can be found here. ))

Here are strips of each fondant atop a simple white cake with American Buttercream icing. All of the fondant colors had “white” in their name, but as excepted the shades vary greatly.  I had ten people taste all the fondants to get their unbiased opinions.


So how was my comparison conducted?   What was the ranking criteria?

First was the taste test, then the kneading test, the rolling test (did it stick, was it easy to roll, how much did it spread, the draping/smoothing/trimming test. Finally the fondant covering the pan was inspected for imperfections. 

The goal was to find the best coverage with the least effort. Would one fondant brand be better at covering mistakes than others? 

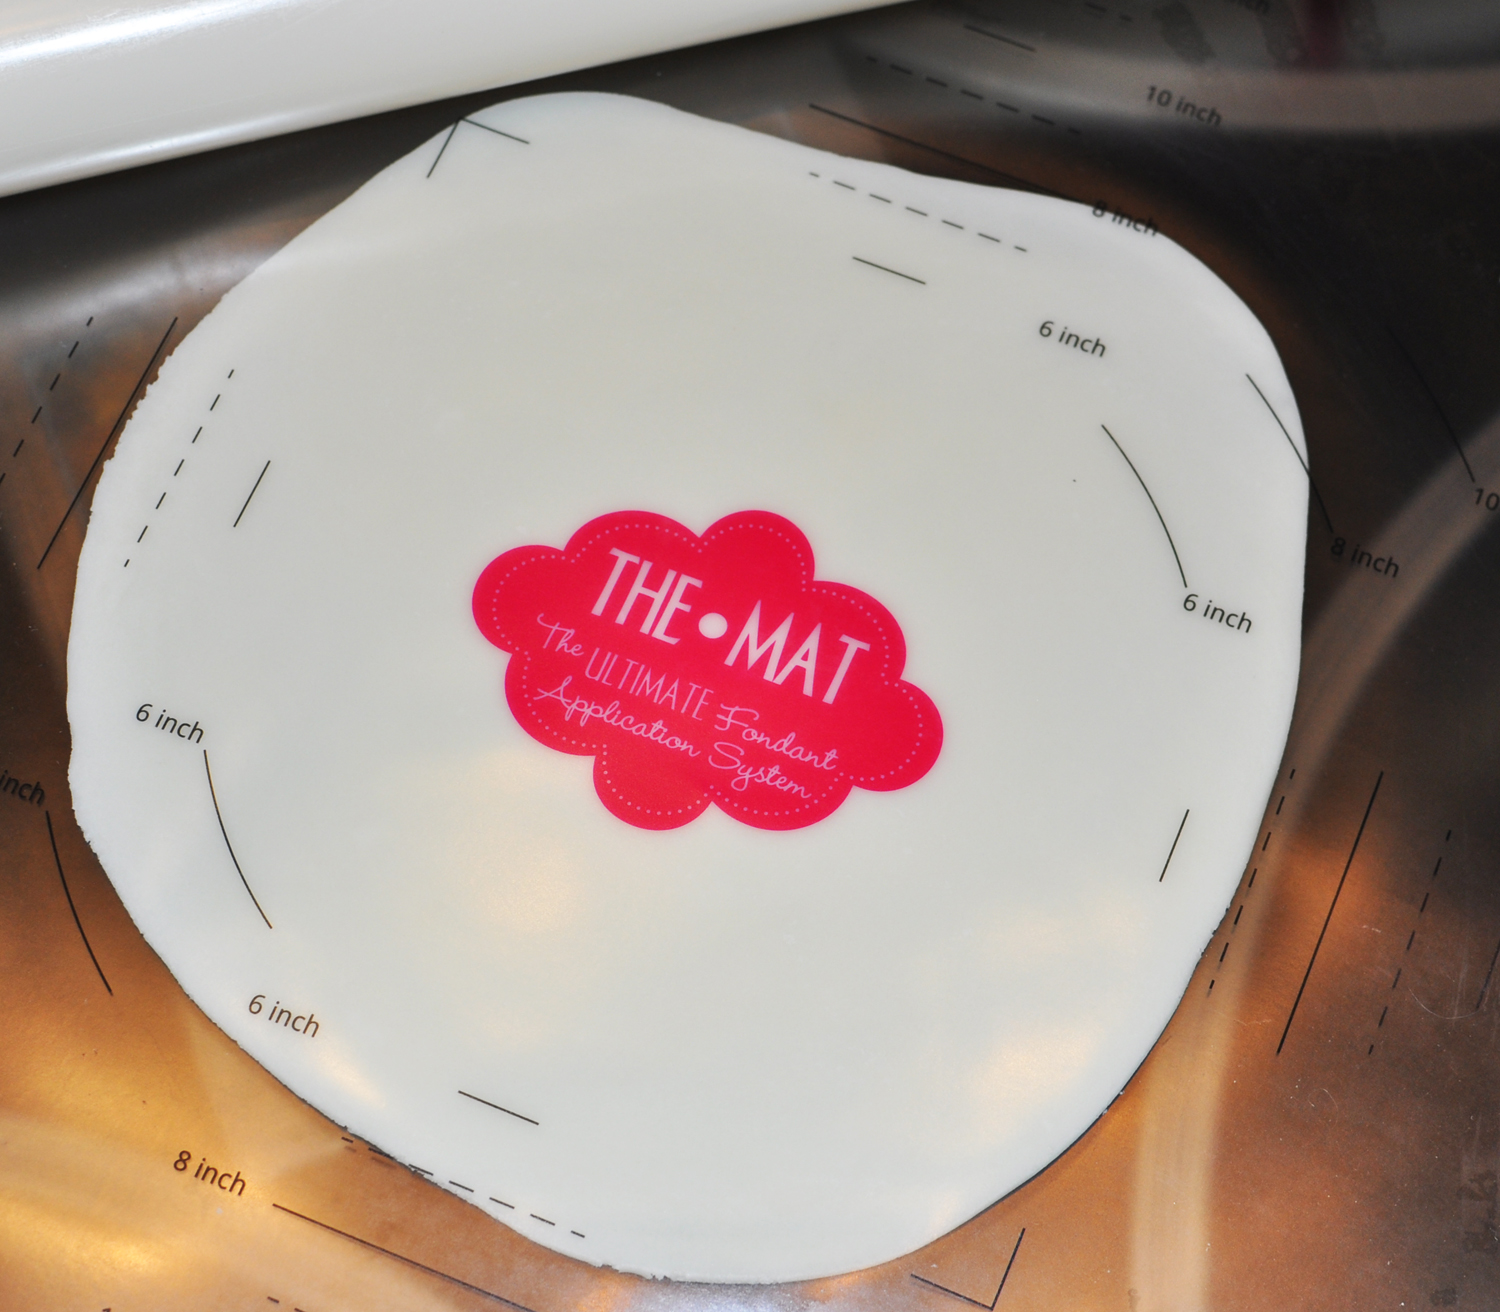
Note #1: I draped all the fondant onto the same Mini Angel Food Pan. No icing covered the pan. It was just fondant atop metal. I wanted to see how many of the pan's nooks and crannies would show through the fondant.


Note #2: For each contender I used 5 ounces of fondant and rolled each to 1/8 inch. I was surprised at the difference in the amount of spread or coverage between the brands. In one case the fondant only rolled to 7-1/2 inches round, and in another the fondant rolled to almost 11 inches round. I guess it is a density issue. The heavier/denser the fondant is the less volume it has to spread. The lighter fondants had more volume per ounce, so there was more fondant to roll into a larger circle. Any mathematicians out there willing to explain this for us? 

Note #3: Because prices of fondant varies greatly from day to day and from vendor to vendor I don't quote any prices.  I only give a general ranking. This ranking does not include taxes or shipping. 

Now onto the testing results (in no particular order): 


Pettinice – White Rolled Fondant Icing 

  • Cost: Middle of the pack as far as pricing.
  • Packaging: This fondant is packaged in a thin, flimsy wrapper. The wrapper was ripped during shipping, and the fondant near the rip was already dried out. 
  • Taste: How does it taste? In a word: WOW. This stuff taste really, really good. Like traditional buttercream icing, only firm. Honest. I usually remove the fondant before eating the cake underneath, but I would be happy to munch on this stuff all day. 
  • Texture: Pettinice is soft and kneads easily. Working the fondant does not strain your arms or cramp your fingers and hands. The fondant has a cool, dry feel and it is not greasy at all. 
  • Rolling: Very easy to roll. The Pettinice did not stick to the rolling mat so I didn’t have to use any cornstarch. Rolled the 5oz to 1/8” which formed an 8" circle.  But at this thickness the rolled fondant seemed a little thin and fragile. It would probably perform better if rolled to 3/16 or 1/4 inch. 
  • Draping: Even as thin as it was, I found it easy to cover the pan with the fondant. The softness of the fondant allowed it to settle with more folds and drapes, but because it wasn’t sticky it was easy to smooth. But all that smoothing took more time and effort. Experience would make this step easier and quicker, but for me the process was a little time consuming. 
  • Cutting: Using a pizza cutter the Pettinice fondant cut cleanly. No hairs or pulls or gooey mess along the trimmed edge; just a nice clean line. 
  • Final Look: Because the Pettinice fondant was so soft it settled into the nooks and crannies of the tube pan. These “imperfections” in the pan were very noticeable in the smoothed fondant. If the fondant had been rolled a little thicker the imperfections may not have shown through as much, but rolling thicker would add to the cake covering costs. 
  • Other Observations: Fondant dries very quickly!!! You must work fast. Re-rolling the same fondant again and again (trying to get the size correct) is risky. You need to have the skill to get it right the first or second time. 
Pettinice  - One of the top two in TASTE.


Duff Goldman – White Buttercream


  • Cost: One of the most expensive, but Duff’s brand can be purchased at big box craft stores with a 40% off coupon. With this coupon it would be one of the least expensive. 
  • Packaging: Nice sturdy tub. 
  • Color: Labeled as “white” but has a very yellow cast. 
  • Taste: Taste good but has a stretchy, gummy feel in your mouth. Kind of feels like taffy. 
  • Texture: You need to microwave the Duff fondant to soften it. It is rock hard before microwaving, but very soft after. Feels and looks a little greaser than the Pettinice. 
  • Rolling: The Duff fondant was a little sticky but still easy to roll. It had a tendency to shrink and snap back after the rolling pin was removed. Took a little more effort to roll it out. 5 ounces rolled to 9 inches round.
  • Draping: The Duff fondant felt more elastic and solid so fewer "folds" form when draping it over the cake. Since there were not as many folds, it is easier to smooth. 
  • Cutting: Because the fondant had an elastic-like pull it didn’t cut very easily with the pizza cutter. The cut edges were a little ragged. After the fondant dried a bit I had to go back and re-trim. 
  • Final Look: The Duff fondant showed a lot of imperfections, and it also had a somewhat greasy look.   


    Choco-Pan – Wedding White 

      • Cost: Middle of the pack as far as pricing.
      • Packaging: Nice sturdy tub.
      • Taste: Very good taste. Actually tastes like white chocolate. One of the best tasting fondants in the group.
      • Texture: I have to admit that I was huffing and puffing trying to get the Choco-Pan out of the container. I had to use a knife to hack off chunks. What landed on to my counter was hard and crumbly. I envisioned spending hours kneading this stuff, but amazingly it was very easy to knead and very quick to soften. I guess body heat does the trick. And I have cold hands!! If you are hot blooded this fondant might actually get too soft.
      • Rolling: The Choco-Pan stuck a little bit to the mat. Choco-Pan fondant had a good spread at  9+ inches. 
      • Draping: Lots of folds formed when draping the cake with the fondant, but it was easy to smooth them away. 
      • Cutting: Cuts clean. No pulls. 
      • Final Look: The Choco-Pan was middle of the road as far as looks. Some brands showed more imperfections than the Choco-Pan and other showed less. 
       Choco-Pan - One of the top two in TASTE.


      Elite (Fondx) – Silk White
        

      • Cost: One of the most expensive. 
      • Packaging: Nice sturdy tub.
      • Taste: Strange chemical-like raspberry taste. It was also a little tougher to chew. None of my taste-testers cared for the taste of this fondant. 
      • Texture: Easy to knead. Feels very squishy and cool. 
      • Rolling: Rolls very smooth and uniform. No sticking at all. You can smell the raspberry while rolling the fondant. When rolling out the fondant, the 5 ounce block spread to 10+ inches. This was the second largest spread out of all the fondant. 
      • Draping: Easy to smooth out the drapes. 
      • Cutting: Easy to trim, very clean cut edges. 
      • Final Look: The covered cake looks great, hardly ANY imperfections from the underlying cake are visible. If it weren’t for the strange taste this fondant would be a top pick. I will try another flavor/color to see if they all have the odd taste. 
        Elite (Fondx) - Produced the BEST LOOKING FINISHED cake.  Looked oh-so smooth and perfect.


      Fondarific – Buttercream Antique White


      • Cost: Middle of the pack as far as pricing.
      • Packaging: Nice sturdy tub. 
      • Taste: Okay taste, but didn't like the taste of the Fondarific as much as the other brands (Choco-Pan, Pettinice). Would give it third place in taste.
      • Texture: Hard and unyielding when removed from pail, but a few seconds in the microwave makes it very soft and squishy. Feels like stretchy play dough. Also feels somewhat greasy. 
      • Rolling: My first attempt at rolling the Fondarific had it sticking to the mat (Wilton Roll And Cut Mat). I had to peel and scrape to get it loose. On the second attempt I use corn starch and this worked like a charm. No more sticking after that. In the end it rolled out to almost 11 inches.
      • Draping: The Fondarific formed nice broad drapes when covering the cake. The drapes did not stick to each other or collapse (all that cornstarch I guess). Smoothing was very quick and easy. Took no time at all to smooth it out. 
      • Cutting: The Fondarific cut very cleanly. No pulls or fondant hairs. 
      • Final Look: The Fondarific was the easiest to smooth and gave one of the best, blemished-free finishes. If it tasted a little better this would be the perfect fondant. 
      • Other Observations: 
        • Fondarific never seems to harden. Neither air nor time will cause it to firm up. If it gets a little stiff just microwave again and it will get soft again.
        • You can re-roll over and over again without the fondant drying out. 
        • Has a very long shelf life (1 year).  Because it doesn't harden you must add gumpaste or gumtex if you want to make stiff decorations out of it. 
      Fondarific - Stays soft, produced a smooth looking finished cake.  Has a long shelf life, won't dry out.


      (Sorry about all the spots of corn starch on the Fondarific cake.  I should have brushed them off.)


      Satin Ice – White Buttercream 


      • Cost: One of the most expensive.
      • Packaging: Nice sturdy tub. 
      • Taste: The Satin Ice – White Buttercream tasted okay but I found it a a little bland and nondescript. 
      • Texture: While you knead the fondant, it feels cool, soft and dry in your hands. But after draping and smoothing the fondant over the cake, it forms an unattractive “elephant skin” texture as it dries. 
      • Rolling: The Satin Ice rolls nicely and spreads to about 9 inches. But it tends to crack and tear around the edges. 
      • Draping: Hardly any drapes formed when placed atop the cake. Feels a little stiff and it is not very easy to smooth out the folds. 
      • Cutting: Cuts cleanly. Had no problems in this area. 
      • Final Look: The “elephant skin” texture that this fondant formed was a no-go for me. I don’t know if I had an old or dry batch of fondant, but I would think twice before trying this fondant again.


      Wilton – White
      Note: the Wilton version tested is no longer sold. Wilton now sells the Decorator Preferred Fondant.


      • Cost: The least expensive of the bunch, and with a 40% off coupon it makes it even cheaper.
      • Packaging: Enclosed in cellophane wrap and then boxed. 
      • Taste: All my taste testers just said, "YUCK!".
      • Texture: Dry and a little stiff at first, but softens with some effort.  This excessive dryness was probably my fault.  The box I tested was old.  I had purchased it may be 9-12 months ago, and never used it.  Probably a fresh pack would have been moister.
      • Rolling: The Wilton fondant rolls nicely and spreads to about 10+ inches. Did not stick at all.  Was super easy to lift off the rolling mat.
      • Draping: Hardly any drapes formed when placed atop the cake, and the fondant cracked along the top edge.  Again this is my fault for not getting a fresh box to test.  To compensate I added a touch of Crisco to soften it up.  After that the fondant draped and smoothed without effort.

      • Cutting: Cuts cleanly. Had no problems in this area. 
      • Final Look: Great, wonderful.  As far as final looks go the Wilton fondant was amazing.  No nooks and crannies from the pan showed through the fondant.  Looked perfect even in my inexperienced hands.  Now if they could just do something to improve the taste.
       Wilton - Next to Elite, the Wilton brand produced ONE OF THE BEST looking FINISHED cake.


      So after all my testing I had no clear winner  :-(

      Some brands I rejected outright, but out of the other brands the “winner” would depend on skill level and which is more important: the way the fondant looks or how it tastes.

      Pettinice had the best taste (in my opinion), but working with the fondant and getting a perfect finish would take more experience and training on my end. The fact that it dried so quickly also scared me off. When I gain more experience and confidence in my ability to roll and cover a cake quickly, this will be a contender.

      Duff Goldman's brand had a good taste, but it did not cut very cleanly and it was also on the expensive side (unless you have a 40% off coupon).

      Choco-Pan had a great taste, was easy to work with, and was middle of the pack as far as price. If I had to assign the #1 trophy to any ONE fondant it would have to be Choco-Pan (given my current level of experience).

      Elite (Fondx) had a strange chemical taste that didn’t appeal to me, but it was very easy to work with and it produced the best-looking finish. Even in my inexperienced hands the fondant came out very smooth, with hardly an imperfection to be seen. If it weren't for the strange taste this would be the undisputed winner in my "Fondant Games". I will have to try other flavors to see if they all have that strange taste.

      Fondarific had just an okay taste, but it was extremely easy to work with and it was also one of the least expensive. But what I really loved about the Fondarific was the LONG shelf life. I don’t make many fondant cakes so it is nice (and cost effective) to buy a big tub of this stuff and not have to worry about it drying out in a few months.

      Satin Ice had a bland taste (in my opinion), and it formed a weird elephant-skin texture that was off-putting to me. I also found that as the fondant dried it cracked around the edges of the cake. I may have had a bad batch, or I may have handled it wrong. Does anyone have any words of advice?

      Wilton has a horrible taste, and I would never cover a commissioned cake with it, but because it is inexpensive, easy to work with, and produces a smooth finished cake, it is a great option if you are just practicing or making fondant decorations for your masterpiece.  (Note: the Wilton fondant tested is no longer sold.)

      As you can tell from the above summary my comparison yielded no clear winner.  In the end I decided to use the Choco-Pan as the fondant to cover my commissioned engagement cake. At this point in time I would probably buy Choco-Pan for any large commissioned cake, but I like keeping the Fondarific on hand to use for any spur-of-the-minute jobs.  And I also like using the Wilton brand to make fondant decorations and flowers.


      So many fondants, each with its own Pros and Cons.  

      The one you pick will depend on your skill, your budget, and what is more important to you – taste or looks.

      If you have made it this far in the post I want to wish you Happy Cake Decorating, and I hope my very unscientific review helps you in some small way.

      Carol 
      .