
Does the price of a fancy wedding or party cake give you sticker shock?
Do you think, "What!!! It is just eggs, sugar, and flour! I can make it myself for a fraction of the cost?"
Well cake may indeed be just eggs, sugar, and flour, but the price of raw ingredients is nothing compared to the labor costs, the skill of the decorator, and the experience your professional bakery has dealing with all the potential cake related disasters.
But if you are on a tight budget and you willing to settle for something less than a Hollywood showstopper, making your own wedding or celebration cake is doable. It IS doable, but realize that there are HUNDREDS of things that CAN AND WILL go wrong during the process.
Below is a list of Tips, Tricks, and Lessons I've learned over my decades as a hobby/wanna-be cake decorator. It saddens me to admit that even after 40 years of practice, something still goes wrong every time I make a cake.
Hopefully after reading these tips you can:
1) avoid some of my disasters,
2) dodge some of my missteps, and
3) never experience my constant fear of getting featured on Cake Wrecks.
1001 Tips for Making Your Own
Wedding or Celebration Cake
Wedding or Celebration Cake
To keep this post from getting too long <bwahahahah>, I have broken it into 9 parts.
Part 1 - The Design & Planning Phase (you are here)
Part 2 - The Science of Ingredients
Part 3 - The Oven, Pans, & Pan Prep
Part 4 - The Mixing Phase - coming soon
Part 5 - The Baking Phase - coming soon
Part 6 - Filling, Crumb Coating, and Covering the Tiers - coming soon
Part 7 - The Stacking & Support Phase - coming soon
Part 8 - The Decorating Phase - coming soon
Part 9 - Transport, Delivery, Placement & Repair - coming soon
Part 1 - Design & Planning Phase
- KEEP IT SIMPLE
- I know it sounds trite, but pick a simple design. The more elements on the cake, the more things can go wrong.
- Ignore the siren call of Pinterest masterpieces and settle for something like a simple stacked cake with a bouquet of flowers on the top or flowers cascading down the side.
- Go with a round cake. Round cakes are so much easier to work with than square cakes, especially if you are going to cover them in fondant. Getting fondant to fit around the sharp side edges of a square cake is hard.
- And skip the fancy shapes. No hearts, hexagon, or paisleys pans. For one your will never use the pans again, and two the weird angles are a pain to work with.
- Avoid designs that include piping or string work on the sides of the cake. Believe me this is a skill that takes a lot of time, patience, and practice. Nothing is worse than half your piping falling off the cake before it even gets to the party. There are special tilting turntables that will help with the job, but they are expensive if you are only going to use it once.
- Ditto with the piped shell borders at the base of the cake. Sure it is easy to pipe the first one, but getting the other 100 to look even, uniform, and identical is a bear. And nothing screams "look at me" like a border with miss matched shells.
- Instead of a piped border, attach a pretty ribbon at the base of each tier. This is an easy way to add elegance to a cake and hide a bunch or stacking flaws. There are always gaps between the stacked cakes, and you need to use some technique to hide them. A ribbon is the perfect camouflage.

- - but make sure to cover the back of satin ribbons with Glad Press & Seal wrap. You don't want the dye from the ribbon leaching onto the cake, and chances are the ribbon is not food safe. The Press and Seal has a sticky side, so just cut the wrap to size and stick it on the back of your ribbon. Easy Peasy.
- You can also use sugar pearls or candy sixlets to hide the gap. Just line the little candy ball along the gap and secure them with melted white chocolate. You can also make strands of beads out of fondant using a silicone bead mold. But whatever you do, don't use Mardi Gras Beads! Sure it is super quick and easy to drape a strand of beads around base of the tier, but you don't know where those beads have been!
- And this point brings up the Cardinal Rule of Cake Decorating - You only want FOOD SAFE stuff attached to or touching your cake. You don't want to inadvertently poison Aunt Betty.
- In recent years I have seen a shift from ultra elaborate wedding cakes to some more understated. (Maybe because all of the Cake Shows have disappeared from The Food Network?) One of the new trends in wedding cakes is the simple "buttercream spoon technique". This method is easy to do and it looks great. It also hides all kinds of flaws in the cake because it is supposed to look rustic rather than sleek and perfectly smooth.
- And those pretty Naked Cakes that have been all the rage? You might want to skip them. I thought - "Hey, no frosting on the side, this will be easy!" Sadly, the "Naked Look" takes a little more effort than one might expect.

- FLOWERS
- Gum Paste flowers can look amazingly realistic (not mine of course), but they take a lot of skill and time to create. If you have the talent and the hours to play, they are the best option because they are (for the most part) FOOD SAFE.

- But gum paste flowers can get expensive to make because of all the equipment involved. You need the gum paste of course, but you also need cutters for each flower and leaf type being used, small rolling pin to roll out the gum paste, veiners to put patterns in the soft gumpaste which make them look realistic, tools and foam pads to shape the petals, food safe wire and floral tape (wire from the hardware store shouldn't be used on cake), and some way to color the flowers - either gels or powders. There are lots of other tools and gadgets you can buy to make the job easier, but the items listed above are the basics.
- If you want the food safety of gum paste without making them yourself, you can buy ready-made gumpaste flower and bouquets.
- And the best part of making gum paste flowers is that you get a lasting memory of your accomplishment. When I use silk flowers on a cake they always get thrown away after the event, but gum paste flower are always kept and saved by the bride-to-be or the birthday girl. Long after the cake itself is gone, the gum paste flowers will live on.
- Good quality Silk Flowers sometimes look more real than real flowers. Silks flowers are an easy and attractive option for someone making their own wedding cake.
- But please, please, please, don't place silk flowers directly on the cake! Unlike gum paste they are NOT food safe.
- Silk flowers are made all over the world, and you as a cake decorator don't know the cleanliness standards of the factory where they were made.
- You don't know about the dyes, or the plastics, or the wires used. Is there lead in the dye? Hazardous chemicals in the plastics?
- What about bugs and rodents crawling across the material as they are assembled and shipped? How many dirty hands touched them before you brought them to your kitchen?
- It doesn't take a lot to make some people sick, so do take precautions if you are going to use silk flowers.
- Big WARNING - Don't just stick silk flowers into your cake or lay them on top. Put a barrier (a plate or cling wrap) between the flowers and the cake,
- or coat any part of the silk flower that touches the cake with melted white chocolate or Candy Melts. The chocolate barrier serves two purposes: it keeps the silk flowers from directly touching the cake, and when the melted white chocolate dries it acts like a glue and secures the flowers to the cake. Win, win.
- So what about Fresh Flowers on the cake? Well this is even trickier.
- First you need to figure out if the flower itself is poisonous. Do you know that common flowers like azalea, calla lily, hyacinths, hydrangeas, lily of the valley, oleander, rhododendron, sweet pea, and wisteria are poisonous? You don't want to show up with deadly flowers on your cake, and accidentally have someone eat it.
- Another issue is finding flowers that are ORGANICALLY grown, meaning they were grown without chemical herbicides or residual pesticides. This also means that the grower can't have used any systemic toxins or weed-and-feed fertilizers. Hey would you want to eat a cake that is covered in roses that were just sprayed with pesticide like Sevin? So if you don't know if your flowers are organic, place a barrier between the flowers (also stems and leaves) and the cake.
- Also, if using fresh flower be sure to remove the stamen and anther. You don't want pollen falling off the flower and covering your cake with yellow dust.

- Cake Flavor/Recipe
- During the planning stage you must decide on the CAKE FLAVOR/RECIPE to use.
- Another decision is BOX MIX or SCRATCH.
- When selecting a particular cake recipe, keep in mind that the finished cake (especially the bottom tier) needs to be sturdy enough to stand up to all the poking, prodding, and abuse that goes on during the decorating and transport of your cake. Think Pound Cake.
- Scratch cakes are typically denser than a box mix cake, but a scratch cake is more prone to error and therefore more stressful.
- A box mix on the other hand has been perfected over decades to bake up perfectly every time. A box mix has also been formulated to bake up light a fluffy, which is actually a VERY BAD thing when making a stacked wedding cake.
- A regular box mix produces a cake that is just too delicate to handle the weight of fondant, gum paste decorations, rods, dowels, and multi-tired stacks. But if you want to use a box mix don't despair, using a box is still an option as long as you "Enhance It". The enhancing (adding extra things like sour cream, extra eggs, etc) makes the finished box mix cake denser, sturdier, and less prone to collapse.
- One of the most popular enhanced recipes is the White Almond Sour Cream Cake (WASC). It has been used for years by countless bakers. I like using Duncan Hines mix in my WASC because I think it is a little sturdy than the Betty Crocker and Pillsbury.
- Also be aware that a few years ago the volume of mix in the box was reduced by almost 3 ounces. All the major brands quietly went from 18 oz to either 15+ oz or 16+ oz without saying a word. Sneaky. THE WASC recipes were designed with 18oz boxes in mind, so to compensate for this short-sheeting of the box mix I just add 2 additional ounces of flour to get the proportions back in sink.
- You can find variations of the WASC recipe all over the web, but my favorite link is on Food.com because it gives you tons of variations. You can make Chocolate WASC, or lemon, or coconut cream, or even Orange Popsicle.
- Number of Servings
- Decide on the number of SERVINGS needed (how many people will be eating cake). A good estimate is that 70% of invited guest will actually show up at the party, so take the invite number * 70% and that is how many servings of cake you will need.
- But what is a "serving"? Well there are two standards. You can have a "wedding" serving which is a piece of cake that is 1" wide x 2" long x 4" high, or a "party" serving which is 1.5" x 2" x 4".
- Once you know how many servings, you can calculate which size pans you need to get the servings you want.
- There is a whole science to cutting the cake to get the correct number of serving and hundreds of website to show you how to do it, but according to Wilton's charts, a 6" round cake is 12 wedding servings, an 8" round cake is 24 servings, a 9" is 32, a 10" is 38, a 12" is 56, and 14" round cake is 78 servings.
- So if you have 150 invited guest, multiple that by 0.7 to get 105 people eating cake. A 3 tier round cake of 8-10-12 will give you 118 servings which is just enough cake.
- But if you have a family like mine that simply LOVES cake and wants to take 2 or 3 pieces home to eat for breakfast the next day, double the number of servings or you will have a riot on your hands.
- Simple Syrup
- Do you want to soak the cake layers in SIMPLE SYRUP?
- A simple syrup is a mixture of water, sugar, and flavoring that is brushed on each cake layer before filling and stacking.
- The syrup is used to add moisture and flavor complexity to the cake.
- I love using chocolate syrup on chocolate cakes, but I have mixed results on white cakes. If too much syrup is used it can make the cake gummy.
- Filling
- Decide on the FILLING.
- Do you want a fruit filling between the layers or just buttercream?
- Fruit fillings may taste better and add flavor complexity, but they make the cake less stable.
- If the fruit filling is not "dammed" properly (see Part III on Filling, Crumb Coating & Covering the Tiers) it can cause bulges, blowouts, oozing, or in the most serious disaster: slippage & collapse.
- Fruit filling are especially troublesome during the hot summer months.
- Other options for filling include Curd, Custard Buttercream (which is a pastry cream with added butter and powdered sugar), and Whipped Cream Frosting (which is whipped cream with added marshmallow cream, butter or gelatin).
- Another big issue with filling is the red flag of perishability. Is it safe to have your chosen filling sitting for hours at room temperature? Be aware that some fillings require refrigeration.
- Frosting
- Decide on the FROSTING for your cake. Some options include:
- American Buttercream (made with powdered sugar and butter),
- Crusting American Buttercream (portions or all of butter substituted for solid vegetable shortening),
- French Buttercream (hot sugar syrup added to pasteurized egg yolk),
- Italian Meringue Frosting (hot sugar syrup added to whipped egg whites and butter),
- 7-Minute Frosting (like Italian Meringue, but egg whites are cooked with sugar and water),
- Swiss Meringue Frosting (Cold Italian Meringue Frosting with butter added),
- Ermine Frosting (Cooked Flour Frosting),
- Cream Cheese Frosting (cream cheese with butter and/or shortening),
- Ganache (white or dark chocolate with cream).
- When selecting which frosting to use, taste is not the only thing to consider. Air temperature during transport and at the event is a big consideration.
- If the cake is going to be outside in the heat, you need to use a heat stable frosting like Crusting American Buttercream made from 100% shortening (no butter). It may get soft, but it won't melt.
- Rule of thumb is the more butter in the frosting, the quicker it will soften, lose its shape, and in the worst case fall off the side of your cake.
- The most heat tolerant frostings are Ermine, American Buttercream, and Cream Cheese.
- If you are going to cover your cake in fondant, there are several things to consider when making your frosting selection:
- Some frostings like Italian Meringue are just too light and fluffy to be used under fondant. Soft frostings won't hold their shape as you drape, smooth, and manipulate the fondant.
- Frostings with a high moisture content will actually begin to melt your fondant if they sit in contact long enough. And what makes deciding on a frosting really difficult is that different frostings will react differently to different brands of fondant. So before making your final decision on frosting do a test: put some of you frosting in a little bowl-shaped ball of fondant. Let the frosted fondant bowl sit for a few days and see what happens. First let the fondant bowl sit in the refrigerator and then at room temperature. Examine the fondant at different intervals and see if it is melting. If the frosting is melting the fondant you will see a puddle of liquid forming under the frosting.
- Heat is the enemy of frosting, and the cause of many collapsing cakes. If your cake is going to be outside in the heat you don't want to use a pure butter based frosting under the fondant, but if the cake will be in an air conditioned room, a butter based frosting under the fondant works great.
- How sharp you want the edges of your cake will determine which frosting to use. If you want a razor sharp edge (see Part III - Covering the Tiers) you need something that will set almost rock hard when chilled. Something like Ganache or a frosting rich in butter.

- Another frosting consideration is the frostings perishability. Some States consider Cream Cheese frosting to be perishable and require it to be refrigerated. Other States consider it stable as long as it has at least 16 oz of sugar to every 8 oz of cream cheese. And as a final gotcha some State consider Ganache perishable because it has cream in it. WHAT?? So check the rule in your location, and when in doubt use Crusting American Buttercream made with shortening.
- If you want to see a truly amazing video on frosting check out Ann Readon's 7 Frosting Comparison.

- Cake Drum / Cake Bases
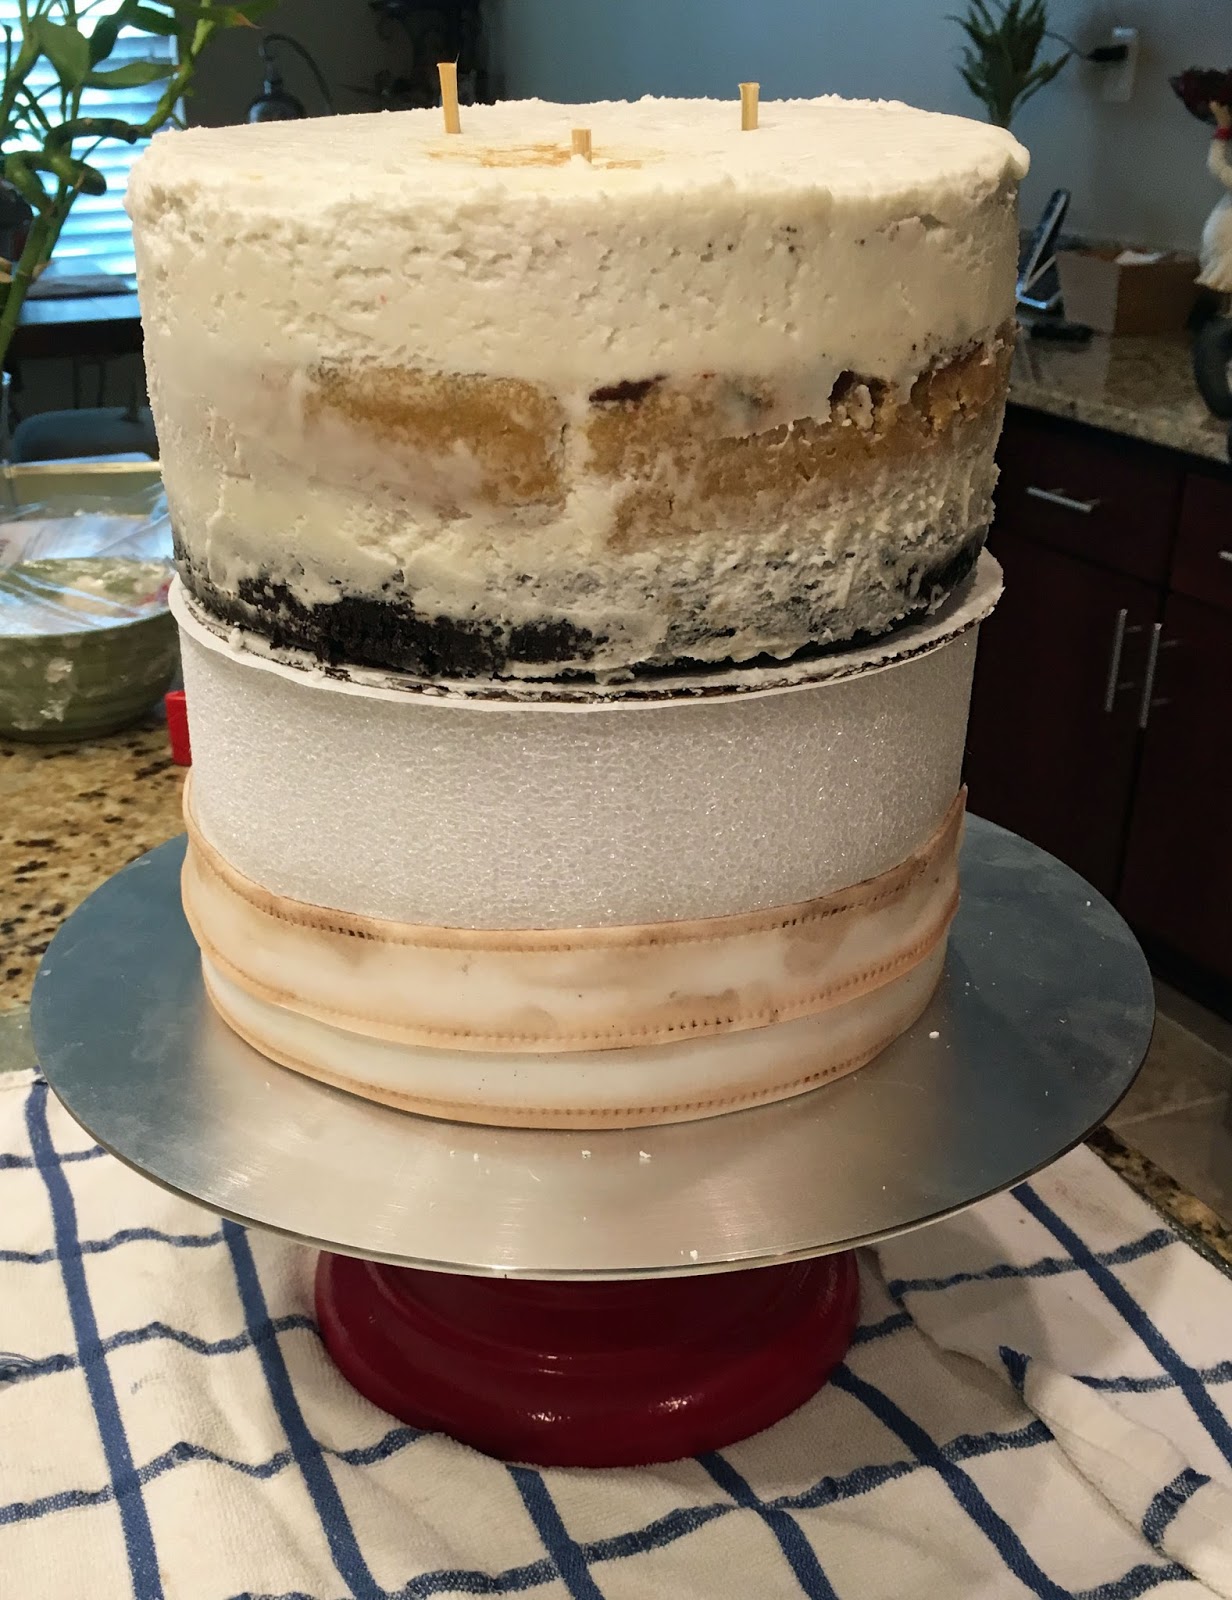
- Think about the CAKE DRUM (Wilton calls them CAKE BASES) that forms the base or foundation of your cake. A cake drum is a big, thick, rigid piece of foam that sits under the bottom tier of your cake. Your cake will be anchored to this board, and your will build the cake up from this foundation. Without a strong foundation, the cake WILL collapse.
- The cake drum allows you to safely move the cake from place to place.
- Even if you want to use a fancy pedestal cake stand or a rustic tree stump to showcase your masterpiece, you still need a cake drum. Your cake will grow out of and be anchored to the cake drum. Cake supports can also be driven through all the tiers of the cake and into the cake drum for add security and support.
- The drum "should" be at least 1 inch larger than the bottom cake tier and at least 1/2 inch thick.
- You "can" use a drum that is exactly the same size as your cake, but this gets tricky because it is hard getting a cake covered in buttercream, ganache, and fondant to exactly match the size of your drum. (See me trying to cope with that situation here. This cake also has a problem with filling bulging out the side, and VERY large gaps between the stacked tiers.)
- Also, don't forget that you need to finish or decorate the cake drum in a way that complements your cake.
- You can buy drums already covered in white, silver, or gold foil. These covered drums look okay in a pinch, but if you want your drum to seamlessly blend into the cake it should be covered in the same fondant as the cake.
- You can also opt for a larger cake drum and decorate it (usually in fondant) in a way that adds to the theme of the cake. If your cake drum is large enough it can also double as your presentation board.
- Cake Stand
- Are you going to use a PEDESTAL CAKE STAND or a PLATEAU?
- If your cake is not very tall one way to make it look more dramatic is to set it on top of a pedestal cake stand or a fancy silver plateau.
- If you want a pedestal stand, be aware that they come in all shapes, sizes, and colors. Choose the one you like, but make sure that whatever you select is sturdy enough to hold the cake. A three tired cake can weigh as much as 50 pounds, so select your pedestal stand with care. You don't want to place your finished cake on a delicate, airy pedestal stand and watch in horror as it collapses and dumps your cake on the floor (been there done that).
- Also, when selecting a cake stand make sure the top is completely flat. You don't want and waves or ripples that might cause your cake to warp and possibly fall.
- If your cake drum is larger than your cake, remember to buy the stand to fit the drum and not the bottom tier of the cake (been there done that too).
- And what ever you do, don't try to transport your cake on the pedestal or plateau. Even having another person hold the pedestal while you drive is not a wise decision.
- Practice
- Once you have settled on your design, you need to start PRACTICING .
- You need to bake your chosen cake in your kitchen and figure out the best baking times for your oven and size of pan.
- Make a batch of your frosting and see how it tastes with the cake.
- Buy some foam CAKE DUMMIES in the same size as your tiers and stack them to see how they look.
- If you are going to cover your cake in fondant you can practice on the dummies. Smear vegetable shortening on the dummies and practice your fondant covering skills. You can remove the fondant, re-roll it, and try again and again till you get comfortable with the process. (Throw away the used fondant after you are finished playing with it.)
- If you are putting flowers on your cake you can test your arranging skill on the dummies. Do the flowers look better on top or on the side? Use this practice time to work out all the kinks in your design. You don't want to leave all these decisions till the day you are assembling the cake!
- You can also include cake dummies in your finished cake. If you don't need a lot of servings, but still want a tall and impressive cake, swap out cake dummies for actual cake tiers. In the "Mummy" cake below you can see that I used a cake dummy for the bottom tier.When everything is covered, you can't tell that the bottom is not cake.


- You can even make the entire cake out of dummies, and make sheet cakes to actually serve to your guest. The dummy cake can be made well in advance, but not too far in advance because over time the decorations will start to yellow and accumulate dust.

- Timing / To-Do List
- The final tip in the portion is about TIMING.
- When it comes time to actually make the cake - DON'T TRY TO DO EVERYTHING IN ONE DAY! You can spread the tasks out over days and even weeks.
- Make a To-Do list of every step/item needed and start checking them off.
- Bake your cakes days/weeks ahead of time and freeze them. Yes, freeze them. Freezing the cakes will make them taste better! (See Part II on Baking tips for more info about freezing.)
- The frosting can also be made a few days ahead of time,
- And if you want to make your own flowers (as opposed to fresh or silk) they must be made well in advance to allow time for the gum paste to dry.
- Assemble and decorate the cake over a two day period, and aim to have the cake completely finished one day in advance. (See Parts III, IV, and V) There is a bakery in my area that has been around for 100+ years (no really), and I was told that once their cake is encased in frosting and sealed up in a cardboard box, it will stay fresh for five days.
- Also check with venue and see if you can deliver the cake the day before the event.
- Remember, don't try and do everything on the day before your wedding. If you break up the task and spread them over weeks and day, you won't end up pulling out your hair in a last minute panic.
So this concludes Part 1 - Design and Planning Phase. If you have any more tips or suggestions for this section, just drop me a comment and I will add it to the list. If I got something wrong, also let me know so I can fix it.
Next up is Part 2 - The Science of Ingredients
Happy Decorating,
Carol
Hello Carol, WOW!!! This is a very *impressive* posting. This is a must-read for anyone who wants to try their hand at making a celebration cake because they will certainly learn a lot from your 40 years of experience. I also have found countless helpful hints for my future endeavors. I would be remiss if I didn’t mention that I personally think gumpaste flowers really do add a lot to a cake, but I guess I’m prejudiced as I’m all about sugarcrafting. So, I sincerely hope that your readers look into creating gumpaste flowers too. Xxxx Edith P.S. Looking forward to Part I.
ReplyDeleteHi Edith, Yes I agree that gum paste flowers are the best option. They are beautiful, food safe, and they can be kept as souvenirs. If I put silk flowers on cakes they always get thrown away after the event, but the gum paste flowers are usually kept and saved. I will add that point to the gum paste section. Thanks for for the suggestion, and for reading!!
ReplyDeleteCarol