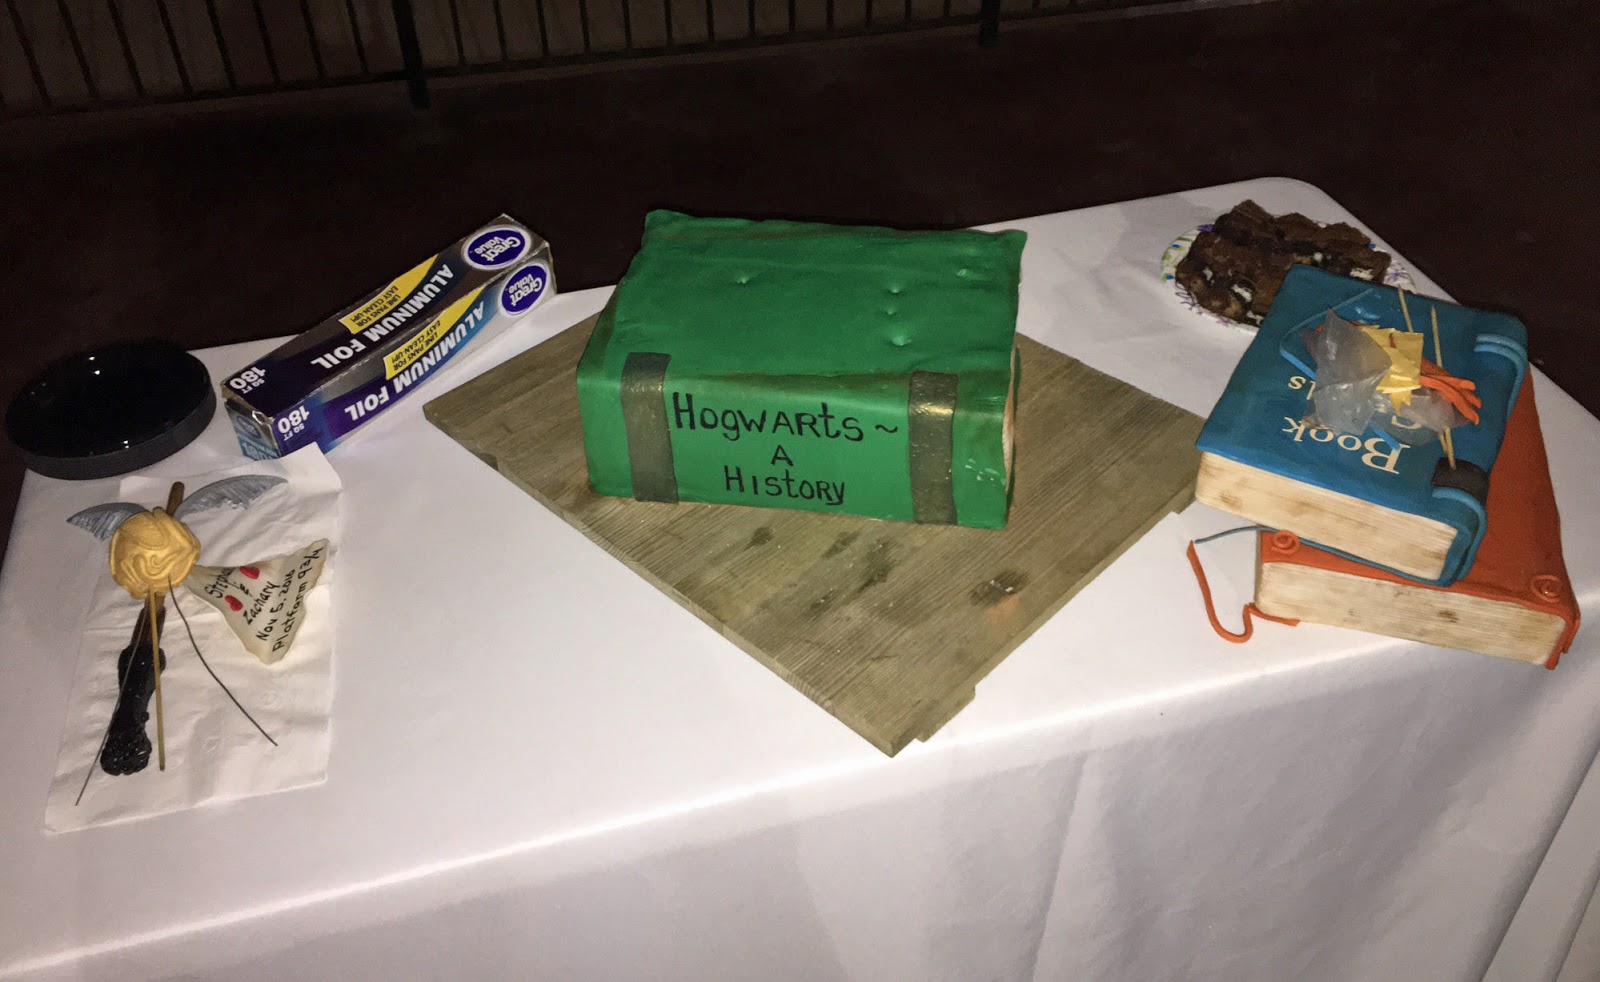
My first Groom’s Cake!!!
Both the bride and groom (close friends of my niece) are big Harry Potter fans, so they requested a Golden Snitch Cake. I didn’t want to do just the snitch, so I decided to build a tower of Harry Potter lesson books with a wand and the golden snitch sitting on top.
(Hey, free cake so I kind-of get to do what I want.)

Not surprising, the snitch was the hardest piece to make. I started with a fondant covered foam ball, and then used various sized fondant ropes (used a clay extruder to form the ropes) to decorate the outer shell.

Next came the wings for the snitch. I rolled out Wilton ready-to-use gumpaste very thin, and then sandwiched a curved metal wire between the upper and lower layer.

I cut out the shape of the wing, and then cut parallel lines through the gumpaste to make the individual feathers of the wing.

As a final step I sprayed (using Wilton's color mist) the wings sliver and the body gold.

The wand came next, and unlike the snitch I was able to whip it out in just with a few minutes of work. I made the wand in three stages, allowing the gumpaste to dry at each stage. First I rolled out a thin log of gumpaste and then inserted a wooden skewer down the center. After the first section dried I built up a second layer near the end of the wand and gave it a little texture to make it look like wood. The third stage was a lumpy wad of gumpaste that I stuck on the end of the wand. I cut deep grooves into the gumpaste, and stuck some wart-like little knobs to make it look like a stick from a tree. As a final step I painted it with some Wilton Black food color and Americolor chocolate brown food color gel.

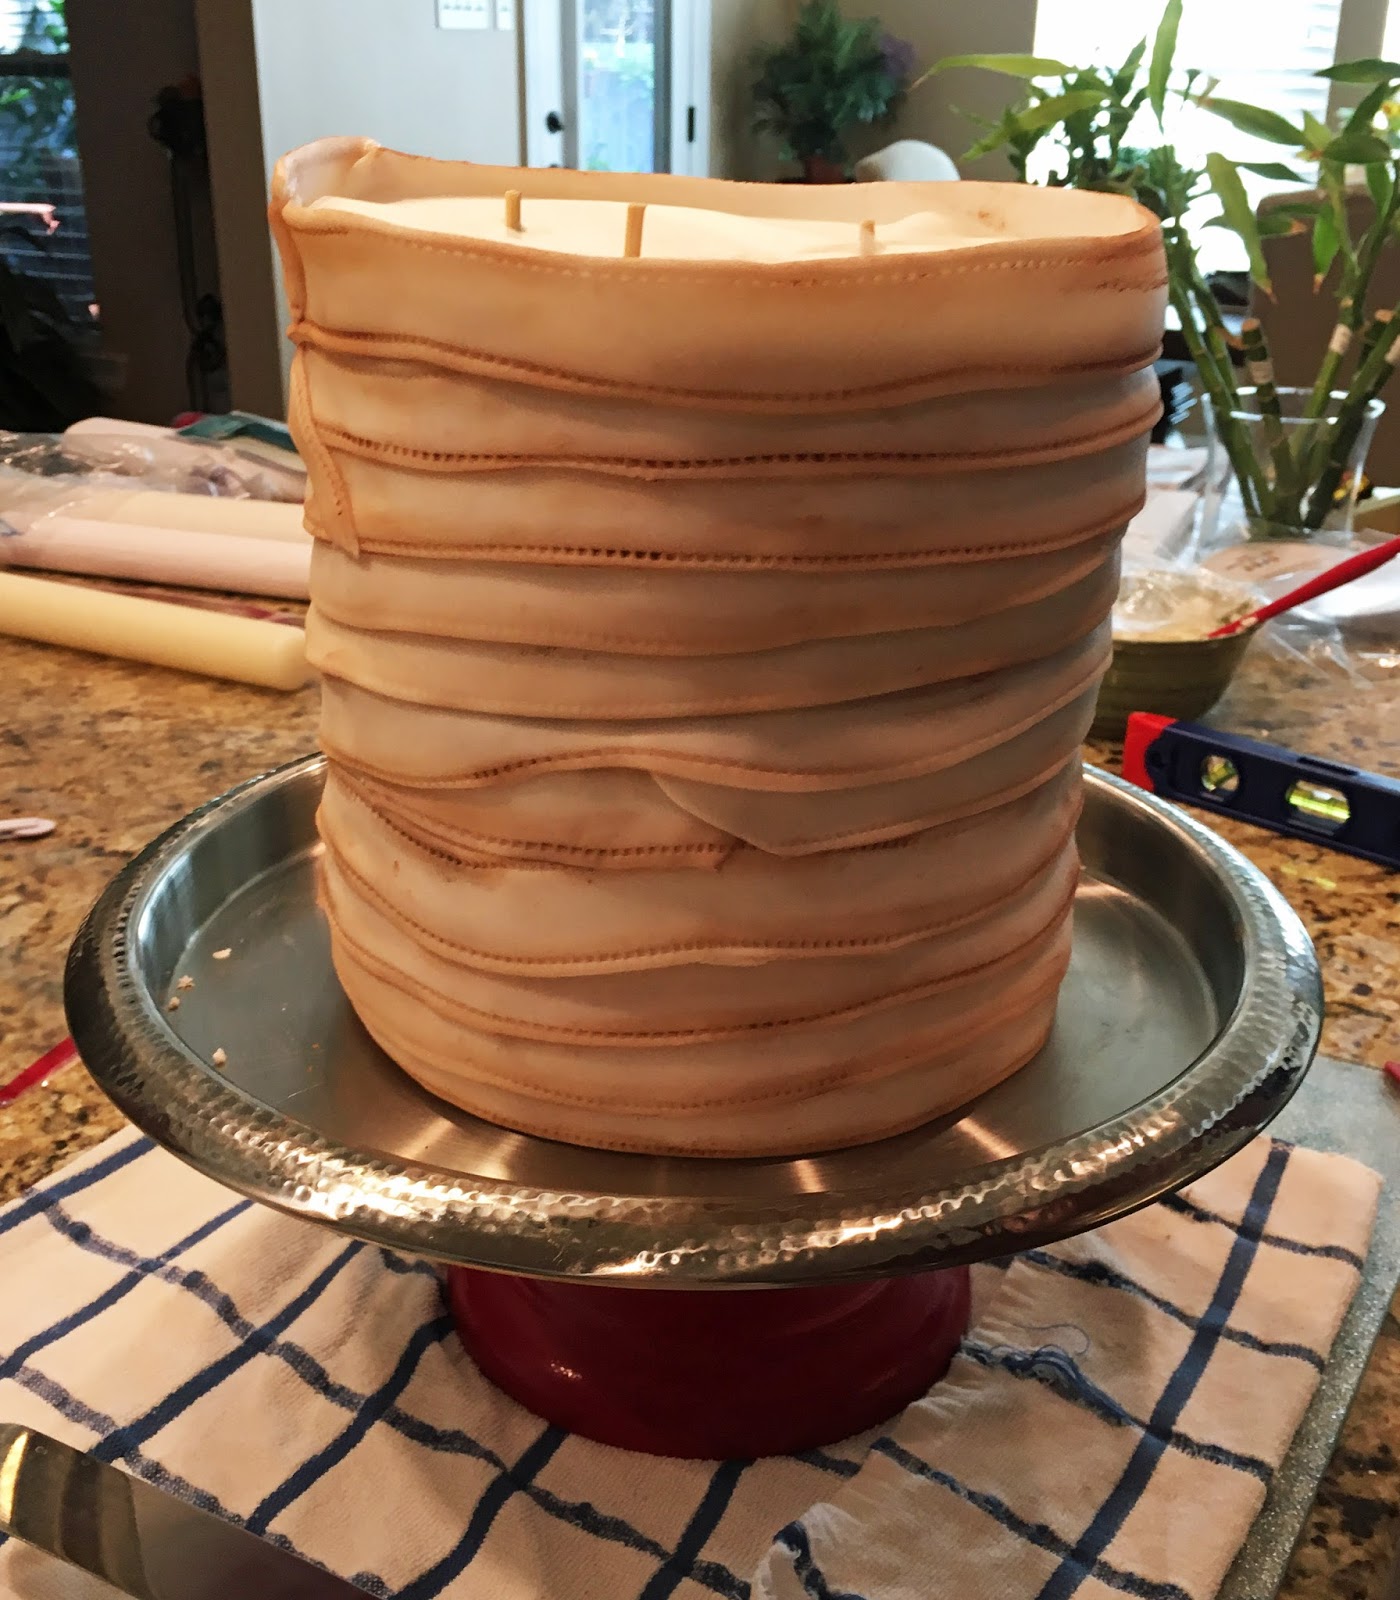
I finished the snitch and wand a few days before the event so on the day before the wedding I only had to worry about the stack of books. I didn't need a whole lot of actual cake, so I made the top two books out of foam. There are lots of detailed instructions on the web on how to construct the closed book cakes so I won't repeat all the steps. But essentially you cover three sides of the foam with white fondant. All the instructions I read said to carefully measuring the cake/foam to get a piece of white fondant exactly the right size, but I just got "close" and smeared the extra fondant over the top of the foam. I used a bit of shortening to stick the fondant to the foam. To make the "pages" of the book I just ran a scoring tool into the fondant to make parallel lines. The lines don't have to be exact. You just want to give the impression of pages.

The books "cover" was the next step. You need to be a more precise when you cut this piece, and I learned the hard way that you also need fondant that is a little stiff. If your fondant is too soft, it will get pulled out of shape when you try and place it on the cake/foam. I used my last bit of Carma Messa fondant on the first dummy cake and didn't have any trouble with the fondant pulling out of shape. On the second foam book I used Fondarific, and had so much trouble I almost yanked my hair out in frustration. The Fondarific was so soft it just wouldn't stay square when I tried to place it on the cake, and the edges that extended beyond the "page" section of the book kept flopping down. The Fondarific was just too soft to use in this fashion. In the end I used some tylose gum tex power to stiffen the fondant. I could get away with this because this fondant was going to cover the foam/dummy cake, and no one was going to eat it.
The final step in the construction was to cut thin strips that are position around the bottom of the cake to form what looks like the bottom cover of the book.

Other than the Fondaric issue, the foam cakes went together pretty easily. But I did have some real trouble constructing the book that was actually made out of cake. I'm not real good at getting my cakes level, so after I putting on the ganache I had to build up the top outer edges with pieces of fondant to get the top somewhat flat and even. I also couldn't roll out a strip of white fondant that was long enough to cover all three sides, so I just cut three pieces and patched them together. If you look closely at the edge along the front left side you can see where I overlapped the two pieces.

And once again I had trouble placing the "cover" on the book. I was using the Fondarific again because that was all I hand, and again it was just way too soft to hold its shape (and I couldn't add any tylose to this one because people might actually eat the fondant). It took me three tries to get the top cover on without stretching it out of shape. I used my SweetWise Pro Mat to help position the cover on top of the cake, and then pull the mat away from the cut edges of the fondant very gently. I also had the prop the corners up with tooth picks so they wouldn't droop. In the end the book made out of cake looked a lot more rustic than the books made out of the foam. The foam "cakes" had sharp edges and smooth sides, and the real cake looked a little lumpy. But remember - free cake.

Final step on the book construction was to add some embellishments to make it look more realistic. You can't really see in the picture, but I used an impression mat on the dark colored bands to get some texture on the fondant. I also dusted it with Chef Alan Tetreault edible gold dust to make it sparkle.

The three books were then stacked, and the titles added to the book. On the top book I cut out the letters using my Cricut paper cutting machine, but I wasn't too happy with the look. The letters were too perfect and precise looking so they didn't match the rest of the book. But I didn't have time to re-cut them by hand so I had to use the Cricut letters.

I hand lettered the titles along the spine using Wilton edible markers, and the final step to complete the books was dusting them with cocoa power to give everything an aged look. I added a few extra things here and there like the "HP" logo and the "parchment letter" with the names of the bride and groom and the date. Funny story but I had a white owl perched on the edge of the book delivering the letter, but the owl look so bad I decided not to use it.

Happy Decorating,
Carol