
The only time consuming and difficult part of the cake was making the throne itself. I should have just bought a plastic throne, but I like to punish/challenge myself.
<< Disclosure: We are a participant in the Amazon Services LLC Associates Program, an affiliate advertising program designed to provide a means for us to ear fees by linking to Amazon.com and affiliated sites.>>
I started out with a rough chair made from Wilton gum paste. I tinted the gum paste in a color named Stone gray. I tried using black, but it gave my gum paste a purplish tint. The made the back of the chair first and set it on the side to dry. Once the back piece was hard, I cut a rough square of styrofoam for the bottom part of the chair, glued the back piece to the sytrofoam, and then covered the exposed styrofoam with more gum paste.

Next I made a pedestal for the bottom of the throne...

And then I rolled out some tube shaped gum paste for the arm rests and the sloped sides of the chair.

The most difficult part of the chair's construction was attaching the sword shaped pieces that stuck up above the back of the chair. I made these ahead of time and allowed them to dry before placing them on the chair. I should have made these sword shapes thicker because the little buggers kept breaking. I attached the swords to the back using melted chocolate. I wasn't too concerned with neatness because I knew all the chocolate would be covered later with other swords.

Once the first row of swords were in place, I just started layering on more and more swords. On the chair back I used the remainder of my dried swords, but for the rest of them I used fresh gum paste that was still soft and pliable.

Layering swords on the side. I just attached the soft gum paste swords with a touch of water.

Here is a view of the back. It looks really mess I know. I had all the swords layered nice and neat, but then the back of the chair started to bend backwards and crack. I attached a clear plastic lollipop stick using melted chocolate, and then layered more swords on top of the stick to hide it. If I ever do another one of these I would make the back part of the chair thicker, and put the lollipop stick on before layering the swords.

Next I made the fancy swords with pommel, grip and guard. I cut the circles for the pommels using my tiny circle cutters, and the rest of the parts I just formed by hand. I use a piece of dry thin spaghetti to stabilized the sword parts that stick up above the sides of the chair. I just pushed the spaghetti up through the three parts (pommel, grip, and guard), and then put the sword/blade part on top of the exposed bit of spaghetti.

Last step on the chair was dusting it with black, silver, and gold edible luster dust.

For the cake I covered it with Renshaw fondant colored with the same Stone Gray gel color.

After the cake and board were covered in fondant, I scored the pie-shaped lines into the cake. I then used crumpled aluminum foil to push a texture into the soft fondant. I also used a various tools to cut random lines and groves into the fondant. All this texturing is what gives the cake its concrete-like texture.

To darken the surface of the cake and give it a more stone-like look, I mixed the Stone Gray gel with a lot of Everclear grain alcohol. I then brushed this thin liquid mixture over the cake. The tinted alcohol sinks into the textures made by the crumpled aluminium foil and other tools, and once the Everclear evaporates you are left with just the color. I prefer using Everclear to Vodka because the Everclear is 95% alcohol and the Vodka is only about 40% alcohol. The 60% water in Vodka will leave the surface of the fondant wet and sticky. Here is a section of the cake just painted. Instead of white-washing I was gray-washing.

After the wash of gray color is dry, I brushed the cake with the same silver, gold, and black luster dusts that I used on the throne. At the last minute I also covered a cardboard cake board in fondant and placed it on top of the cake. I wanted something sturdy for the Iron Throne to sit on. I didn't want it to sink into the cake!.

Here is a close up of the finished texture. For this cake I didn't have to worry about rips, tear, or imperfections in the surface of the fondant.

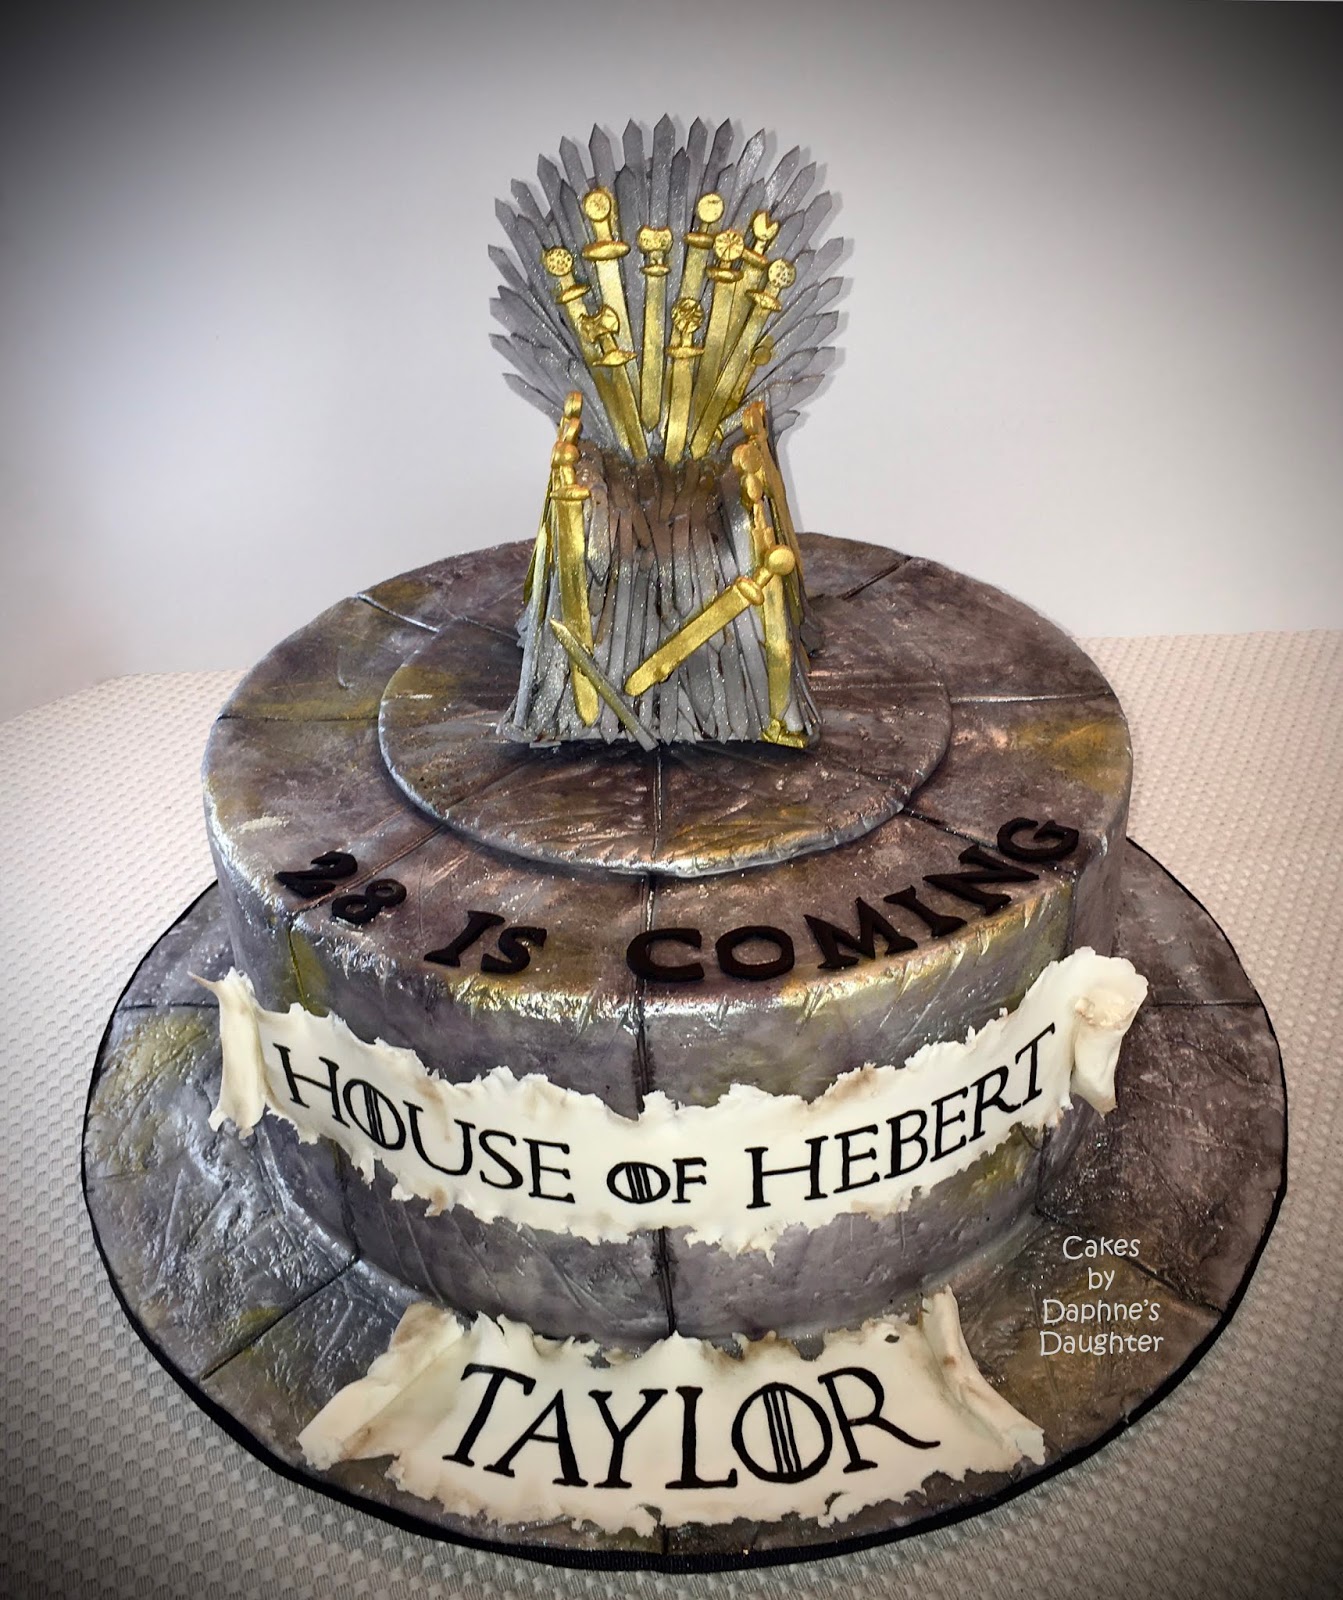
And here is a closeup of the finished throne.

For the banners on the side of the cake I just rolled out gum paste very thin, and used the tip of a little rolling pin to pull at the edges and give it a ripped look. For the text, I found a GOT font on the web and projected the words onto the gum paste using my handy-dandy mini projector. This projector isn't the easiest thing to use, but once it is setup, it makes writing special text a breeze. I used an edible black pen to write the text on the gum paste, and dusted the edges of the white gum paste with brown petal dust to give it the aged look. I attached the banner to the side of the cake using melted white chocolate.

The letters on the top of the cake was hand cut from black Fondarific fondant.

So another interesting cake. I learned a lot of new techniques that I hope I can use on future cakes.

Happy Decorating,
Carol