Monday, December 4, 2023

Red Fish Cake for Bow Fisherman

 I made this cake for my cousin who happens to be an avid bow fisherman.


<< Disclosure: We are a participant in the Amazon Services LLC Associates Program, an affiliate advertising program designed to provide a means for us to earn fees by linking to Amazon.com and affiliated sites.>>

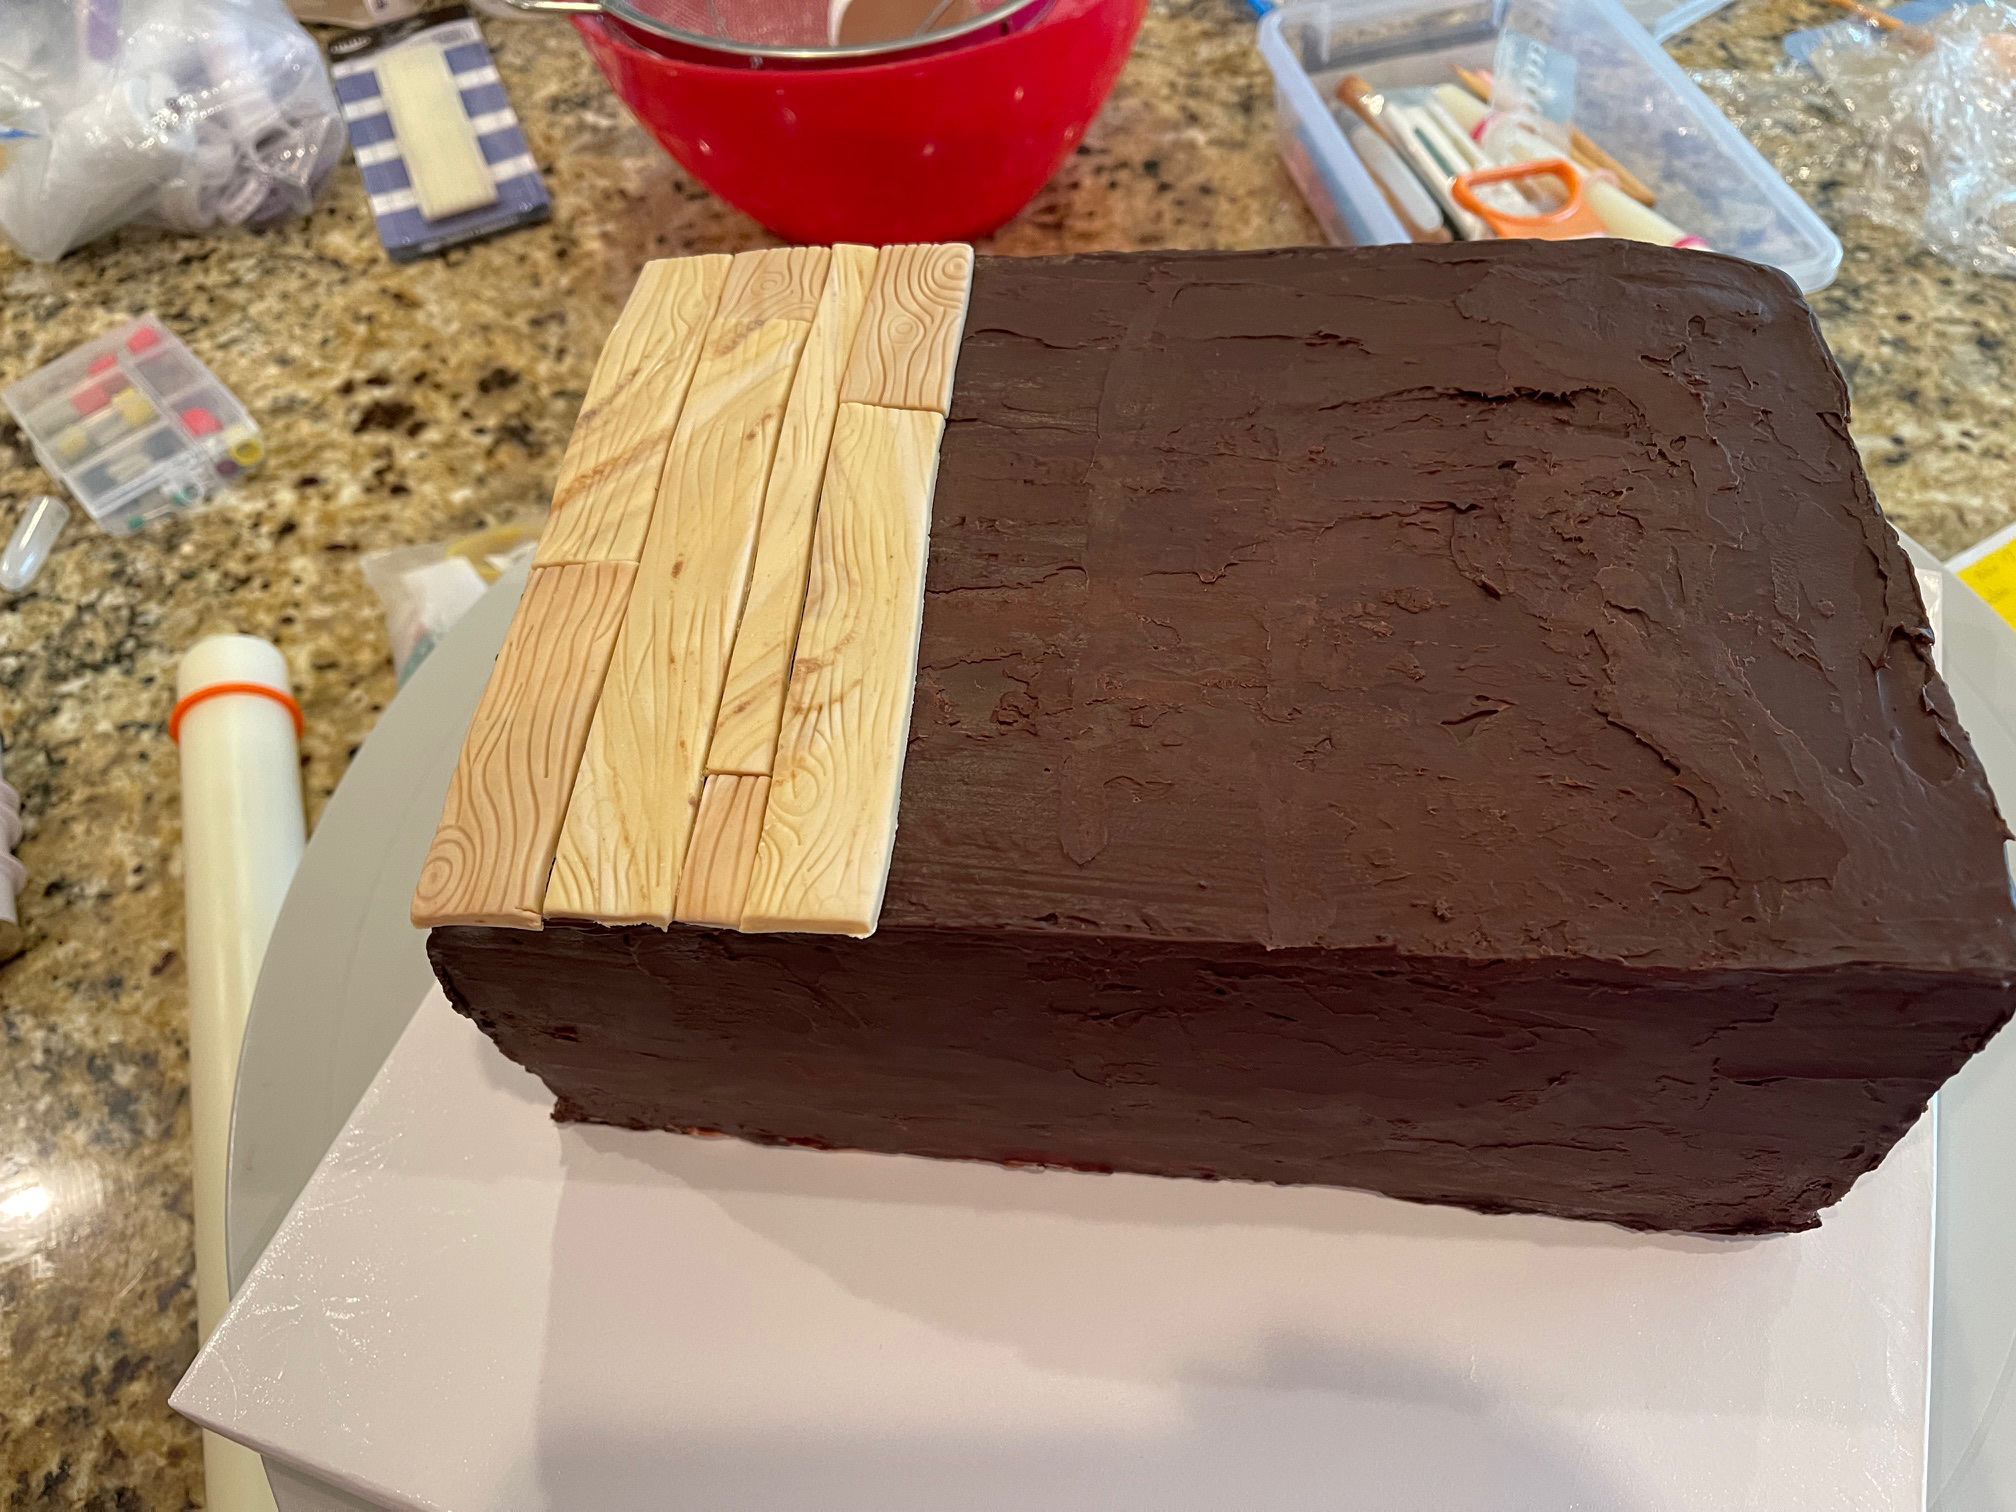
The cake itself is a 7x11", and I covered it with wood-grained fondant.  I marbled together brown, tan, white, yellow, and black fondant.  Rolled it out flat and used a wood-grain impression mat to give it the pattern.  I used a strip cutter to cut the planks of wood, positioned them on the prepared cake, and dusted with brown and black petal dust.  Easy Peasy.


The fish I made ahead of time so I wouldn't be rushed on decorating day.  I found a picture of an actual Red Fish, printed it, and used that as a pattern.  I tinted some white fondant with red and orange food gel in different ombre shades.  I layered the different shades and rolled them out together so it was darker on one side and lighter on the other.  I then cut out the body of the fish, and used a fish scale embosser to make the scale pattern on the fish.  The other oval shaped blob of white fondant was placed under the main body of the fish to give the fish a puffed/curved look.

At this point I didn't think the Red Fish looked red enough, so I dabbed on some red food gel and spread it around using a damp finger.   I cut out the tail and used a cookie scribe to make all the marks, then I dabbed on more red food gel and placed it on the main body of the fish. 

I went through the same process to make the fins.  I used the paper pattern to cut each piece, used the scribe tool to make the marks, and then added red food gel for accent color.

For the head I again used the paper pattern and cut out the shape.  In the end I thought the head looked a little too brown, but I fixed that later by adding more red to the head and more brown to the body.  As a final touch I spritzed the fish with some Intense Pearl Luster Dust to give it a little shine and shimmer.  The image below is without all the "fixes".

After the cake was covered in fondant, I positioned the fish on top, and speared the fish with a bow (a 12" Lollipop stick embellished with red, green, and black fondant pieces).

Here are some other views of the fish.


So here is my first Red Fish cake.  I hope Tony likes it!


Happy Decorating,

Carol


Sunday, December 3, 2023

TMNT Sewer Pizza Cake

I've been making cakes for my cousin Leland since he was just a baby bump.  This is cake #7 for Leland, and this year the theme was TMNT.  


<< Disclosure: We are a participant in the Amazon Services LLC Associates Program, an affiliate advertising program designed to provide a means for us to earn fees by linking to Amazon.com and affiliated sites.>>

This is a two-tiered cake made from an 8" and a 5" round cake.  Each tier is 3 layers of cake and stand between 5" and 5-1/2 " tall.  For this cake the first things I made were the turtle heads and the sewer tubes and cover.  To make the turtle heads I used this YouTube tutorial by The Lovely Baker.  Here are the heads drying on the top of an egg crate.  I dry them sitting on a depression in the egg crate so the back of the head doesn't flatten.

To make the TMNT sewer cover I mixed  Satin Ice Silver Shimmer fondant with some Tylos Powder/CMC/Gum-Tex (all names for the same stuff).  The Tylose Powder makes the fondant harden to a rock-like consistency.  I rolled the conditioned fondant out flat and then pressed a textured mat into the fondant.  This mat came in a set of knitted/fabric weave silicon mats.


I cut out circle shapes from the fondant.


And then I cut some strips of silver fondant using the JEM #2 Strip cutter.  (These things come in so handy).  I positioned the strips around the outside edge of the circle securing them with a dab of water.  I also used a tiny circle tool to make the circular marks. 


As a final touch I dusted with some black petal dust to give it an old, dirty look.


For the TMNT letters, I used my 3D printer to make fondant cutters.  You can just cut these by hand, but I like making cutters when I can.  I also dusted the letters with some silver luster dust to give it added sparkle and shine.  I attached the letters to the sewer cover with a little water.  After the sewer top was completely dried, I glued a bamboo skewer to the back using  melted candy melts.


On decorating day, I tinted my buttercream with AmeriColor Stone food gel then frosted and stacked the cakes.  Next I started cutting out red bricks for the bottom tier.  (Of course I made a cutter for this.)  Before cutting out the bricks I textured the fondant with another fabric weave texture mat from the set mentioned above.


I also added a little black and brown petal dust to make the bricks more interesting.


Then it was just a matter of placing all those bricks on the side of the cake.  In hindsight I should have put the bricks closer together, but by the time I noticed my mistake, it was too late to reposition what I had already done.   Note that I also use the JEM #2 Strip cutter to make a border for the top tier.  I used the tiny circle tool to make the marks and dusted with black petal dust.  I think the black dust really makes it look like aging metal.

Also notice that I used a 14" black cake drum for this cake and offset the cake on the drum to give me more room in the front for my pizza toppings.


Next, I started making the metal plates for the top tier.  I just cut out random rectangular pieces of silver fondant, added tiny fondant circles to represent nuts & bolts, dusted with some black petal dust, and stuck them to the side of the cake with a dab of water.  But not too much water.  Too much water will make the fondant ooze and slide around.  And you want to just moisten little sections of the fondant, not the entire piece.
 

Next I attached the sewer cover and TMNT heads to the top of the cake, and then secured the sewer tube on the side of the cake.


The final part was decorating the drum.  I smeared some red buttercream all over the base - this will be the pizza sauce.


And then I made a long sausage shaped wad of ivory colored fondant for the crust.  Before placing the crust, I dabbed a little piping gel onto the drum.  The piping gel helps the fondant stick to the drum and keeps it from sliding around.  But don't use too much gel or it will ooze out and make a mess.  

Then I positioned the sausage of ivory fondant, pushed my fingers into it to make it look like hand-thrown crust, and dusted it with brown and orange petal dust to give it a baked look.


The cheese on the pizza is grated candy melts.  I used yellow and white.  Note I used the more ivory white rather than the Bright White.


I sprinkled on the "cheese", and added some pizza toppings.  The pepperoni are just red fondant circles and I added some dots using a white edible marker.  For the slime coming out of the pipe, I used strips of fondant that I colored with ROLKEM UV-florescent Lunar Yellow edible food color.  The glow-in-the-dark color gives it that luminous look.  I bought the ROLKEM colors for a Glow Party cake I did recently.  I had the coloring leftover, so I just used it on this cake. 


So here is the finished cake.  I wonder what Leland will want next year.


Happy Decorating,

Carol

Tuesday, November 28, 2023

Jurassic Park Themed Cake

Here is a Jurassic Park themed cake that I made for my cousin.  It has a broken reptile egg on top, a glowing T-Rex eye camouflaged by green leaves, and vicious claws coming out of the side of the cake.  I kind of love how this one came out.


Sorry I didn't take any pictures during the assembly, but I do have closeups of the different sections.

Here is the egg.  I used a chocolate mold but filled it with fondant instead of chocolate.  After the fondant had hardened slightly, I used a craft knife to cut it apart and make it look like broken egg pieces. 


Here is the glowing eye.  I painted the eye with food gel color mixed with piping gel.  The gel gives it that wet, slimy look.


And the claws.  I wanted to have blood dripping from the claws, but I thought that would be too unsettling for the birthday boy.


So here is the finished cake again.  Gotta love that T-Rex.


Happy Decorating,

Carol

Sunday, November 26, 2023

Disco Cow Girl Cakes

Apparently Disco Cow Girl party themes were big in 2023.  I made two of them within a few weeks.  The first cake has more of the cow girl theme going on...


<< Disclosure: We are a participant in the Amazon Services LLC Associates Program, an affiliate advertising program designed to provide a means for us to earn fees by linking to Amazon.com and affiliated sites.>>

For the #2, hat, boot, and cow spots, I made some fondant cutters using my trusty 3D printer.  For the #2 topper I made two cutters, one slightly larger than the other.  I used Wilton's Pink with the larger cutter and White for the smaller #2 cutter.  The cow spots were made with black fondant.  For fondant toppers, I mix the fondant with some Gum-Tex / Tylos Powder / CMC Powder (all names for the same stuff).  The powder makes the fondant dry to a rock-hard consistency and allows it to stand upright without any support. 


The hat and boot...


The cake itself is an 8" chocolate on the bottom and a 6" almond cake on the top.  Don't you just love chocolate cake???  Here is the cake getting its crumb coat.


Both cakes are frosted with white American Buttercream, and then I made the border using a Pie Crust Impression Mold.  Doesn't it look like rope?


After getting the cake stacked and frosted, it was just a matter of placing all the decorations.  These are the Disco Balls I used.  They are not the best quality: gaps and missing pieces of mirror plastic, but they were good enough for cake decorations.

So here is the finished cake...


The second "Disco" cake I made had less of a Cow Girl theme.  This cake used Pink and White acrylic balls in addition to the disco balls.  I made the name using my Cricut Air Explorer.  I hot glued the cardstock paper to a 2mm 1/16" acrylic rod, and kept the cardstock away from the buttercream.  Be warned that cardstock will absorb the grease from the buttercream and get all splotchy.  So make sure they don't touch!


I also made a smash cake for this customer. I used buttercream for the cow spots because I don't like putting fondant on smash cakes.


So, two Disco Cow Girl themed cakes just a few weeks apart.  What are the odds?


Happy Decorating,

Carol


Saturday, November 25, 2023

Easy Demon Slayer Cake

It is amazing how many popular things exist in this country that I have absolutely no knowledge of.  Take this cake for example: Demon Slayer.  What in the heck is Demon Slayer and how do I represent it in cake form?  Google to the rescue, and in the end it was an easy cake to make.


<< Disclosure: We are a participant in the Amazon Services LLC Associates Program, an affiliate advertising program designed to provide a means for us to earn fees by linking to Amazon.com and affiliated sites.>>

I bought the two characters ( Tanjirou and Nezuko) for the cake ( no way was I going to make those out of fondant).  The cake itself is a 7" square and about 6" tall.

Once the cake was stacked and covered in ganache, I marbled some Wilton's Chocolate and white fondant, rolled it flat, and textured it with a wood-grained impression mat.  I then cut the fondant in sections to fit the sides and top, and then just stuck the sections onto the cake.


I used Satin Ice Silver fondant for the silver decorations in the corners.  I used my 3D printer to make a cutter, but you can just cut them by hand.


For the black strips on the sides of the box, I used Wilton's black fondant, and a PME/JEM Strip Cutter #4.


The Demon Slayer sign is just a paper printout that I cut out and hot glued to an acrylic rod.  The red straps on the back of the box are just long strips of red fondant that I cut out and attached to the back.

So, see how easy that was!  And best of all the birthday boy got to keep the toys as a souvenir. 


Happy Decorating,

Carol