Can something be so ugly that it is cute? As an example take this Pirate Fox (aka Foxy) cake inspired by Five Nights at Freddy's. It is just Ewwww.... But Ewwwww in a cute way.
<< Disclosure: We are a participant in the Amazon Services LLC Associates Program, an affiliate advertising program designed to provide a means for us to ear fees by linking to Amazon.com and affiliated sites.>>
Here I am cutting out the muzzle and draping it over some crumpled aluminum foil. (The oval cutter is from Sweet Sugarbelle.) I could have made the whole thing from fondant, but I thought it would be too heavy. The aluminum foil helps to lighten the load, and it saves money on fondant too. In the background you can see the paper template that I used. The templet was used to cut the head, ears, eyebrows, and nose and to get the sizing of the eyes correct.
Next I rolled out the yellowish fondant for the teeth and stuck them in place. I left it like this to dry for a few days.
Carol
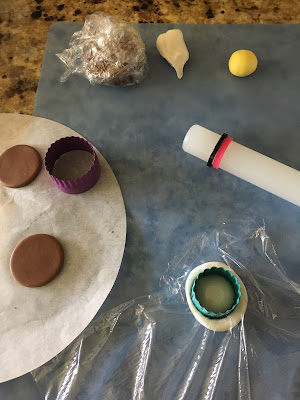
Here I'm cutting out the eyes. They are just circles of different sizes that I layered on top of each other. At the base is a black circle, then a slightly smaller brown circle, then a white circle, then a yellow circle for the glowing iris, a smaller brown circle for the pupil, and a very small white circle for the pin-point of light on the pupil. I used a brown food marker to make the lines around the outer edge of the iris.
To give the white and yellow circle the curved or domed edges, I placed a piece of plastic cling wrap over the fondant before I cut it with the circle cutter. The plastic wrap forces the circle into a nice domed shape.
After cutting out the head from red fondant, I started to layer all the facial features on top of it. Note that I mixed the fondant with Tylose/Gum-Tex powder so it would dry stiff and hold its shape. I draped the head over a Styrofoam cake dummy, and I used plastic cling wrap to propped up the tuffs of hair on the side of the face. The wadded up cling wrap held the fondant while it dried in that shape. For the tiny black circles on the muzzle I used this set of tiny, metal circle cutters, or you can use the opening of a piping tip.
I didn't make the lower jaw ahead of time because during final assembly of the cake the fondant needed to be soft so I could wedge it between the cake, cake drum, and hardened parts of the face. But I did mix the fondant used to make the lower jaw with Tylose powder so once I squished it into pace, it hardened and stayed in position.
So the day before the cake was due, I started to assemble everything. I frosted the cakes using CakeSafe acrylic disks which gives the cake the sharp edges and straight sides. (I have a blog post HERE explaining how I use them.) This particular cake is 8" in size and it is sitting on a 14" black foil cake drum. I used such a large drum because I needed lots of room for Freddy's bottom jaw to stick out from the face.
After frosting the cake it was just a matter of placing all my ready made pieces onto the cake - and making the bottom jaw with its yellow teeth. Here is everything waiting to be placed on the cake.
The lettering on the cake drum was made of glitter cardstock and was cut using my Cricut Air Explorer. The metallic looking parts of the cake (the number 10 and the bolts under the ears) were painted with silver edible luster dust to make them shine, and then dusted with black petal dust to give them some shadows and definition.
Sorry I don't have more pictures of the final steps of the construction. Sometimes I just get in the groove and forget to snap a few photos.
Happy Decorating,
Carol


