
This is a quickie Baby Shark cake that I made for my grand-nephew, Kristopher. He is turning two! The yellow Baby Shark and the "2" on the top are cookies, and I made Kristopher his own Baby Shark cookie to munch on.

<< Disclosure: We are a participant in the Amazon Services LLC Associates Program, an affiliate advertising program designed to provide a means for us to ear fees by linking to Amazon.com and affiliated sites.>>
Like a lot of my recent cakes, I used my Creality Ender 3 v2 3D printer to make the cookie and fondant cutters. I made the shark cutters, the "2" cutter, the wave shape cutter on the "2", and a few sizes and shapes of coral. If you want to read an intro into 3D printers for cookie cutters you can read my post HERE.
Here is a line drawing of shark that I sent to CookieCad to generate an STL file and then sent to the 3D printer for printing.

I didn't feel like mixing up icing for the cookies, so I used Satin Ice's Choco Pan Modeling Chocolate in yellow, black, and red. The modeling chocolate is stiffer than fondant, so it is easier to cut and transfer to the cookie. The modeling chocolate also tastes a lot better than fondant. First layer on the cookie was yellow. I used the same cutter for cutting out the dough and the modeling chocolate.

Then I added the red mouth, and white part of the body. I had cookie cutters for each body part so it was super easy to cut of the pieces. Note: I used regular white fondant for the belly of the shark. The modeling chocolate comes in what they call "Bright White", but to me it is more ivory and not white.

Eyes and teeth went on last. I also scored lines into the modeling chocolate to separate the fins from the main body. This just gives it a little more interest.

For the cake itself I used a blue Ombre effect to make it look like water. I frosted the cake using CakeSafe acrylic disks which gives the cake the sharp edges and straight sides. (I have a blog post HERE explaining how I use them.)
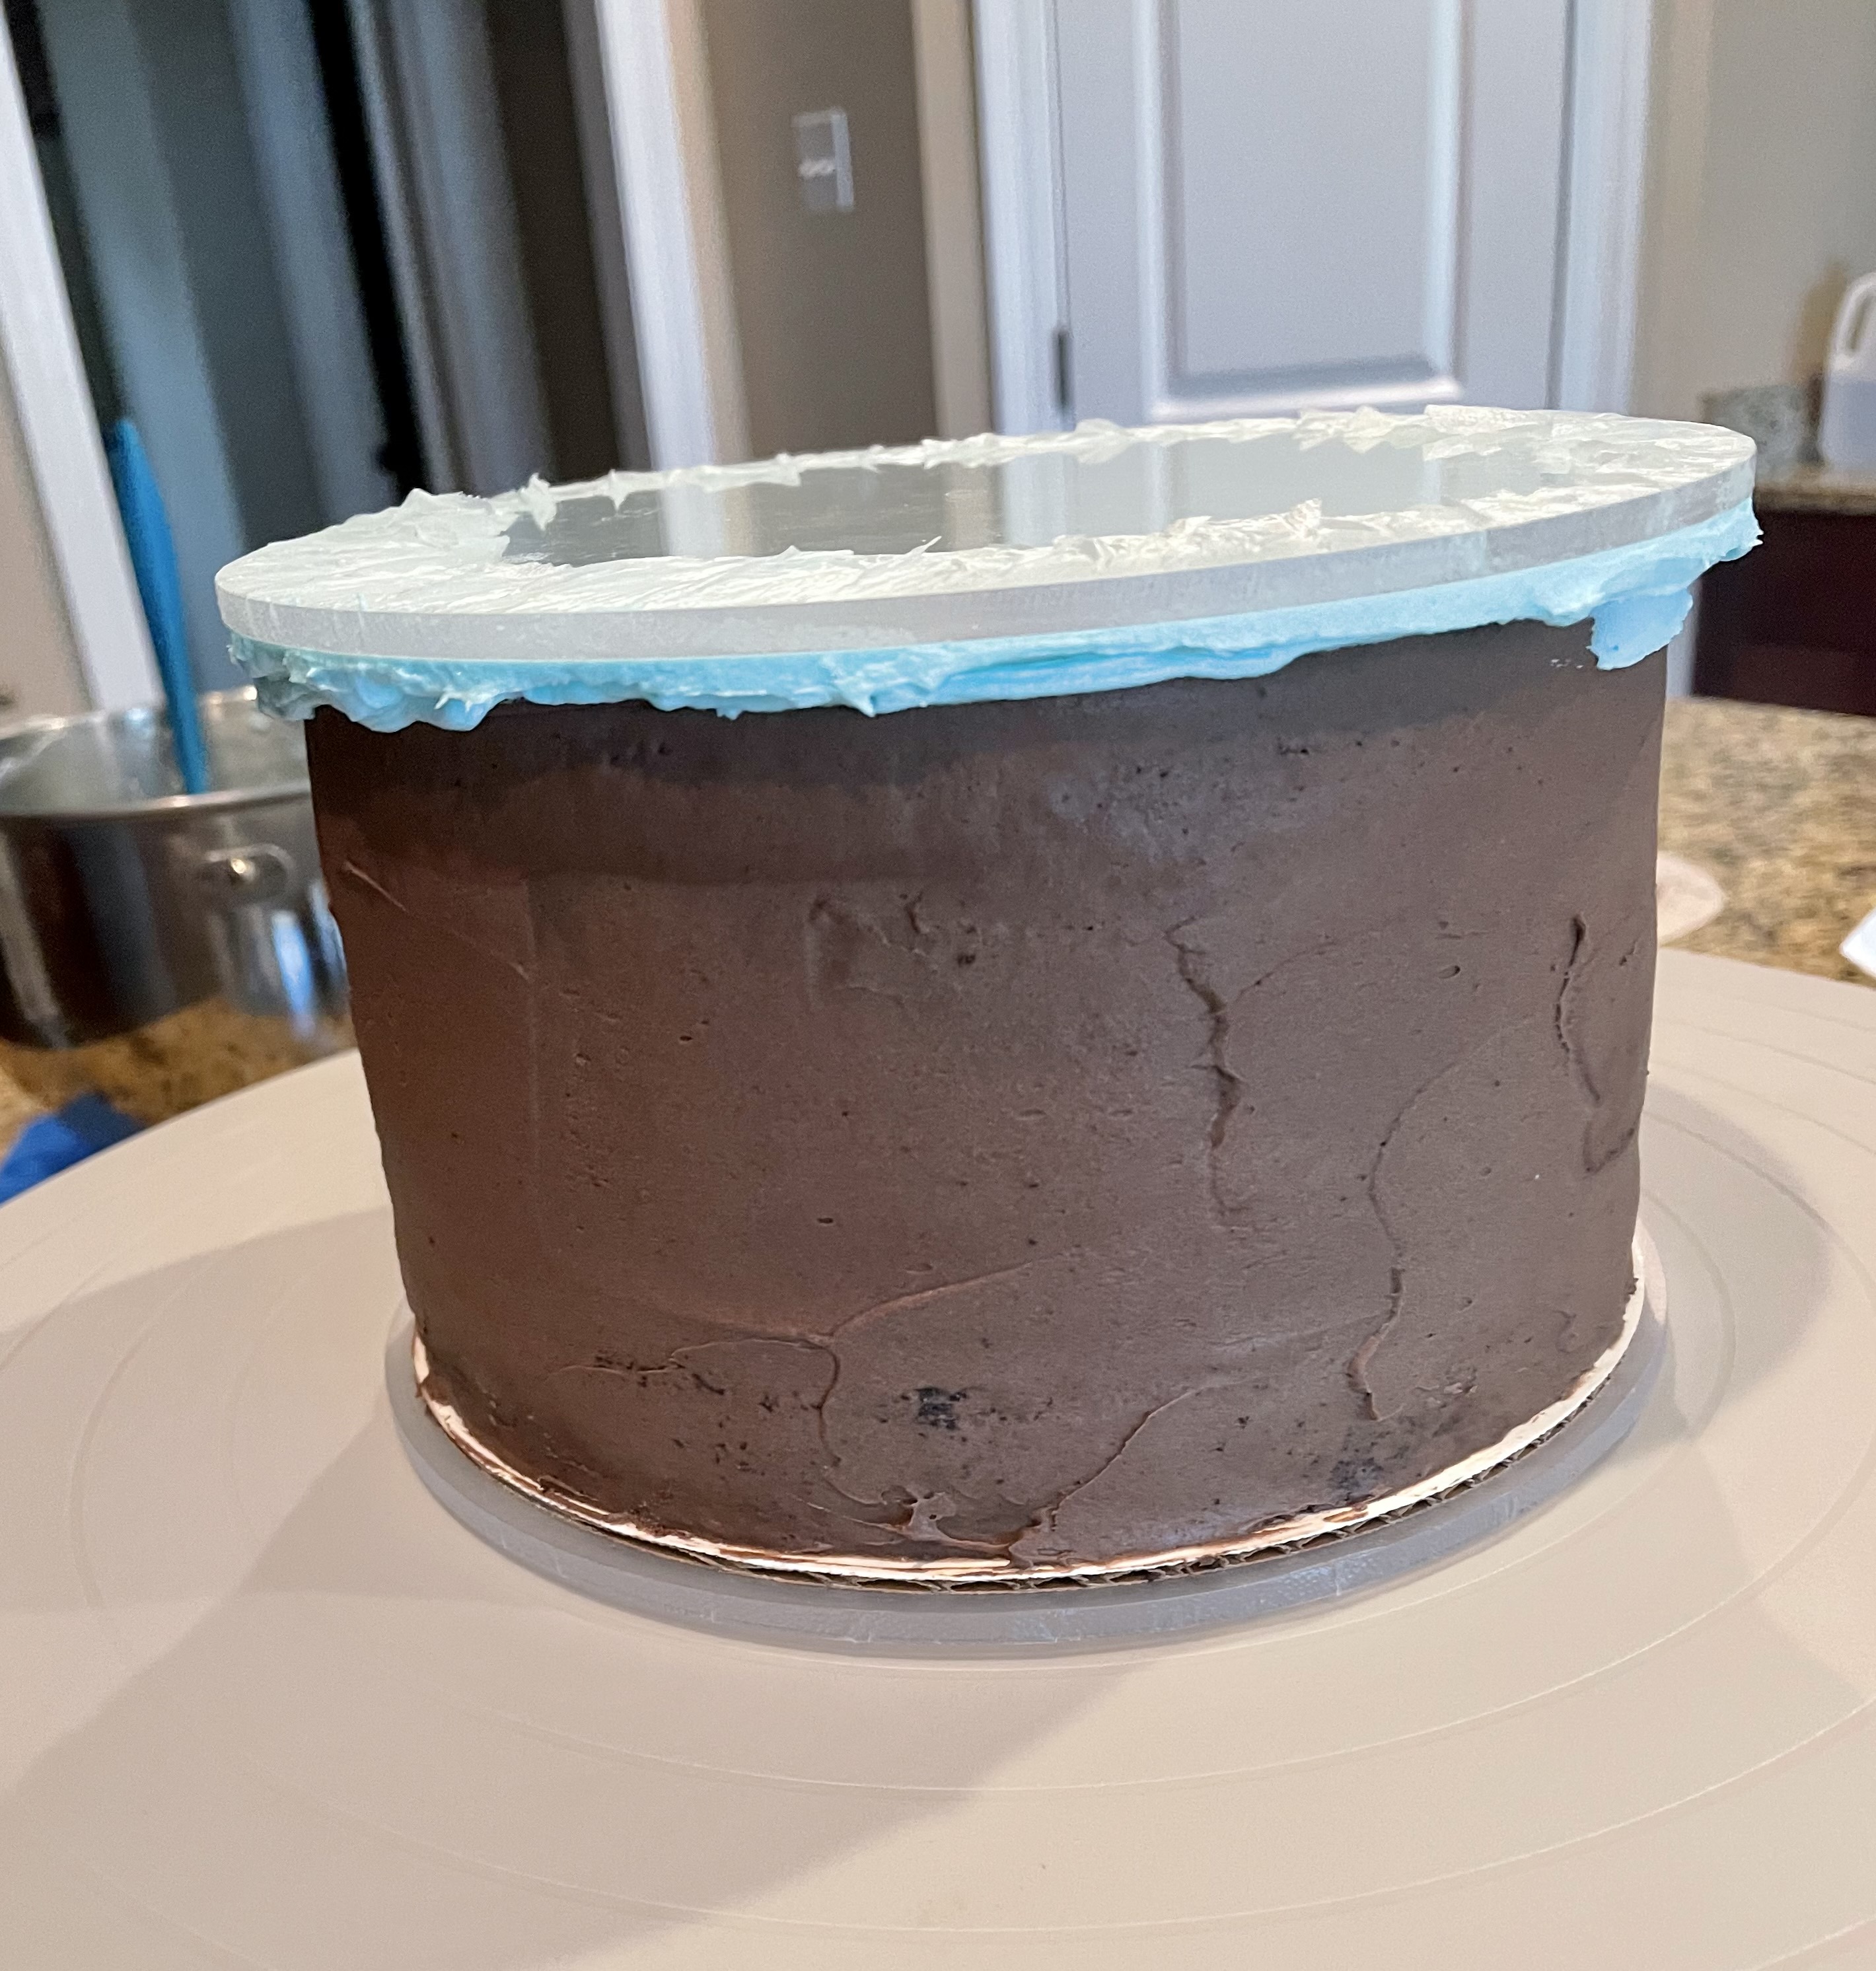
I tinted the frosting in four shades of Wilton's Sky Blue gel, and slapped it on the cake.


After frosting the cake it was just a matter of slapping on the decorations. The coral I made with my 3D cutters, the sea shells were made with silicone molds that came in a Mermaid set. I used the mermaid tails on another cake I made recently.

For the sand on the Baby Shark cake I used ground up graham crackers. Below you can see where I placed the shark and the "2" topper on the cake. I made a few different "2"s with different decorations. In the end I just went with the plain one you see the in final picture. I didn't like the one shown below with the white pearls and jimmies on it. The lettering on the cake was made with fmm Art Deco Alphabet Set 2cm Upper Case. I'm really bad at piping names using buttercream (especially on the side of a cake), so I just use the fmm cutters for all my lettering. And what do you think about the nose on the Baby Shark? I don't like it. It looks too much like a pig's nose. I should have use a different shape. Oh well, live and learn.

And once again the final cake. Super easy and simple to put together.
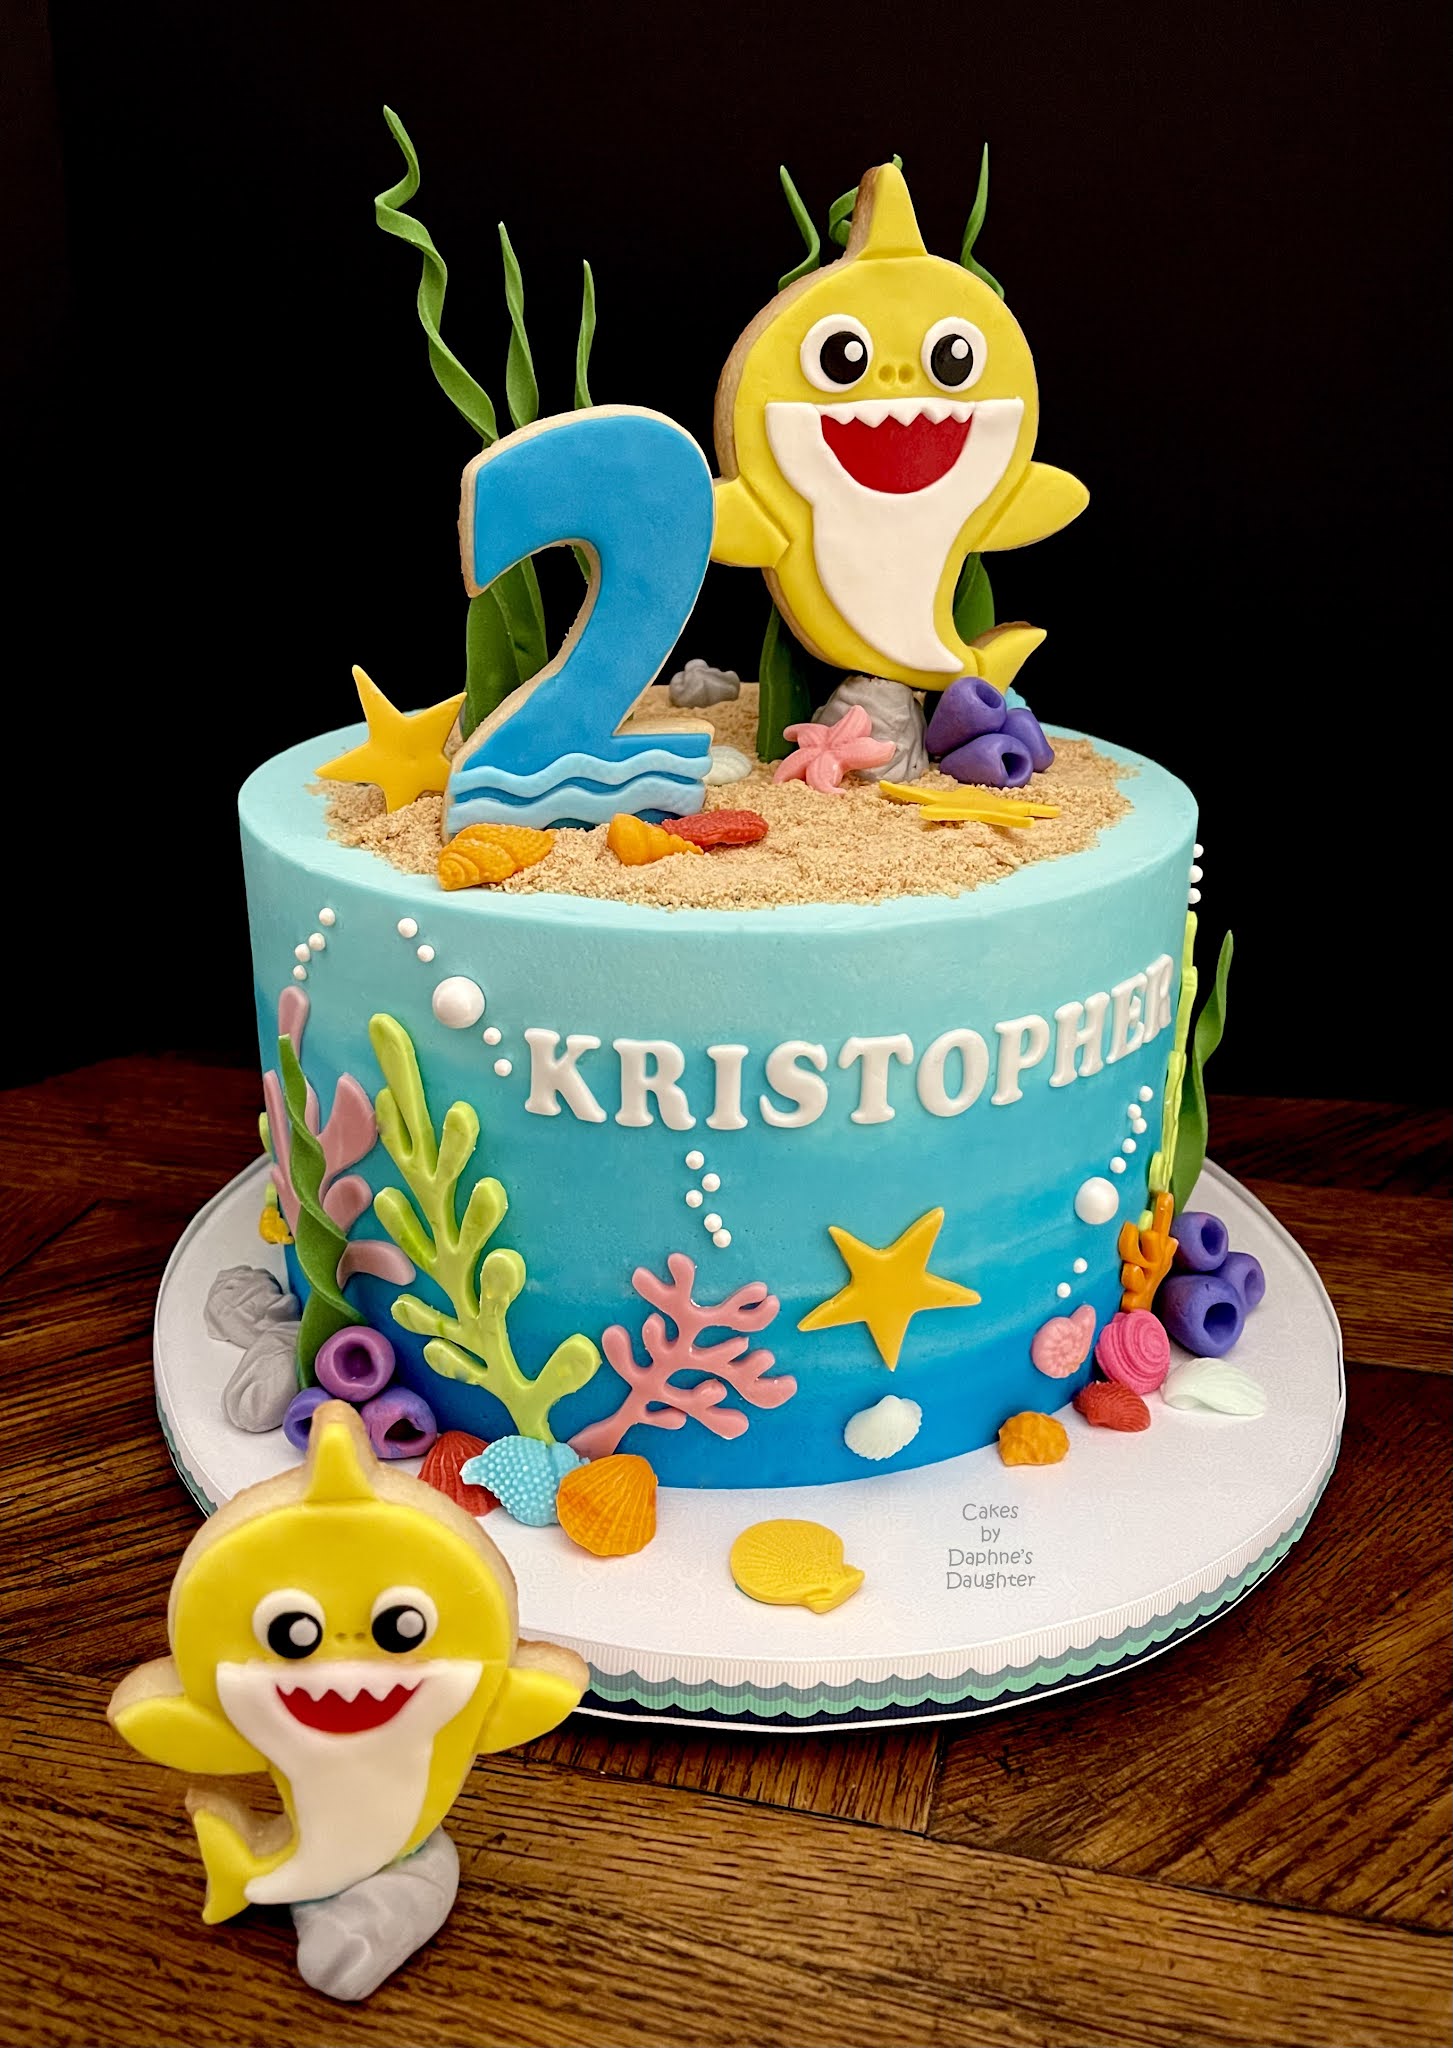
Happy Birthday, Kristopher!

Carol
So So Cute!
ReplyDeleteHello, such a cute cake. Do you have the .stl files for the baby shark cookie cutter?
ReplyDeleteHi Hillary, In the blog text, I added the line drawing that I used to create the cookie cutter. I also included a link to CookieCad that will call up the image and cutter settings and allow you to create a STL file. Hope it works,
DeleteCarol