Monday, August 31, 2015

Neymar Jr Jersey Cake

It has been awhile since I decorated a cake.  The last one was exactly one year ago when I decorated a One Direction cake for my niece.  Well this year she has gotten over Niall Horan and is now in love with Neymar da Silva Santos Junior, a Brazilian soccer player.  So this year she is getting a Neymar jersey cake. Ta Da...


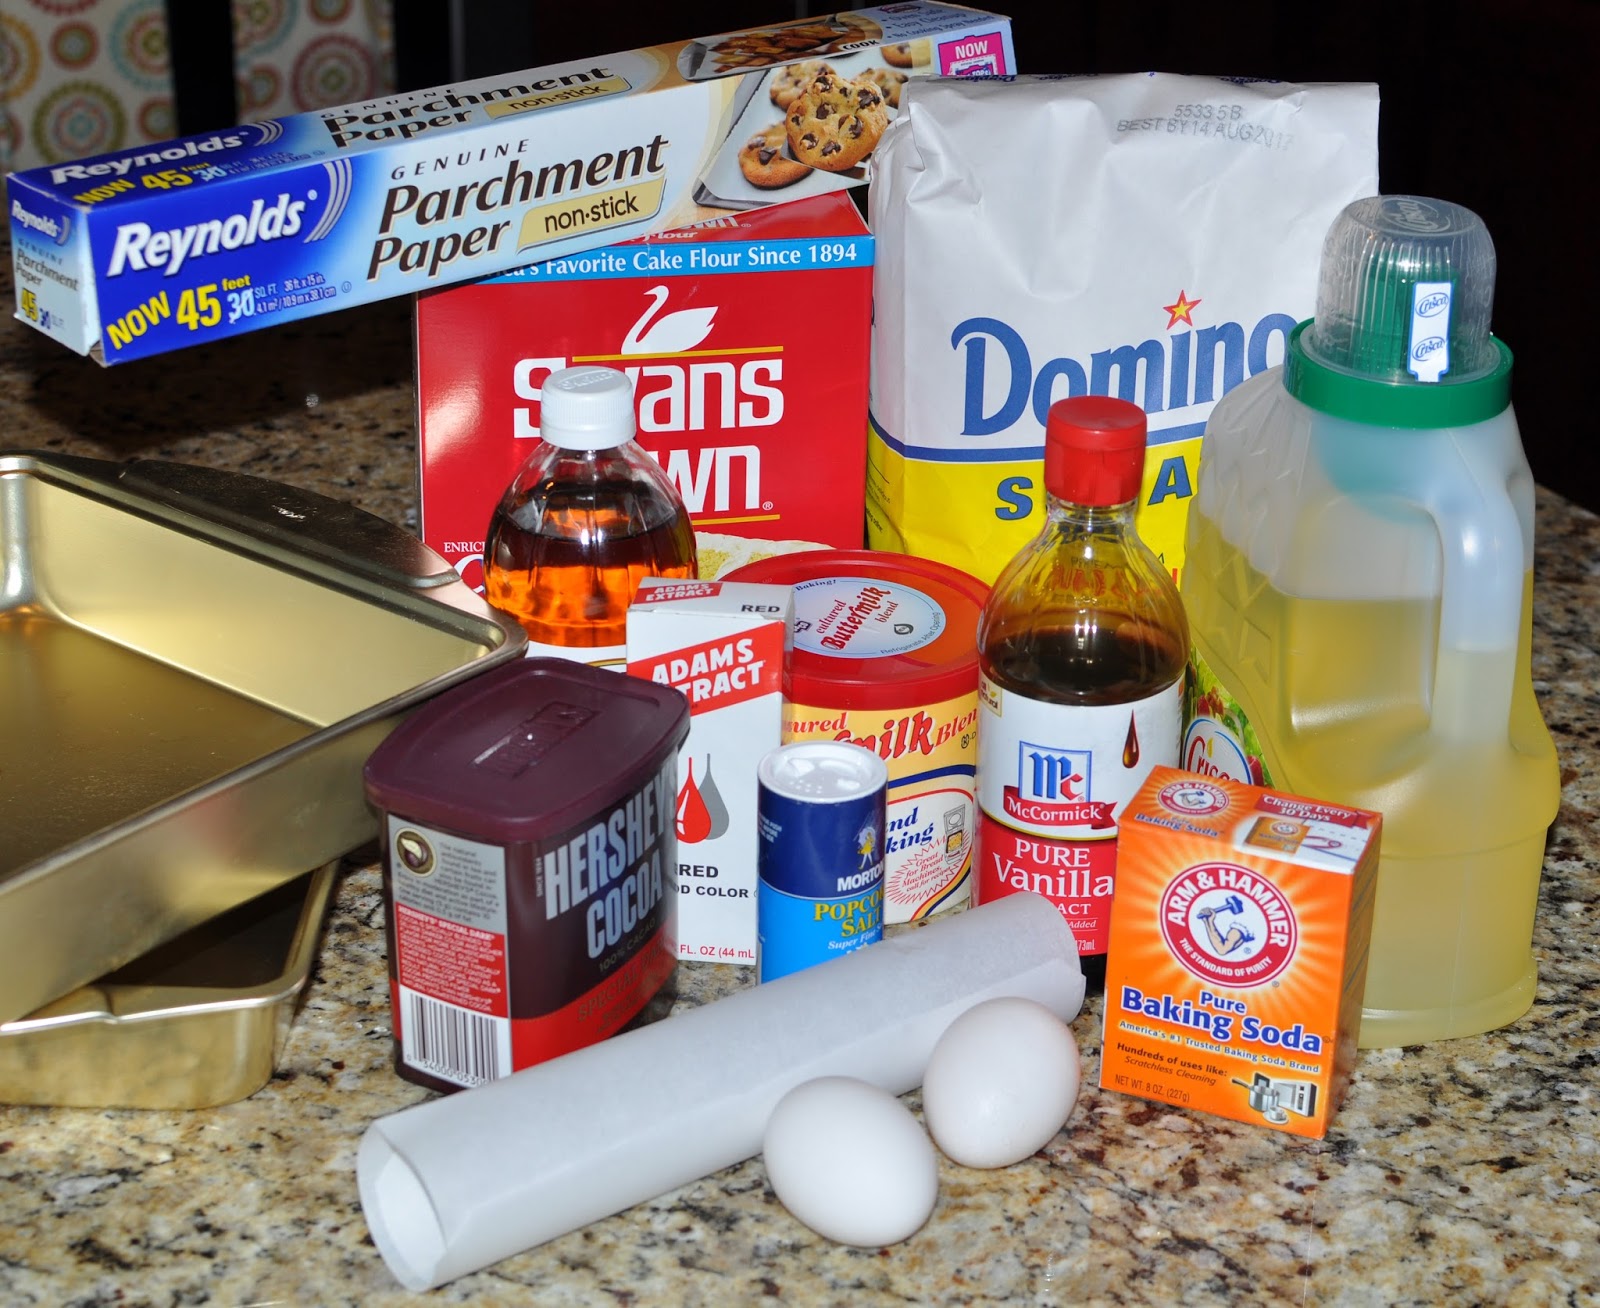
I'm not a great cake decorator, but she was pleased with my efforts.  And the inside of the cake was Cake Man Raven's Red Velvet (recipe at bottom) so she was really, really happy about that.  Here are all the ingredients that go into the cake.  Note that I use powdered buttermilk instead of the fresh, liquid stuff.  I've made hundreds of Red Velvet cakes using both fresh and powdered buttermilk, and honestly I can't tell the difference.


Below is the cake being mixed.  The original Cake Man Raven recipe called for mixing with an electric mixer, but for me the combination of red food color and an electric mixer never turned out well so now I just use a whisk.  For this cake I baked a double batch, so I ended up with 4, 10" square cakes.  But a word of warning: make sure you line your pans with parchment paper.  This cake will stick to the bottom of the pan if you don't take precautions.  After baking I iced the layers with a crusting cream cheese frosting. (recipe at bottom).


After frosting and stacking the cakes, I placed them in the freezer for about 30 minutes.  This gets the cakes firm enough to cut and shape.  After cutting and shaping comes a thin crumb coat, and then back in the freezer for another 30 minutes.  Chilling the crumb coat keeps it from sticking to the fondant as you tug, push, and smooth everything into place.


Next comes the fondant.  I'm all about making things easy so I used my latest discovery Via Roma Bakery Fondant.  This stuff is great.  It is soft right out of the box so it doesn't need any kneading or microwaving.  It takes color pretty well, but I did noticed a tiny bit of marbling when I tried to make darker colors.  No matter how long or how vigorously I kneaded the dark blue fondant it still had faint streaks of lighter blue.  My Wilton food colors were also old and a little hard, so I ended up with hard flecks of dried food coloring in the final fondant.  I tried to pick them out, but I didn't get them all.  I think I'm going to switch to the AmeriColor brand, I'm hoping they don't dry out as much.  But regardless of which coloring I use, next time I make a fondant cake I'm going to buy boxes of the pre-colored stuff.  No more kneading for me.

I also like the Via Roma Fondant because it rolls so easily.  You can even get it down to a paper-thin thickness of 1/24" inch.  I don't even bother using guides on the rolling pin.  I just roll and roll till the fondant doesn't stretch any more.  I also roll using Sweet Wise's The Mat.  This is another great time saving tool.  With The Mat it is so easy to transfer the fondant to the cake.  No creases, folds, tear or tears.


Onto the cake the fondant goes...


Next some red fondant cut into strips for the jersey decorations.  I used a Wilton fondant cutter and embosser.  It works okay, but it is a little difficult keeping it straight and steady.  


Red and yellow stripes on the cake.  It is starting to come together.


Next all the lettering.  I used the Wilton fondant cutouts for the letters, but in that kit all the letters are capitals.  Capital letters are okay for Neymar's name, but the other text (like unicef and beko) should have been in lower case letters.  And I didn't know this till later, but apparently unicef, beko, and LFP are the team's sponsors.  Nike and Qatar Airlines are also sponsors, but their logos are on the front of the jersey.  I should have made a jersey that stood on end and showed both sides.


And finally the finishing touches of thin ribbons of fondant scored to look like stitching.  Another Wilton tool: the fondant wheel cutter/embosser.  Wilton has a tool for everything. 


So my niece was pleased with her birthday present: the Nike Neymar Barcelona Home Jersey 15/16...


And she was also pleased with a cake that kind-of, sort-of, looked like a Neymar Jr jersey...


And all that work --- gone in 60 seconds.


But it sure did taste good.

Happy Baking (and Decorating),


Carol


Red Velvet Cake Recipe 

( from Cakeman Raven & Southern Red Velvet)

Ingredients:

2-1/2 cups Cake Flour
1-1/2 cups Granulated White Sugar 
1 teaspoon Baking Soda
1 teaspoon fine salt ( I use popcorn salt )
1 Tablespoon Cocoa Powder

1-1/2 cups Vegetable Oil
1 cup Buttermilk (or the powdered stuff with water)
2 large Eggs
2 Tablespoons Red Food Coloring
1 teaspoon Vinegar
1 teaspoon Vanilla

Directions:

1 - Preheat oven to 350 degrees
2 - Grease and line with parchment paper 3 - 9" round pans. (Note: I like thicker cakes so I usually bake in 2 - 8" pans.)
3 - Sift together all dry ingredients
4 - Combine all wet ingredients 
5 - Slowly add dry ingredients to wet, whisk until smooth
6 - Bake 20-30 minutes till a tooth pick comes out moistly clean.  These cakes are super moist so don't over bake.


Crusting Cream Cheese Icing 

Ingredients:

1 cup (2 sticks) Unsalted Butter, softened
1/2 cup vegetable shortening
1 lb (2-8oz bars) cream cheese, softened
1 Tablespoon vanilla extract
1/2 teaspoon fine salt ( I use popcorn salt )
3-1/2 lbs (14 cups) sifted Confectioners' Sugar
1 teaspoon fine salt 


Directions:

1 - In a small cup dissolve salt in extract
2 - Cream butter, shortening, cream cheese, and extract mixture
3 - Gradually add confectioner's sugar 

This recipe will produce a frosting with a thick consistency.  For a thinner consistency use less sugar.  This frosting will crust when it dries.

Yield: 4-5 cups


Tuesday, June 2, 2015

Via Roma - My New Favorite Fondant


Disclosure: We are a participant in the Amazon Services LLC Associates Program, an affiliate advertising program designed to provide a means for us to earn fees by linking to Amazon.com and affiliated sites.
 
Back in August 2013 I did a big comparison of different fondants to decide which I liked the best.  Sadly there was no clear winner.  The ones that tasted the best were the most difficult to work with, and the ones easy to work with didn't taste so hot.  I was so disappointed that I didn't have a "goto" fondant, that I when a new fondant from Italy hit the US market I jumped at the chance to give it a try.  This new, ready-to-use fondant is called Via Roma Bakery White Roll Fondant. Ta-da....


In my original fondant comparison I used 8 different criteria to judge and rank the fondants.  I will stick with the same 8 criteria in this post. 

Taste ---- Face it -- No fondant taste great, but some are more palatable than others. This Via Roma Bakery tasted okay, but it did have a somewhat rubbery feel in my mouth. It had a pronounced marshmallow flavor that was both mild and agreeable. It didn't taste as good as brands like Pettinice or Choco-Pan, but it tasted much better (IMHO) than some of the other brands like Wilton, Fondx Elite, Fondarific, or Satin Ice.

Texture ---- When you knead the Via Roma it feels very dry in your hands. It is not sticky or tacky at all. It is very soft and does not need to be microwaved or heated to loosen it up. It is amazingly easy to work with.

Rolling ---- It rolled very easily, and I did not need any powdered sugar or corn starch to keep it from sticking to the mat. In fact the Via Roma did not stick at all. No matter how thin I rolled it, it easily lifted from the mat without any sticking, pulling or tearing. The rolled fondant was also very elastic so the edges of the fondant didn't crack as I rolled it out.


Coverage ---- In my fondant comparison I used the same amount of fondant (5 ounces) rolled to the same thickness (1/8") to see how far each brand would spread. At 11+ inches round, this Via Roma fondant was one of the best performers (tied with Fondarific). The worst performers, at 9" round, were Duff & Satin Ice. I was also able to roll the Via Roma to 1/16" which gave me a 13" circle of fondant. (The box says that you can roll the fondant to 1/24", but my rolling pin doesn't have spacers that thin.) So with just 5 ounces of Via Roma fondant you can cover an 8" cake! That is pretty amazing.

Fondant rolled to 1/8"...


Fondant rolled to 1/16".  You can see through the fondant it is so thin.


Draping/Smoothing ---- Because the Via Roma is so soft and elastic it created a lot of folds and drapes when placed on top of the cake. But the folds were very easy to smooth away with a little bit of work. The stretchy, elastic nature of the fondant also made it easy to buff away imperfections. As the Via Roma dried I did notice a bit of “elephant skin” texture forming (Satin Ice does this a lot), but when I smoothed it with my warm hands the skinning went away. Also no air bubbles formed. Yea!


Cutting/Trimming ---- The fondant cuts very cleanly; no ragged edges like you can get with other fondants (Duff).


Drying Time ---- The Via Roma fondant has a slow drying time. I was able to re-roll, position, and smooth the fondant three times without noticing any stiffness or cracking in the fondant. Some fondants I tested would start to dry out while as soon as you start rolling (Wilton). If you need a fondant that never dries out try Fondarific -- this stuff will stay soft for years!

Final Look --- Perfection. I have to say that I was really impressed with the final look of this fondant. The elastic nature of the fondant kept it from drooping into the nooks and crannies of the cake. The fondant almost seemed to float on top of the cake which helped to mask all the imperfections beneath it. Out of all the fondants I’ve tested, I think the Via Roma looks the best. (Followed closely by Elite and Wilton.)


So all-in-all this Via Roma is a great fondant. It is easy to knead, roll, drape, and smooth. The elastic nature of the fondant gives the finished cake a look that is as smooth as glass, and hides most of the cake's little imperfections. The fondant stays soft enough for repeated rollings (important in case you mess up and have to start over), and even when it dries it is still easy to cut. It doesn't taste as good as Pettinice or Choco-Pan, but it is still pretty tasty.

So after all this time I think I have found my "goto" fondant: Via Roma Bakery!

Note: some additional fondant comparisons/reviews are for Cake Craft Fondant and Carma Massa Ticcino .

Note2:  I haven't been pleased with my last two purchases of Via Roma Fondant (there were a little dry and I got the dreaded "elephant skin" texture on my cake), so I'm again on the hunt for the perfect fondant.

Happy Baking (and Decorating),


Carol


Sunday, May 31, 2015

Rustic Crusty French Bread - Fun, Funky & Fabulous

I'm not a big bread baker (not sweet enough for this cake loving gal), but I was intrigued by the simple Rustic Crusty French Bread recipe I found in my newest cookbook: Fun, Funky & Fabulous - New Orleans' Casual Restaurant Recipes.


He is the bread just coming out of the oven.  Doesn't it look fabulous.  (It does look a little overcooked, but hey, that is my trademark.)


The recipe has just four ingredients: flour, salt, yeast, and water.


And best of all the dough just takes a few minutes to mix with a wooden spoon.  No kneading, no bread hook, just stir it a few times and place it someplace warm to rise.  Easy-peasy.   But I have to admit that my first batch didn't turn out so fabulous.  The recipe calls for All-Purpose flour, but the AP flour I keep in the house is a soft flour (Martha White).  While the Martha White is great for tender cakes and cookies, it is not so good for bread.  The Martha White just doesn't have enough gluten to allow bread dough to get a good rise.  The second loaf, which was made with Gold Medal Bread Flour, came out much nicer.


The only bummer about the bread recipe is that you can't whip it up at the last minute.  Because after mixing you need to let it rise for at least 12 hours.  I usually make the dough at night, allow it to rise overnight, and bake it in the morning.


After rising, you form the dough into a ball and cut a hash pattern in the top.


Next it goes into a Dutch Oven.  I'm using this nifty Cast Aluminum Dutch Oven by CorningWare.  The pot is a little finicky to use (long list of do's and don'ts associated with the pot) but it works great and cleanup is a breeze.


With the cover on the Dutch Oven bake at 450 degrees for 30 minutes. 


Then remove the cover and bake for another 20 minutes until golden brown.


Slice and enjoy.  But be aware, they call this stuff Rustic Crusty French Bread for a reason -- it is very, very, very crusty.  It is so crusty I had to use an electric knife to cut it into slices. But once sliced, the crust was crunch and chewy and oh-so delicious.


(Below is the first loaf I baked using the Martha White AP flour.  You can tell that it is much flatter than the Gold Medal Bread Flour used above. So the type and brand of flour do make a difference when baking bread.)


So if you are new to bread baking, or just want to try a new technique/recipe, then give this Simple Rustic Crusty French Bread a try.  It is really worth the time. 


Happy Baking,


Carol