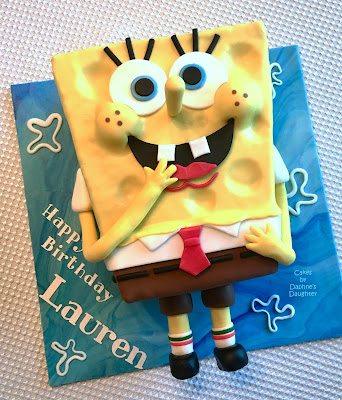
I made this SpongeBob Square Pants cake for my niece who brought it to a friend at work. It looks a little complicated to make, but it was actually pretty easy.
I started by trimming the cake to fit the shape of SpongeBob's body. Just straight cuts here. I use a huge 11" serrated knife to cut and trim my cakes. I have the Farberware Resin brand - I love this knife! Amazon isn't selling it any more, but this Mercer brand looks comparable.
I let it chill in the refrigerator till everything was nice and firm. While the cake was chilling, I used the paper template to cut out the mouth and tie. I also made the arms, legs, and shoes, but when I started to place them on the cake I found that they were too small. (It doesn't pay to make too many things ahead of time.)
Next I used a circle cutter to cut the depression into the cake - this is what makes SpongeBob look like a sponge. To make his pants, I covered the bottom section in brown fondant, and I used a strip of white fondant for his shirt. I made the white strip a little too thick, but I didn't realize this mistake till later. I thought SpongeBob's yellow body would sit directly against the white strip, but I realized later that the yellow needed to overlap the white stip. Oh well...
Next I added two yellow balls of fondant to make his cheeks. Those lines in the cheeks will butt up against the mouth which will be placed later.
Next I added his face. I used circle cutters for his eyes, and the paper templet to cut out the mouth.
And that little black strip along his pants - I used this PME strip cutter to make those. I also used the strip cutter to make the details on his socks.
For the bubbles on the cake board, I used a circle cutter set to cut an outer circle and and inner circle giving me a narrow, hollow circle.
The cutouts for "Happy Birthday" and "Lauren" were made using my Cricut cutter (this is a must have tool for cake decorating). His eyelashes were made with the strip cutter, and the tiny dots on his checks were made with some teeny, tiny circle cutters.
Happy Decorating,
Carol


No comments:
Post a Comment