... and if I do say so myself -- they were pretty dog-gone good. More cakey than a traditional scone, but moist and sweet and packed with a delicious citrus scent.
Now if you have never tasted a Satsuma orange, then you are missing out big time.The Satsuma Mandarin is one of the sweetest citrus varieties, with meltingly soft pulp, huge juice sacs, and paper thin segment walls. The outer skin peels off easily to reveal the bright, reddish-orange fruit below. In the United States they are grown mostly in the coastal parishes of South Louisiana, and they are a common sight in New Orleans around Christmas. Where I live you can find farmers selling their bagged Satsuma on the side of the road from October to late January.
So like I mentioned earlier, I have been experimenting with different scone recipes trying to find the New Zealand Dream scone I tasted 20 years ago. This time I decided to try a recipe from the British National Trust -- with only a few modifications to use my Satsumas. My recipe is at the end of the page, and essentially it is the National Trust recipe, with Satsuma juice replacing half the milk. I also added sugar, vanilla, glaze, and increased the butter and shortening but it is the National Trust recipe - No really it is...
I wanted a lot of citrus punch in my scones so I also added some zest. The skin of a Satsuma is very soft and fragile so I only managed to get about 2 teaspoons of zest. I would have liked more, but I didn't want to destroy any more Satsumas.
In the end I used 3 Satsumas and got my 2 teaspoons of zest and about 1/2 cup of pulpy fruit. And take a look at the color of the juice -- isn't the red-orange color amazing. No Photoshop manipulation here.
The National Trust recipe calls for butter and lard (I used shortening sticks). I froze both the butter and shortening, and grated it till I got the weight called for in the recipe. And then I added a little more. More butter is always better.
The National Trust recipe didn't call for any sugar, but I added 3 Tablespoons and I rubbed the zest with the sugar to bring out even more of the orange scent. I have been told that the sharp edges of the sugar crystals lacerates the skin and allows more citrus oil to escape.
Next add the sugar-zest to the flour...
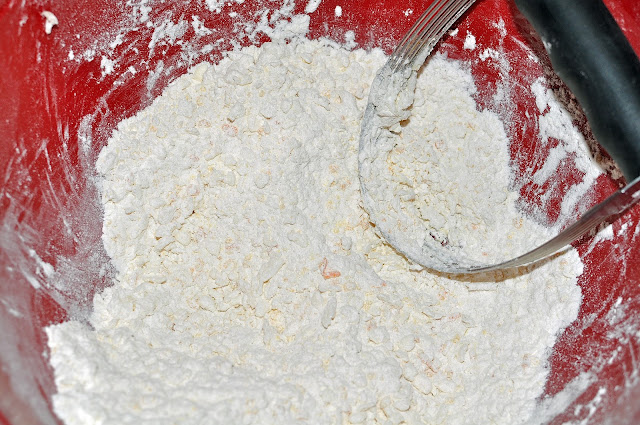
And then cut in the frozen, grated butter and shortening with the flour.
The liquids go in next. Combine the milk, Satsuma juice and a touch of vanilla extract, and then add the liquid mix to the flour a little at a time till the right texture is reached. I always have trouble with the liquid addition. Too much and the scones are too cakey, and too little and the scones are dry, crumbly, and get stale very quickly.
Gently pat the dough to the correct thickness and then cut out the scones. Notice the flecks of zest and Satsuma pulp in the dough. Yum.
Here are the scones all cut out and placed on a baking stone. Did you notice some of the scones look a little round and lumpy? After I cut out the scones I didn't re-roll the dough. I just gathered it up and formed it into sticky balls. I also placed the dough scones close together. I read recently that having the scones close together helps them to rise...
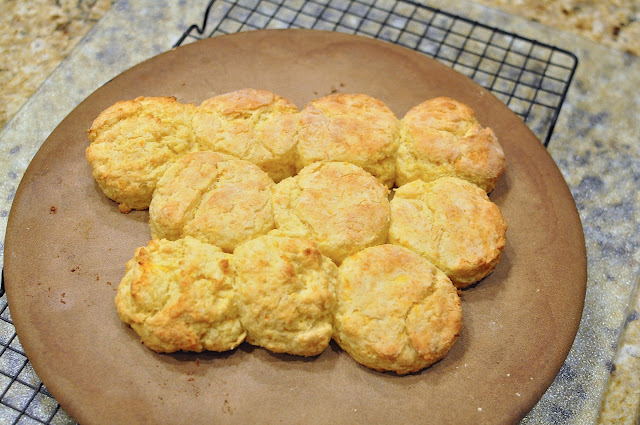
And I think putting the scones close together did help them lift a little higher. You can see the sides that are touching rose more than the edges that weren't touching. Also notice the pale, orange color to the scones -- that is real and not a result of my poor photography skill.
While the scones were baking I mixed up a little glaze. Just confectionery sugar mixed with a little Satsuma juice and touch of vanilla. Doesn't that juice look like egg yolks?
Drizzling the glaze on the hot scones.
Side view...
Top view. This is one of the sticky ball scones - It almost looks like a cinnamon roll.
So here is the recipe. It is highly modified version of the he National Trust's scone recipe. I also halved the original recipe. I just didn't want all those scones sitting around begging to be eaten.
Satsuma Scones
Yield 10 scones (depending on the thickness of dough and size of the cutter)Ingredients:
175 g / 1-1/2 cups All Purpose Flour (I use White Lily Flour)2-1/2 teaspoons Baking Powder
1/4 teaspoon Salt
3 Tablespoons White, Granulated Sugar (use more if you want the scones sweeter)
2 teaspoons Satsuma Zest
45 g / 3 Tablespoons Unsalted Butter (frozen and grated)
45 g / 3 Tablespoons Vegetable Shortening (frozen and grated) (I use Crisco sticks for easy handling)
1/3 cup Satsuma Juice with pulp
1/3 cup Whole milk
1/2 teaspoon Vanilla Extract
For Glaze:
1/2 cup of Powdered Confectioner's Sugar (double if you want more glaze)
3-4 teaspoons Satsuma Juice
1/8 teaspoon Vanilla Extract
Directions:
- Preheat oven to 425 degrees.
- Rub the Satsuma zest into the granulated sugar. Set aside to allow the sugar to absorb the oils from the zest.
- Freeze butter and shortening and when frozen solid use a large holed grated to grate the appropriate weight. Place the grated ingredients back in the freezer until needed.
- Combine flour, baking powder, and salt in a large bowl.
- Add the zest and sugar to flour mixture, and whisk till combined.
- Combine the milk, Satsuma juice and vanilla in a measuring cup.
- Add frozen butter and shortening to flour mixture and using a fork or pastry blade cut the fats into the flour mixture.
- Add about half the liquid combination to the flour and mix with a fork. Add more liquid until the dough comes together and is slightly sticky.
- Turn the dough onto a lightly floured surface and gently pat the dough into a 1/2 to 3/4 inch high circle.
- Using a 2-1/4 inch circle cutter cut out the scone. Note: don't twist the cutter as you push it down. Push down in one motion and then pull up. Twisting the cutter and smearing the edges of the scone will stop it from rising during baking.
- Place the scones on a baking stone or on a greased cooked sheet.
- Bake for 15-20 minutes until golden brown. Baking on a stone will take longer than baking on an aluminum cookie sheet.
- While the scones are baking mix the powdered sugar, vanilla, and just enough Satsuma juice to created a pourable glaze.
- Removed the baked scones from the oven and place on a cooling rack. Allow to cool for a few minutes and then drizzle the glaze on top.
So I hope you like these Satsuma Scones. And if anyone can recommend a scone recipe that is light and moist and bakes up to twice its height -- send me the recipe. Please... I'm getting fat testing all these scones.
Happy Baking,
Carol


