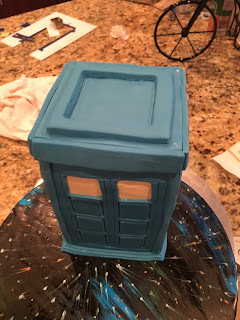
And covered in Rose Tyler's "Bad Wolf" graffiti...
I spent a lot of my youth watching Dr. Who (Tom Baker was my favorite), but now I spend most of my free time making cakes that look like my childhood obsessions. Strange how life works.
<< Disclosure: We are a participant in the Amazon Services LLC Associates Program, an affiliate advertising program designed to provide a means for us to ear fees by linking to Amazon.com and affiliated sites.>>
The construction of this Tardis began with a red velvet cake. I cut two 8" cake into into 4x4 pieces - 8 pieces in all. To cut my frozen cakes I use this huge Farberware knife. I have tried lots of cake cutting knives and this hulking baby is the best. It can cut through frozen cakes like a hot knife through butter.
Once cut, I stacked the pieces to make the cake 7 inches high. (I used 6 of the 4x4 squares.)
For the cake drum, I covered it with fondant and painted on some splotches of blue and green food color mixed with a little vodka. Then I painted the rest in black. I added some dabs of white gel food color (to represent the stars) and then pulled a tooth pick through it to make it look like the stars were moving by in a blur of motion.
Once the cake drum was dry and the crumb coated cake chilled, I positioned the cake near the edge of the drum. I used bamboo skewers to hold the tower in place because the cake was a little wobbly and leaning. Sadly it looks like the Leaning Tower of Pisa. I'm not quite sure what happened.
I used a long super slicer blade to make some horizontal impressions above the panels.
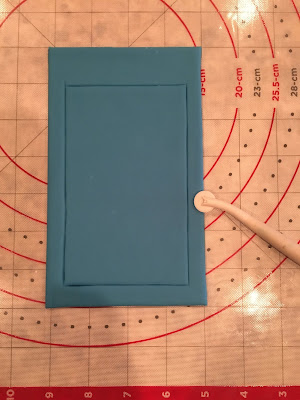
Then I used a square cookie cutter to make the windows/panels. For the blue panels I didn't cut all the way through. I pushed the cookie cutter in just enough to make the lines. For the "windows" at the top I did cut them out completely because they would later be filled with yellow pieces.
Once all the markings were complete, I gently picked up the 4x7 rectangles and placed them on the sides of the cake. Sadly the top section where the window were cut out did stretch a bit. In hindsight I should have put a second piece of 4x7 fondant behind the decorated 4x7 to give it more stability. I also should have put the yellow windows into position before I put the panel on the cake. Oh well, live and learn.
For the exposed corners I cut some narrow strips and made it look like wood trim.
For the base of the Tardis I used my trusty ACE Food Safe Extruder and squeezed out some baseboard looking pieces.
I made 45 degree cuts and mitered the base board strips together.
I covered the top with a 4x4 square on fondant and cut some thick rectangles to form the area where the "Police Box" signs would be placed.
Then I formed the stair-stepped roof of the Tardis by placing square fondant cut-outs one on top of the other. I was running low on my blue fondant so I had to cut out the center to conserve fondant.
To keep the fondant above from sinking into the hole, I cut a square of stiff cardboard that was slightly larger than the hole.
I used smaller and smaller cookie cutters as I moved higher.
Next I cut out the yellow windows, and used thin ropes of blue fondant to form the window panes.
Then I placed the windows panes in the opening. I hindsight I should have placed the windows panes in the openings before I put the panels on the cake because the openings were pulled out of shape when I picked up the panels and placed them on the cake. Next time I will put everything together before I try and pick it up.
I made a light for the top of the Tardis by rolling out some yellow fondant and adding some of the thin ropes of blue fondant to make it look like a cage.
For the "Police Box" signs I decided to take a short cut and use a printed image instead of trying to hand letter the signs. I didn't want to place the paper signs directly on the fondant (the fondant might make the paper damp and cause the ink to run), so I attached the paper to some gumpaste instead.
To give the Tardis and aged/weathered look, I dusted it with some black powdered food color.
The final step was the lettering. I used my FMM Funky Lowercase Tappit alphabet cutter to form the Bad Wolf graffiti on the side of the Tardis, and the Upper Case Tappit to form the happy birthday message on the cake drum.
So this is the end of my first Tardis Cake. In May I need to make another Tardis, which will be larger and more elaborate, so this was a good practice cake.
Happy Decorating,
Carol
Supply List:
Farberware Knife
Mona Lisa Fondant
Wilton's Sky Blue and Violet gel food color
Cake Boss Decorating Tools
ACE Food Safe Extruder
12" Cake Drum
Razor Slicer
Square Cookie Cutter Set
Black Edible Powdered Food Color
FMM Funky Lower Case Tappit Alphabet Cutter
FMM Funky Tappit Upper Case Alphabet Cutter


