I mainly make cakes for family & friends (free or at cost), but occasionally a stranger will ask, “How much would a cake like that cost?”
I give them a price, and I inevitably get that look that says, “That Bitch Be Crazy!”
For example I made this Frozen inspired cake for my niece’s niece. It is a 10” and 8” cake covered in American Buttercream with a handmade toppers, fondant snowflakes, and plastic Funko Pop character figures.
Someone at the party asked how much, and I replied honestly that a two tiered cake that feeds 62 people would cost $190.
The woman choked on her punch, pinched her lips together, and give me what I call the TBBC look. In other words: “That Bitch Be Crazy."
But in reality $190 is a very reasonable price.
Let me break it down…
<< Disclosure: We are a participant in the Amazon Services LLC Associates Program, an affiliate advertising program designed to provide a means for us to ear fees by linking to Amazon.com and affiliated sites.>>
Lets start with the tangibles-the ingredients (2019 prices.)
My 10” White-Chocolate, almond flavored cake filled and covered in buttercream cost me $20.47 in ingredients and supplies. $6.82 for the cake ingredients, $4.75 for the filling/crumb coat, $7.13 for 1-1/2 batches of American buttercream to cover the outside, about $1 for
cardboard cake rounds and
parchment paper, and $1 (5% of ingredients and supplies) for miscellaneous supplies like food color, plastic wrap, aluminum foil, paper towels, water & electricity. This cake is three layers of cake, stands about 5+” tall, and the 10” cake serves 38 people.
My 8” Chocolate cake filled with chocolate cream cheese and covered in buttercream cost me $13.90 in ingredients. The 8” cake is also 3 layers and feeds 24.
The
cake drum (covered in fondant and edged with ribbon) cost me $5.45.
Support
boba straws and dowels for a 2 tiered cake and a box to deliver the cake in runs about $2.68.
Total for ingredients and supplies for an un-decorated 2-tiered cake is $42.50.
Moving onto the supplies for the decorations-
This Frozen cake didn’t have a lot of materials tied up in decorations so the cost for
gum paste to make the toppers,
fondant to make the snowflakes, skewers to hold the toppers,
Tylose powder to stiffen the fondant, and misc supplies (gel colors, toothpicks, etc) comes to $4.85.
I also purchased some
Funko Pop mini plastic figures for the cake for $9.99.
Grand total for ingredients and supplies is $57.34.
So if I’m making a two tiered cake for friends I would charge about $60 to recoup my cost. If the cake is for family, then it is just part of my share of the pot-luck party food.
Now if I were making the cake to sell, I would add in the big ticket item called LABOR.
For this cake I kept track of the time spent on each task, and, drum roll please, the total time invested in this cake was 13 hours. Yes THIRTEEN HOURS.
That may sound like a crazy high number but let me break it down.
I spent about 1-1/2 hours making the Olaf and the number 4 topper. I make these ahead of time so they would have time to dry. I use my
Sculpey Super Slicer blade to cut the straight edges and a
xacto knife to cut the curves. I insert the bamboo food skewers into the gum paste before it dries.
Here is Olaf's head.
And Olaf's body.
Baking my signature white cake is labor intensive. It takes over 1-1/2 hours!
I need to triple sift the cake flour, cream the butter with the sugar, whip the egg whites, melt the white chocolate, mix my special concoction of flavors. I need to prep the pans with
parchment paper,
baking strips, and
heating cores. I need to weigh all the ingredients and then weigh the batter to get it evenly distributed between the pans. To ensure that the three 10” cakes bake evenly I need to use two ovens. While the cakes are baking (about 25 minutes), I wash all the bowls and utensils. After cleanup I prep for the next step. I setup racks for cooling, plastic wrap and aluminum foil for freezing. (Yes I freeze my cakes. It makes them taste better and makes them easier to handle.) With the mixing bowls and working surface cleaned-up, I watch my baking cakes like a hawk. I need to remove them from the over at the precise moment. Not under baked or over baked. They need to come out in that tiny window known as the sweet spot. Once out of the oven I remove them from the pans and then double wrap in plastic wrap, stack in
special 4” tall cake pan, cover in aluminum foil, and finally pop into the freezer. After that there is more cleanup. Yep all that takes over and hour and 30 minutes.
Making my chocolate cake is a little less time consuming, but it still takes 1 hour and 15 minutes.
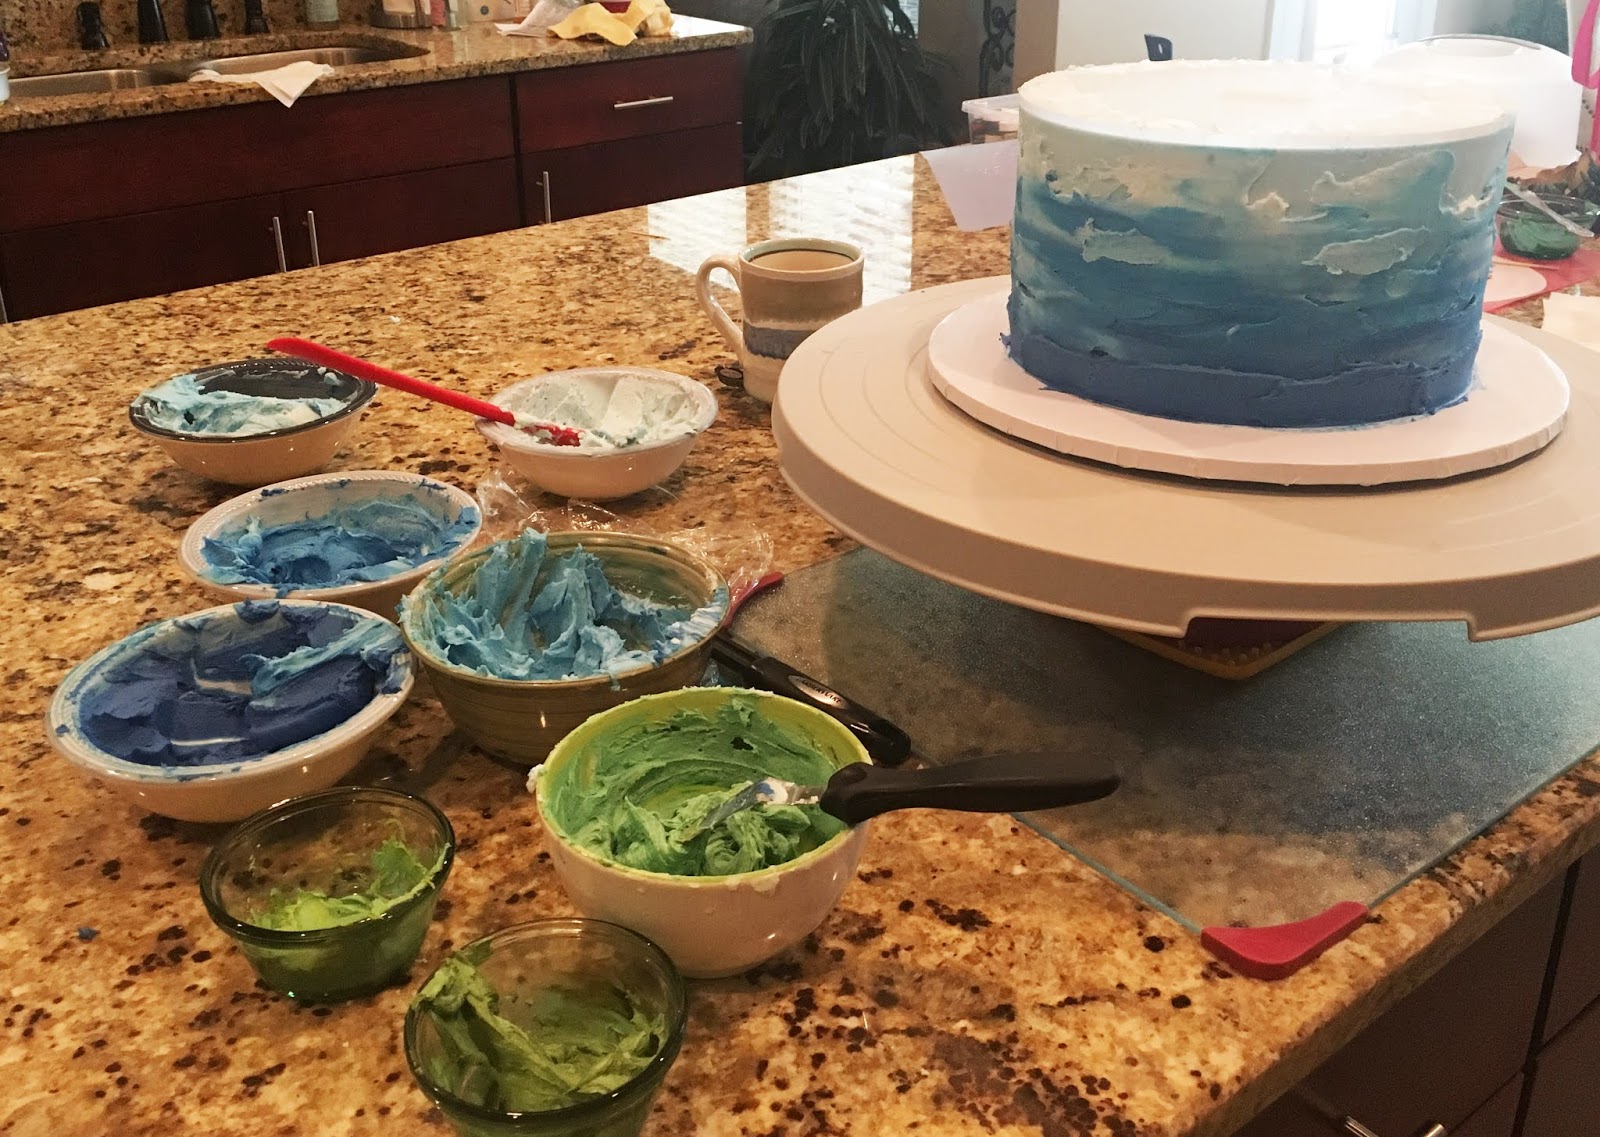
On the day before delivery, I start on the cake(s). The first step is making the icings. For this cake I needed three types: a soft chocolate cream cheese for filling and crumb coating the chocolate cake, a soft buttercream for filling and crumb coating the white cake, and 2-1/2 batches of stiff/firm, crusting butter cream to cover the tops and sides of the two cakes. I also needed to color the firm buttercream in two custom shades. One in lavender and one a violet-tinged pink. Making three icings and tinting took over an hour. For the bottom tier I used
Wilton's Sky Blue and for the top tier I used a mixture of
Wilton's Violet and a touch of
Americolor Electric Pink.
Next I start “Stacking” the cakes. For my white cake I use an almond flavored simple syrup so I have to make that first and allow it to cool. Then I un-wrap my frozen white cakes and scrape off all the bits of caramelized brown from the cakes. Believe me – if you don’t scrape off the caramelized bits people will make remarks about brown stuff in their slice of cake! I use this nifty
resin knife to trim my cakes. It is super long and super sharp. It works great for cutting and serving the cake too.
Here are the cakes ready for their brushing of simple syrup. The crumbs I cut off are on the side, and see that big bowl of icing in the back? That is is firm buttercream used on the two cake. I barely had enough. I should have made three batches for cakes this size.
After applying the simple sugar to the cakes I then start stacking. I place the first layer of cake on a
cardboard cake round, and then using stiff buttercream I make a dam along the top edge of the cake and then fill with the filling. The dam keeps the filling from oozing out and creating unsightly bulges on the side of the cake.
I put the second layer of cake on top of the first. I squish them together and then check that the cake is level. It is very, very important that the cakes are level so I check it multiple times. I dam and fill on top of the second layer and then place the third layer of cake on top. Again I check that the stacked cake is level and make adjustments as needed.
At this point I eye-ball the sides of the cake and trim off any pieces of cake that a sticking out beyond the others. It is import that the sides are straight.
As the final step in the “Stacking” phase I crumb coat the cake with a thin layer of the soft buttercream. Like the name implies, the crumb coat traps the crumbs and keeps them from getting into the final coat of firm buttercream. The “Stacking” phase for the white 10” cake takes about 45 minutes.
Stacking the chocolate cake takes a little less time because I don’t have to scrap the brown bits off or add the simple syrup. Stacking the chocolate takes about 30 minutes.
At this point I allow the cakes to sit on the counter for about an hour. This allows the cakes to settle, and allows any air trapped between the layer of cake and filling to escape. I also gently weigh down the cakes to encourage the air to escape, and I periodically check that the cakes remain level during the settling process. After an hour of settling I put the cakes in the refrigerator for an hour so the fillings and crumb coat can harden. Note – none of this time that the cakes spend on the counter settling or in the refrigerator are included in the final total of time spent on the cake.
Once the cakes are chilled I apply the final coat of stiff buttercream. I used
acrylic disks to ensure the sides of the cake are straight and the top is flat. This also gives the super sharp edges to the cake. Some decorators can do this step without the acrylic disks, but I’m not that good. To cover the disks with
Glad Press & Seal wrap, stack everything in perfect alignment, generously coat in buttercream, carefully scrape of the excess buttercream, and give a final smoothing with
Viva paper towels takes about 45 minutes for each cake. So both cakes take about 1-1/2 hours.
Note: The
Viva paper towels method of smoothing crusting buttercream has been around a long time. You need to use the Viva brand because there is no pattern pressed into the towel (like Brawny). You gently lay the paper towel on the cake and then smooth it with
fondant smoother. This step give the surface of the cake a uniform and smooth look.
At the point the perfectly smooth cakes go back in the refrigerator so the buttercream can harden.
While the cakes are chilling I work on covering the cake drum. To cover with fondant, add a texture to the fondant, and add a ribbon takes about 30 minutes. Although I typically wait till the end to add the ribbon.
Once the cakes are chilled the “Assembly” phase begins. I have to place the first cake on the prepared cake drum, and then place the second tier on top of the first. This is the most nerve wracking part. One wrong more and you can destroy the smooth coating of buttercream or worse yet drop the cake!
First I need to remove the acrylic disks. The disks make it easy to get those straight sides and flat top, but getting the bottom disk off is a bitch. With the cake and icing really cold I flip the cake upside down and remove the bottom disk. Then I place the cake drum on the bottom of the cake (which is now at the top), hold the two tightly together, and then quickly flip the two upright.
With the bottom tier in place on the cake drum, I then add the
boba straws and dowels that support the weight of the upper cake. When the straws are in position I place the second cake on top of the first. This "Assembly" phase takes about an hour.
So at this point I only have a stacked, two tiered cake and I’ve already invested 9 hours of time!
This cake had the birthday girl’s name on the side of the cake. To color the fondant, cut out the letters using
Funky Alphabet Tappits, and place them on the cake takes about 30 minutes. It takes a lot of measuring to get the letters level and equally spaced.
This particular cake has snowflakes on it – lots and lots of snowflakes. I had to mix about 6 different shades of pink, purple, blue, and white fondant and then cut out each snowflake. I used a
snowflake cutter, but it was still a time consuming process. I also had to make a fondant rope for the base of each cake (I use a
food safe extruder), and roll some balls for the “snow”. To decorate the cake and place the topped took another 2-1/2 plus hours.
And then the clean up. Oh my, my kitchen is a disaster zone after a marathon of cake decorating. It takes about 30 minutes to clean up and pack everything away.
So the final tally of time spent on this cake is 13 plus hours.
So how much do you get paid an hour? Multiple your hourly rate by 13 and add the $57.34 What is your total?
I used a very conservative hourly rate of $10, and I get $130 for labor. Add in the $57.34 for ingredients and supplies and I get $187.34.
Was your total higher than mine?
Granted I might be a slow decorator, but the time I spent is real. I have been baking and decorating for years and I think I have gotten slower and not faster. I think this is because I know what can go wrong so I’ve added a lot of steps to prevent disasters from happening.
So yes, if you want someone to make this type of cake it is going to cost $190.
And when they tell you the price don’t roll your eyes. Don’t gasp or assume the decorator is crazy. A lot of time and money goes into decorating cake.
Happy Decorating,
Carol
Supply List:
Cardboard cake rounds
Parchment paper
Cake Drum
Boba Straws
Gum Paste
Fondant
Tylose Powder
Funko Pop Mini Plastic Figures
Sculpey Super Slicer blade
xActo knife
Baking Strips
Heating Cores
4” tall cake pan
Wilton's Sky Blue
Wilton's Violet
Americolor Electric Pink
Resin Knife
Acrylic Disks
Glad Press & Seal Wrap
Viva Paper Towels
Fondant Smoother
Funky Alphabet Tappit
Snowflake cutters
Food Safe Extruder