Sunday, April 29, 2018

Trifecta of Rosette Cakes

The last few months have been so busy.  Between work, family weddings, graduations, birthdays, and the corresponding CAKE for each occasion, I haven't had time to document my (mis)adventures.  So I'm going to try and bundle some of them together.

First bundle is a Trifecta of Rosette Cakes.  Rosette are so pretty, so delicate, so girly-girl.  Rosette Cakes must be the trend this year because I had three requested in the last few months.  One was for a baby shower....


One for my Mom's first cousin, who turned 96...


And one for a bridal shower for my sister-in-law's niece.


Whew, that is a lot of rosettes.  Thankfully they are easy to make.  Here is a YouTube video that I found the most useful for learning to pipe the rosettes.

<< Disclosure: We are a participant in the Amazon Services LLC Associates Program, an affiliate advertising program designed to provide a means for us to ear fees by linking to Amazon.com and affiliated sites.>>

My first attempt at a rosette was with Goldie's cake so I went a little overboard with the placement of the rosettes.  I scored guide line into the cake using Wilton' Cake Marker, and then used a circle cookie cutter to mark where each rosette went (I wanted to make sure each rosette was exactly the same size.)


Then I started piping rosettes using Wilton's big 1M tip.  First row, finished so I used the cookie cutter again to mark the location of each rosette.  Overkill I know.


The second tier used the "spoon" texture method.  (You just drag the back of a spoon through the soft buttercream as you spin the cake on a turntable.)  And because I'm horrible at cutting supports and placing the second tier, I had to pipe something to hide the gap between the tiers.


But I wasn't happy with the camouflage of the gap, so I added some Wilton sugar pearls.  What a time consuming and tedious job to individually place each pearl!  (FYI: The bentnose micro pliers is a jewelry making tool.  These tools work great for cake making because they are lightweight, compact, and they let you get into tight places without disturbing the buttercream or fondant.)


I made the name plate from fondant using a plaque cookie cutter, and the letters/numbers from gumpaste using Funky's Upper Case Letter Cutters.


And at the end I threw on some tiny pink fondant flower and a few more sugar pearls, and called it a day.


Here we are at the party.  Happy Birthday, Goldie.  Goldie is on the left, and my Mom is on the right.


On the bridal shower cake I used an interesting Round Pearl/Bubble Mold to make the ribbon-like cluster of pearls.  It worked pretty well, but the mold needed to be dusted with cornstarch, and the fondant needed to be mixed with a little Tylose Powder to keep the fondant ribbon from stretching out of shape as I gently squeezed it from the mold .  On the Amazon reviews for the mold someone suggested that freezing the mold/fondant  helped the fondant release, but I didn't find that it helped.  In the end all that was needed for a quick release was the Tylose stiffened fondant, a little cornstarch, and a few minutes of drying time.


In the end I was happy with the results of the mold.  Using the mold was so much easier than placing the individual pearls, and from a distance you can't even tell that the pearls aren't real.  On the bridal shower cake, the pattern of rosettes was a little different from the other two.  Instead of a tight, overlapping pattern, the bride-to-be wanted a more random placement of the rosette with the space between the rosettes filled with small star flowers.


In hindsight I should have positioned the second tier's pearl ribbon a little higher because the rosette's are hiding the lower portion of the ribbon.   I also wasn't too happy with the color of the rosettes.  The color was supposed to be "blush" but it came out a little too pink.   Oh well, live and learn...

Here is the finished cake at the party.


So this ends my Trifecta of Rosette Cakes.   Happy Decorating, everyone...


Carol


Supply List: 

Mona Lisa White Fondant
Circle Cookie Cutters
Turntable extender
Wilton Cake Marker
Wilton's big 1M tip
Bentnose micro pliers
Alligator Impression Mat (used on the fondant covering the cake drums)
14" Cake Drum
Plaque Cookie Cutter
Funky Upper Case Letter Cutters
Fat Boba Straws
Round Pearl/Bubble Mold
Wilton Gum-Tex Tylose Powder

Sunday, March 18, 2018

Little Tug Boat Cake that Sank

This was a tough and frustrating cake to make, and I'm not sure where I went wrong.  When I asked the recipient how he liked the cake the most he could muster was a lukewarm - It tasted good.


Maybe it was the tires on the side of the boat that turned him off?  (They do look more like Life Savers than tires.)  Or maybe it was because I called it a Tug Boat when it was actually a Offshore Transport Boat?  I thought it came out okay, but the birthday boy definitely wasn't impressed.  Oh well, at least he liked the taste.

The cake started with a Styrofoam base covered in red Fondarific fondant.  In the background you can kinda see a photo of what the cake was modeled from.


Next I cut the boat shape from a half-sheet of my white chocolate almond cake.


I filled, stacked, and crumb coated the cake and then covered the side in black Fondarific fondant.  I typically use Mona Lisa fondant to cover my cakes, but I had this pre-colored black fondant on hand so I decided to use it instead.


The decking on the boat cake came next.  I colored some Mona Lisa fondant using Wilton Buttercup Yellow food color gel and then marbled it with some Wilton Brown.


I rolled the fondant out thin, and press a "wood" impression mat into the surface of the fondant.  Narrow 1/2" strips were cut out and then placed on the top of the crumb coated cake.


I added some white stripes on the side, and white accents on the top of the decking.


Next came the crew house on top.


And the railings made from dry spaghetti covered in fondant.


View from the top...


And a view of the other side.  On the back is a plaque that reads "El Capitan".


So where did I go wrong?  My crew house came out a little lumpy, and the tires look like Life Savers more than tires, but was that enough to sink this ship?  Constructive criticism please.  I have a fire engine cake coming up in a few weeks, and I hope that one comes together better than this one.


 Happy Decorating,

Carol


<< Disclosure: We are a participant in the Amazon Services LLC Associates Program, an affiliate advertising program designed to provide a means for us to ear fees by linking to Amazon.com and affiliated sites.>>


Supply List: 

Mona Lisa White Fondant
Fondarific Red Fondant
Fondarific Black Fondant
Wilton Buttercup Yellow gel food color
Wood Impression Mat
Wilton Ribbon Cutter Set


Sunday, February 11, 2018

Simple Stripe and Polka Dot Cake

This week's cake was for my nephew and his bride-to-be's engagement party.  I modeled it on a  Black, White & Crimson beauty I found on The Cake Parlour's website, but sadly my cake didn't look as striking as theirs.  I guess my teal, white, and peach colors weren't as bold and eye-catching as the black and white combo.  Oh well, such is life.


For the stripes I simply used silk ribbon which I backed with pieces of Glad's Press & Seal wrap.  I didn't want the ribbon touching the fondant, because I was afraid the dye from the ribbon would bleed onto the cake.   Using the silk ribbon is SO MUCH EASIER than fondant ribbons that pull out of shape when you try to place them. 

The positioning of the fondant dots was the hardest part of this cake.   To get the placement of each dot exactly right I tried making a templet on the computer, but it was a time consuming PITA that didn't work.  In the end I just kind-of eye-balled it.  I cut out a square of paper matching the height of the tier (minus the height of the ribbon) and put a hole in the center.  Then I just hovered the paper over the cake and placed the polka dots at the four corners.  I pricked a pin-hole in the fondant at the center of the paper square, and when I removed the paper I just placed the center dot.  When I got the the back of the cake the placement of the dots wasn't "exactly" correct, but it was close enough that no one noticed.


So I think this is the last engagement cake for a while (thank goodness).  I much prefer doing birthday cakes - so much less stressful.


Happy Decorating,

Carol


<< Disclosure: We are a participant in the Amazon Services LLC Associates Program, an affiliate advertising program designed to provide a means for us to ear fees by linking to Amazon.com and affiliated sites.>>


Supply List: 

Mona Lisa White Fondant
Fat Boba Straws
Wilton 14" Cake Drum
Alligator Impression Mat
Glad Press & Seal Wrap


Sunday, February 4, 2018

Grumpy Yoda Minion Cake

My nephew, Jason, is a big Star Wars fan, so for his birthday he wanted a Yoda cake.  He didn't specify what "kind" of Yoda, so I made him a Yoda Minion!  Who doesn't love those Minions???  Well, apparently 36 year old men don't really care about Minions!!


There were a lot of pieces parts to this cake, but nothing too involved.  Including the baking of the cakes, it took about 12 hours of work.  That may sound like a lot, but for me 12 hours is quick!

I made the goggle, light saber, and ears first because they needed extra time to dry.  For the goggle I mixed a little Gum-Tex in some gray fondant, and then used circle cutters to make the shape.  I cut the outside and then used a slightly smaller circle to cut out the inside.  Kind of like a very narrow donut.  I used a stitching tool to put some markings on the outer edge; keeping the inner circle cutter in place so the soft fondant would hold is shape.


Next I added some fondant balls to the top of the goggle and pressed them down with the end of a tool.  As a final step I added some little rectangular pieces to the sides, and put some score lines on them.  I kept the inner cookie cutter in place while the goggle dried.


For the light saber I cut out some small gray fondant circles and put them on a long bamboo skewer. For the bottom "gear" looking piece I cut out a larger circle, and then used the edge of a smaller circle to cut out the arcs.


For the "light" part of the light saber I wanted to use rock candy, but I couldn't find any so I just glued coarse sanding sugar to the bamboo.  I coated the stick with glue and then just sprinkled the sugar on top of it.  The glue is not exactly edible, but, hey, neither is the skewer.


I don't show it here, but after the fondant of the goggle and light saber dried, I sprayed the gray portion with some Silver Luster Mist.  This made them nice and metallic looking.

To make Yoda's ears I started with a fat teardrop piece of fondant, and used a tool to hollow out the inside and form the cupped sections of the ears.


While the fondant was still soft I inserted two skewers in each ear.


The minion character I modeled this cake on was tall and thin so I used 6 inch cakes, and to get the height I wanted I used three 2-layer cakes.  There is a board under each of the three cakes, and for support I used plastic Boba straws.  The straws are so much easier to cut and they are just as strong as the wooden dowels.   I put eight straws in the bottom tier, and four in the middle.

And I didn't worry about smoothing the sides of the cake because Yoda is very wrinkly.  I covered the top tier with fondant, and trimmed the fondant at the location of the first cake board.  This line would later be covered with the band of the goggle.


To cover the center tier I rolled out a rectangular 4" x 19" piece of fondant and wrapped it around the center of the cake.  (Math Note:  To get the circumference of the cake multiple the diameter of the cake by Pi (~3.14) So 6" x 3.14 = 18.85".  My middle school math teacher would be proud of me.)

Next step was to use my trusty circle cutter and mark where the goggle would go.  Then I cut a strip of black fondant and placed it on the seam between the top and middle tier.  You can't see it in the picture, but I scored the black strip with my stitching tool just to give it a textured look.  The brown "shirt" went on next.  I had some Choco-Pan chocolate fondant hanging around so I just used that.


My trusty circle cutter was used to form the grumpy mouth.


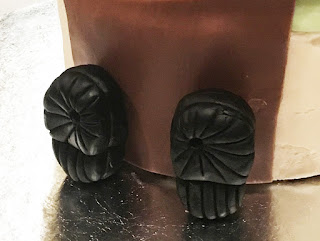
Next the shoes...  Just blobs of black fondant with marks on the bottom to look like soles.


The tan/yellow robe came next.  I cut rectangular pieces of yellow fondant and draped them to look like folds in fabric.  Side note: On the top of Yoda's head I scored some lines to represent his wrinkles.  You can't see it here, but I also stuck two long skewers through the entire height of the cake and into the cake drum below.  Can't have too much internal support.


After the robe was in place, I added a strip of black to represent the belt.


I added some do-dads to the front of Yoda's shirt.


Next I put on the sleeves and then rolled some green fondant around skewers and pushed them into the sleeves.  Don't they look like little Yoda arms?


Next came the eye.  Time for the circle cutters again.  I layered the pieces of the eye together and then used the cookie cutter to make sure it was the exact fit for the inside of the goggle.  Then I put the eye inside of the goggle and stuck them both onto the cake using a little vodka.  The goggle was still a little soft, so it stuck to the cake like glue.


The gloved hands went on next.  One to holds the birthday candle...


... and one holds the light saber. Before I attached the second hand, I pushed the bamboo skewer of the light saber into the cardboard cake drum to hold it in place.  Once the light saber was secure, I then wrapped the gloved hand around the shaft of the light saber.  I added some Minion hair on the top of Yoda's head too.  In fact two strands of hair are hiding where the bamboo skewers stick out from the cake.


The most nerve-racking step was pushing the ears into the cake.  For added holding power I dabbed a little bit of melted white chocolate where the ear came in contact with the head.  I was so afraid they would fall off, but thankfully they didn't move one bit.


Almost finished....


Some final touches of edible brown luster dust to give the robe, head, mouth, ears, and eyes some dimension...


And that is it.  Grumpy Yoda Minion is complete.   Happy Birthday, Jason.


Happy Decorating,

Carol


<< Disclosure: We are a participant in the Amazon Services LLC Associates Program, an affiliate advertising program designed to provide a means for us to ear fees by linking to Amazon.com and affiliated sites.>>


Supply List: 

Mona Lisa White Fondant
Fondarific Black Fondant
Choco-Pan Brown Fondant
Fat Boba Straws
Wilton Strip Cutter
Wilton 12" Cake Drum
Wilton White Candy Melts
Circle Cookie Cutters
Wilton Gum-Tex Tylose Powder
Wilton Silver Color Mist
Edible Brown Powder Food Color
Wilton Sparkling Blue Sugar