
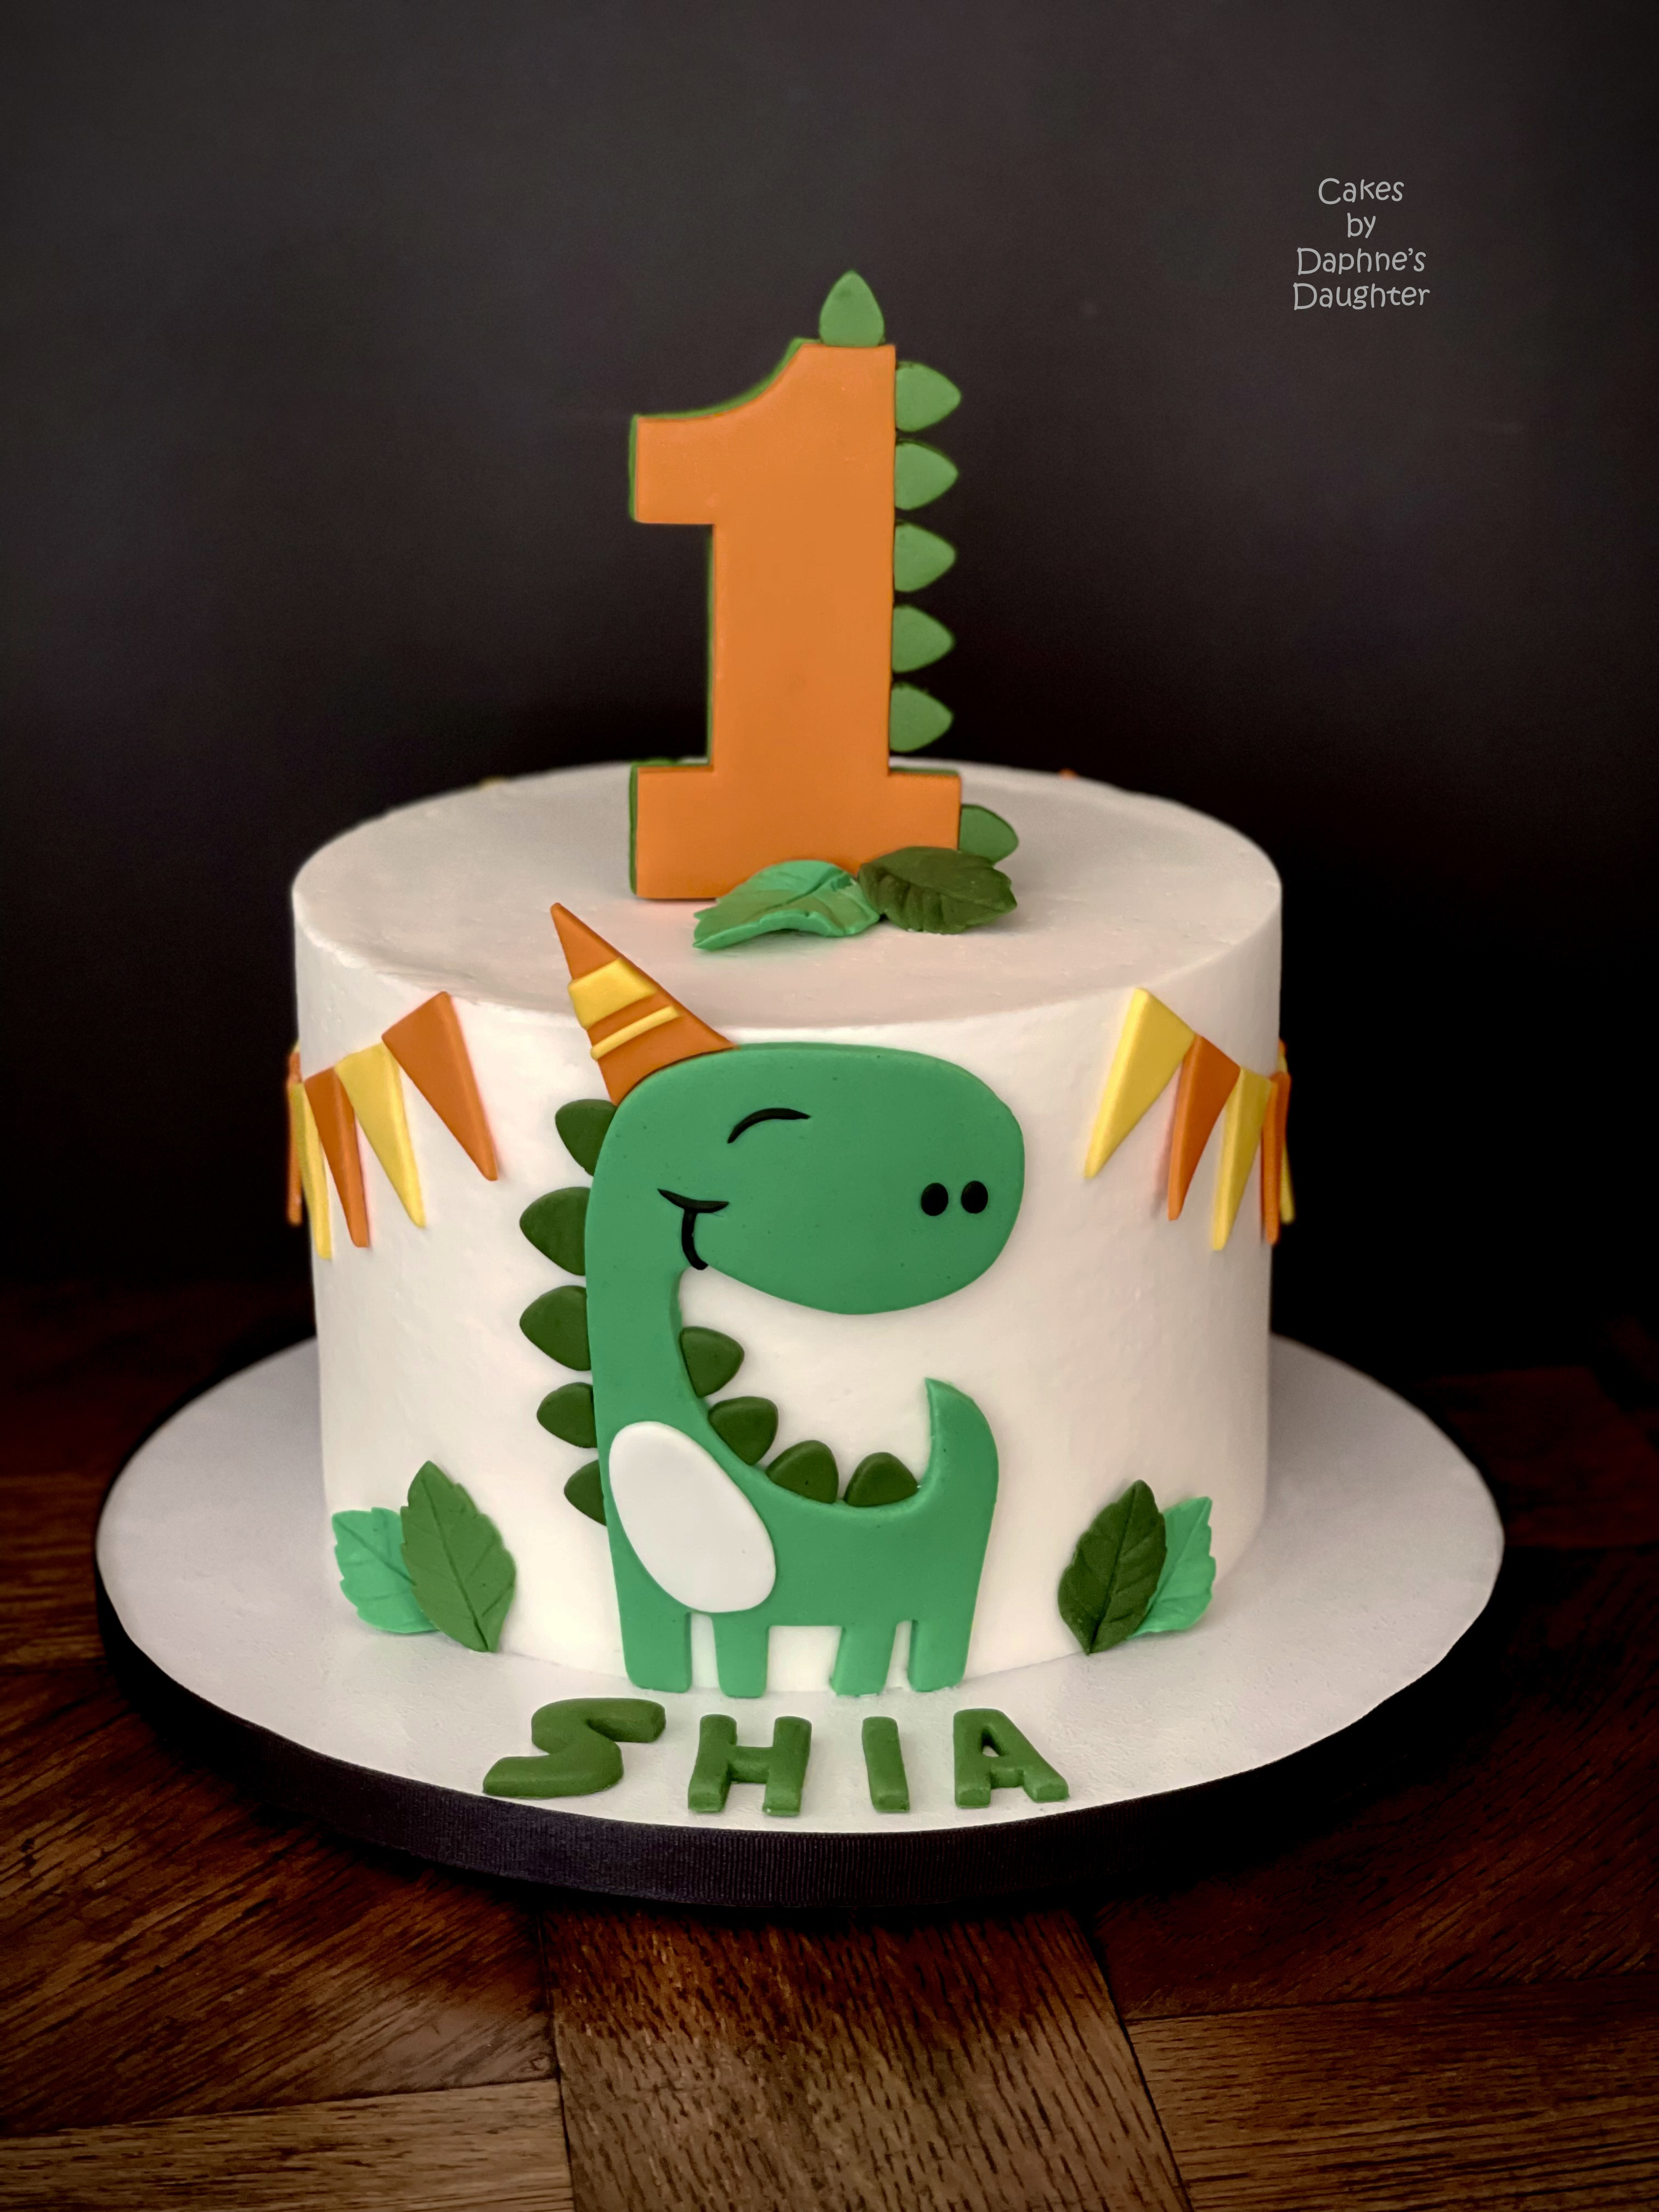
Some cakes are easy to make, yet the finished product still looks impressive. Take this cute little Party Dino cake for example.

As with all my cakes, I made some fondant cutters to help make the decorations. I used my 3D printer to make the cutters, but you could just use paper templates and cut them out by hand. I wasn't sure what size hat/banner I was going to use, so I made several sizes. I also made several sizes for the plates that line the back and neck of the dinosaur. (For more into on using a 3D printer to make cookie and fondant cutters, click HERE.)

<< Disclosure: We are a participant in the Amazon Services LLC Associates Program, an affiliate advertising program designed to provide a means for us to earn fees by linking to Amazon.com and affiliated sites.>>
For the dinosaur I used Wilton green fondant mixed with some Juniper Green food gel. I thought the packaged Wilton green fondant was a little too bright, so I toned it down with the Juniper Green. Then to a small blob of green fondant I mixed a lot of the Juniper Green to make a really dark shade for the back plates, the lettering, and the leaves. Once all the back plates were cut, I stuck them to the body of the dinosaur with a touch of water. For the mouth, eye, and nose I used black fondant.

For the dinosaur's party hat, I mixed Wilton Orange food gel to white fondant, but I thought the color was too orangey so I added a touch of red. The yellow is just a mixture of Wilton Yellow fondant and white fondant. While the fondant of the dinosaur and the party hat were still soft, I stuck the two together with a touch of water. Once the dinosaur was assembled, I put it to the side and allowed it to dry.
For the #1 topper I took my orange fondant and added some Gum-Tex/Tylos/CMC powder to it. The Gum-Tex will make the fondant dry rock hard, and allow it to stand upright on its own. I added the Gum-Tex to the green fondant I used for the dinosaur plates, and made some additional plates to go on the #1. While the number and plates were still soft, I stuck them together with a touch of water, and then allowed them to dry flat. Once the #1 was dry, I used some melted orange candy melts to glued a bamboo skewer to the back of the #1.

On decorating day all the decorations were premade, so I just needed to arrange everything onto the cake. The cake is 8" and I have it sitting on a white 12" cake drum. The final touch was to add a black ribbon to the edge of the drum.

No comments:
Post a Comment