Wednesday, November 17, 2021

Paris Inspired Cake

Here is a Paris inspired cake I made recently.  It is supposed to represent the shops and sights of Paris.  There is a dress shop, a shoe store, and a bakery.  There is a wedding shop, and outdoor cafĂ©, a fancy house with potted plants and a snooty poodle.  There are picture frames to represent the museums, a scooter, and plants and greenery for the parks.   There are macarons, and roses, and lots and lots of lamp posts.  


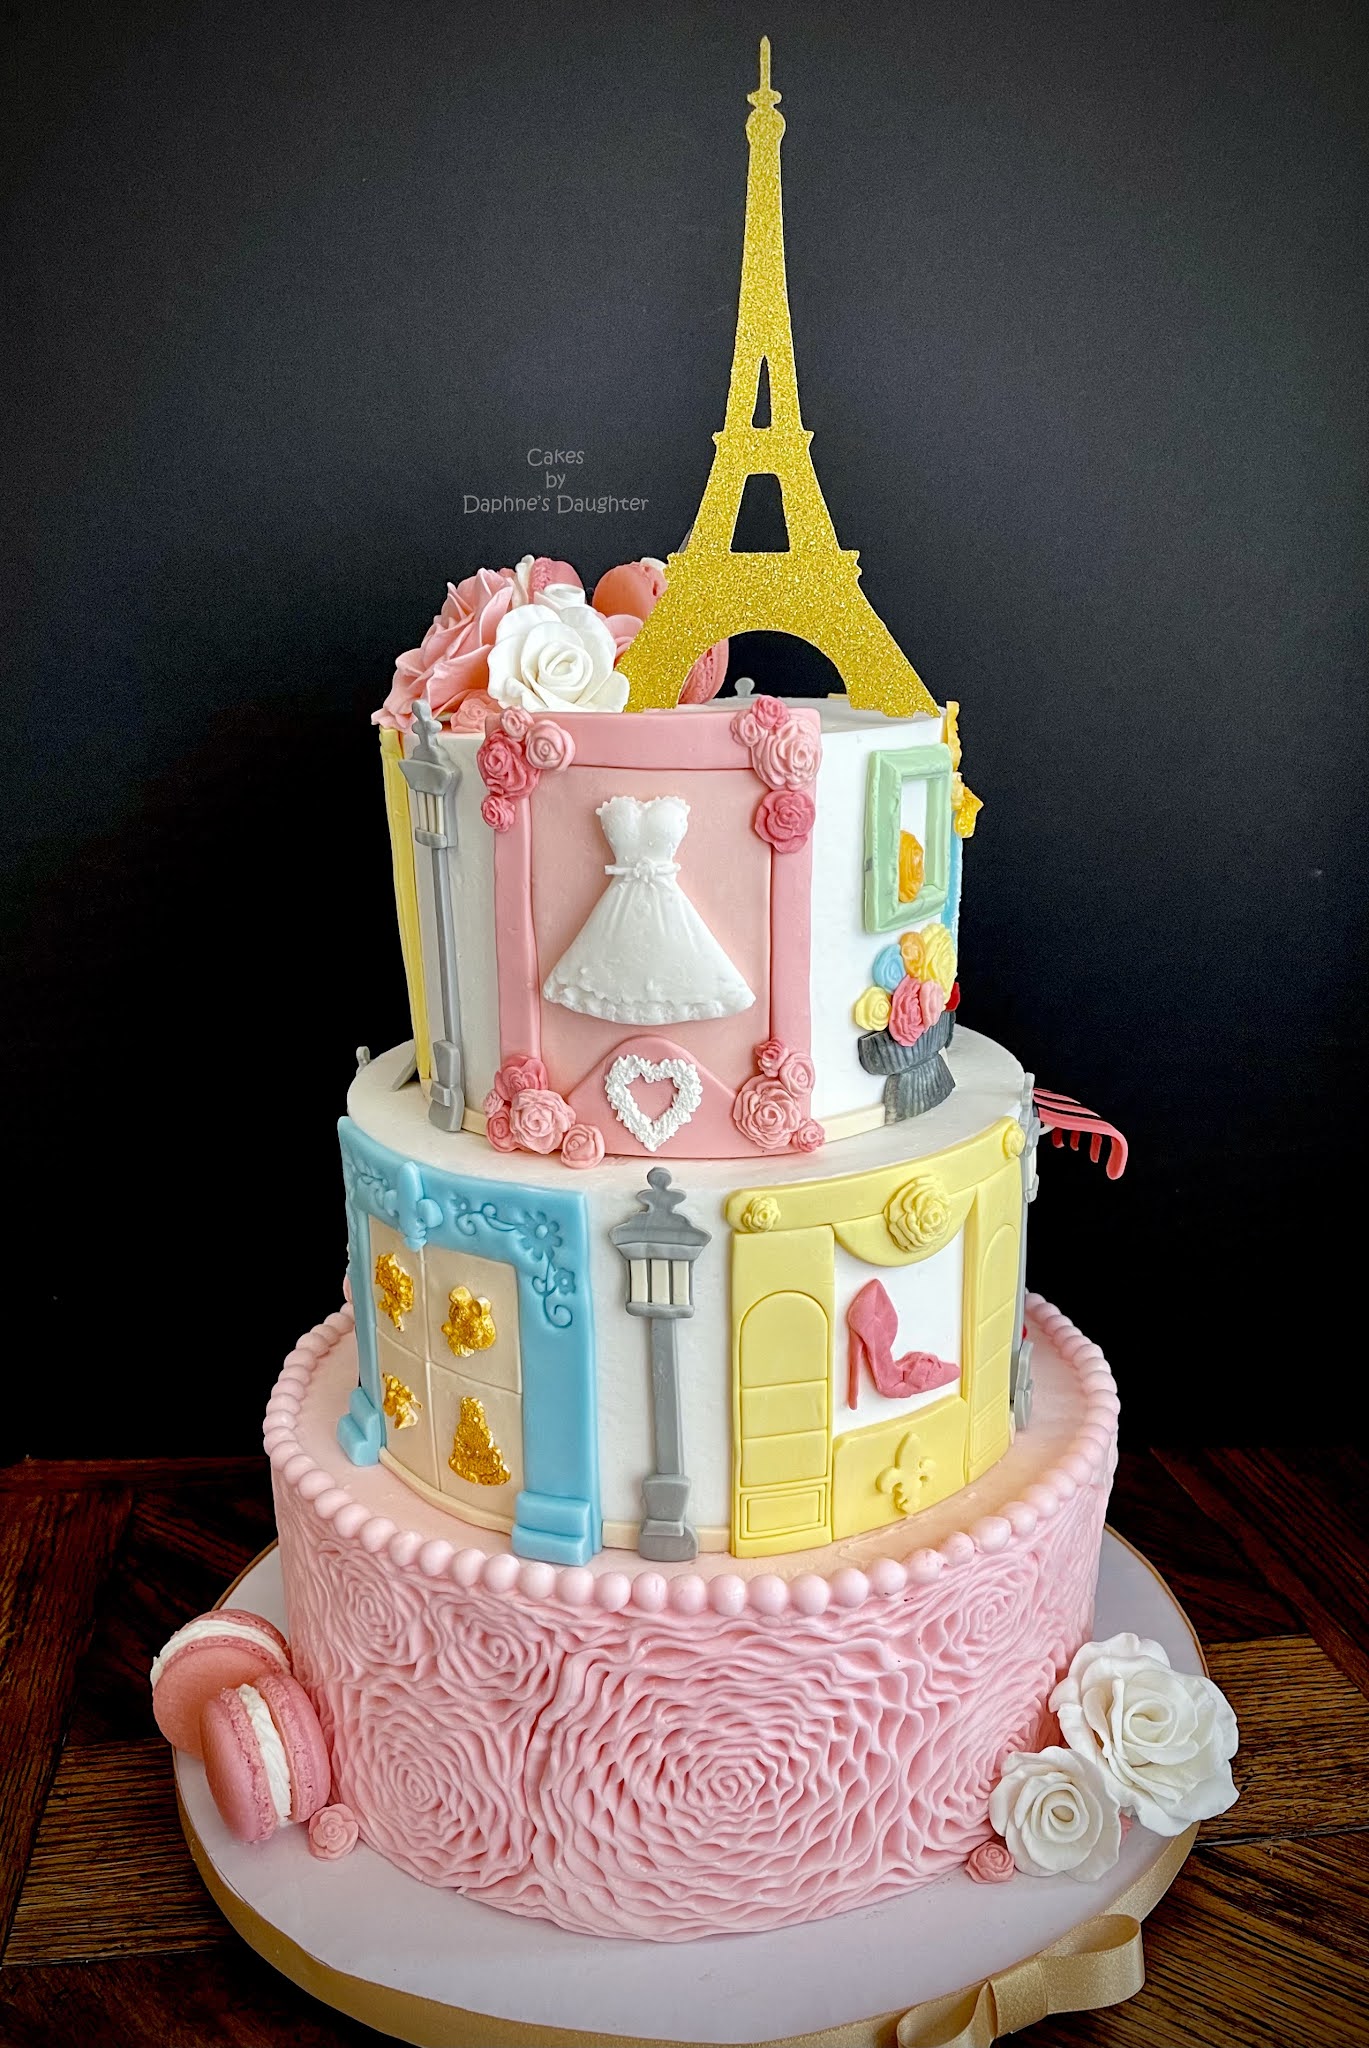
And that wimpy paper Eiffel Tower??  That was replaced by a nice metal 3D version once the cake arrived at the venue.   But sadly my picture didn't come out very good - too much light in the room.


<< Disclosure: We are a participant in the Amazon Services LLC Associates Program, an affiliate advertising program designed to provide a means for us to earn fees by linking to Amazon.com and affiliated sites.>>

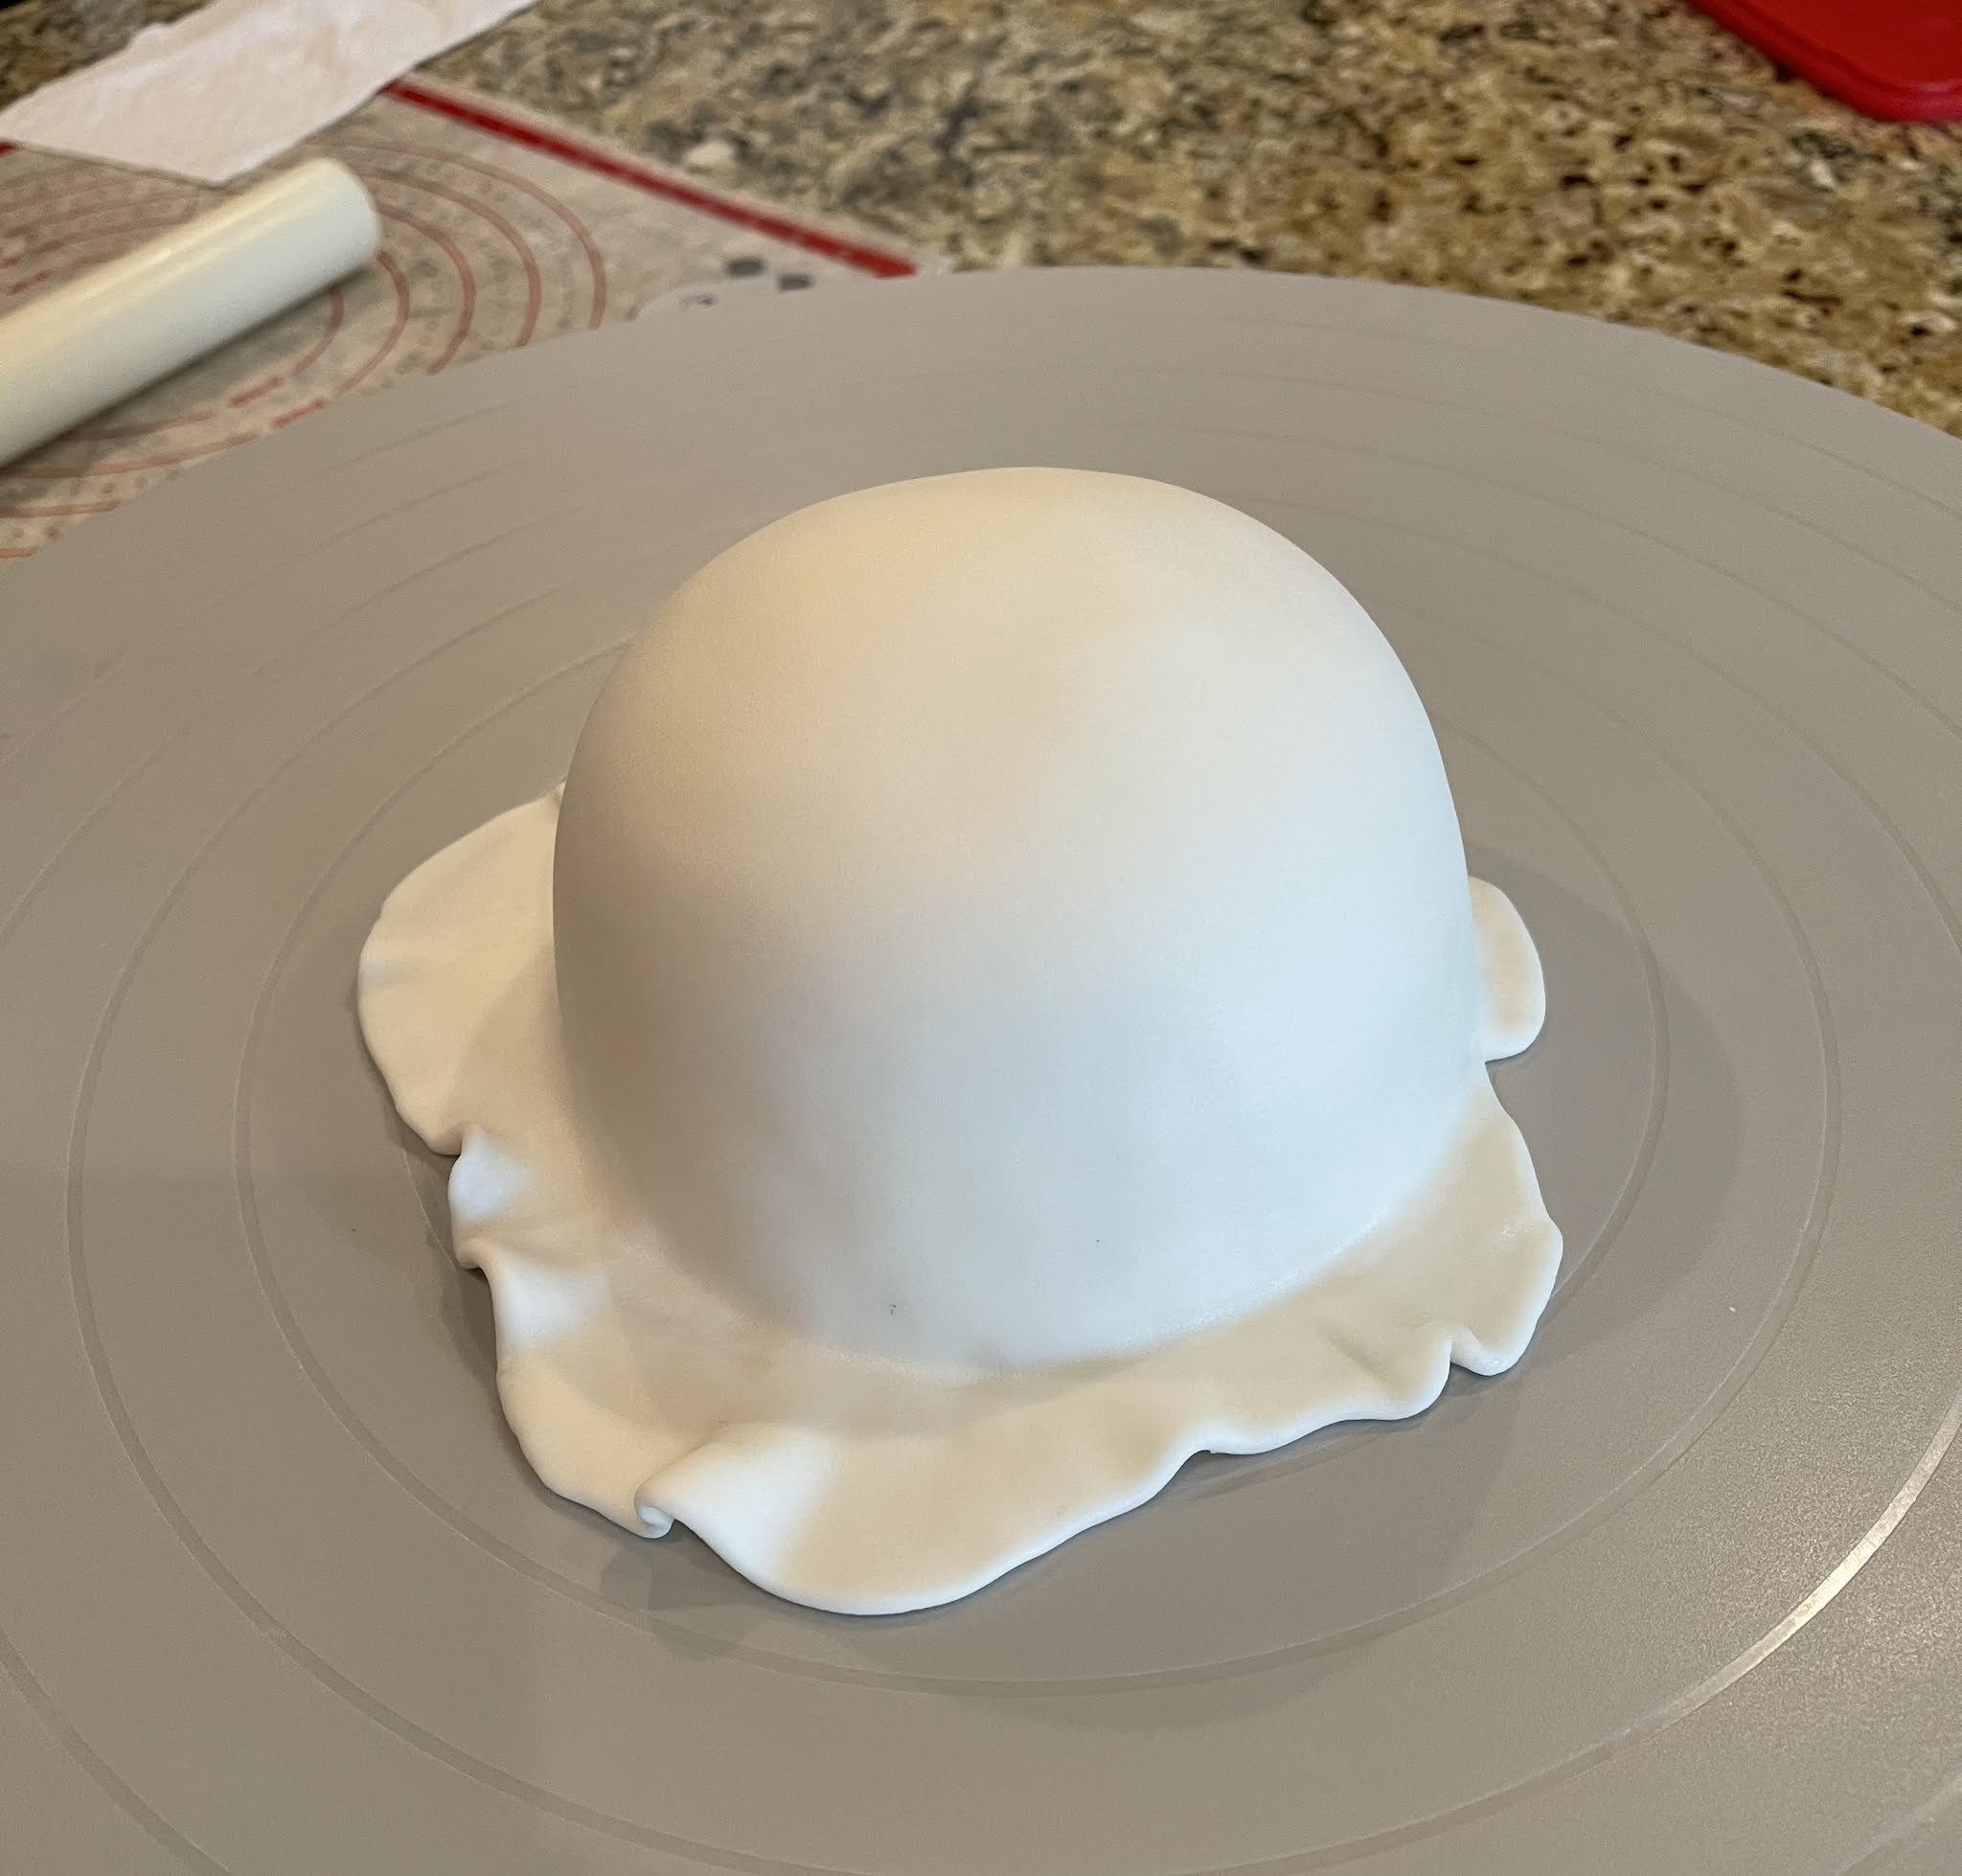
Construction of the cake started with the bottom tier.  I used a mold to make the rosette ruffle.  It was easy but a little time consuming.  It took me about and hour and a half to cover the 10" cake base.  First I had to tint the fondant a soft pink color.  Then, per the instructions on the mold, I mixed the fondant with a little Tylose powder  (aka Gum-Tex and CMC).  I dusted the mold with LOTS of corn starch, and then I just pressed the fondant into the mold to form the rose rosettes.


Then it was just a matter of placing the rosette panels on the cake and joining the panels together.  If you look close you can see where the panels where joined, and at the back of the cake (although there really isn't a back to the cake), I had to cut one of the panels to make it fit.   I also made sure my base tier was 4" tall so it would match the height of the mold.  
 

With the base finished, I added the second tier and started to place my "shops".   I pretty much just cut random squares, rectangles, and arches to make the shops.  I used Choco Pan Modeling Chocolate instead of fondant to make the cutouts.  The modeling chocolate is stiff and holds its shape when you pick it up and transfer it to the side of the cake.  The modeling chocolate doesn't need the yucky Tylose to stiffen it up, and it tastes good too (unlike most fondant).  


And I did make a few custom fondant cutters and embossers using my Creality Ender 3D Printer: the lamp post, the little fleur-de-lis, the poodle, and the scooter.  I also didn't care for the way the top of the rosette panels looked, so I used a Wilton pie edge mold to cover the top with a beaded edge of fondant.


Sorry, I forgot to take pictures as I was working on the top tier.  I've been doing that a lot.  I just get into the groove and forget to take step-by-step photos.  Once I got all the "shops" in place I added the final touches.  I used a mold for the dress, purse, and shoes.  Another mold for the picture frames.  For the items in the bridal shop window.  For the roses and butterflies


Happy Decorating,

Carol


Sunday, November 14, 2021

Tinkerbell Inspired Cake

This is a simple little Tinkerbell inspired cake.  It has lots of flowers in pink, blue, and purple; it has butterflies, poke-a-dot mushrooms, and a plaque with the birthday girl's name.  Happy 2nd Birthday, Sophia.


<< Disclosure: We are a participant in the Amazon Services LLC Associates Program, an affiliate advertising program designed to provide a means for us to ear fees by linking to Amazon.com and affiliated sites.>>

Most of the pieces I made before hand so it was a snap to put together on assembly day.  I started with the name plaque and number 2 topper.  I made all the cutters and the diamond embosser using my  Creality Ender 3 v2 3D printer.  If you want to read an intro into 3D printers for cookie cutters you can read my post HERE.


Then I made all the flowers.  I used Wilton fondant mixed with a little Tylose power (also called Gum-Tex and CMC).  The Tylose makes the fondant harden.  The more Tylose you add to the fondant the harder the fondant will become.  To put the texture on the petals of the flowers I used this nifty little JEM veining stick/wand/tool.  The veiner is a quick way to give the flower petals some life.   Here is some of the stuff waiting to go on the cake.  I also made the blades of grass ahead of time to give the little curls time to dry in that shape.  


Assembly day!!  The name plaque and the flower on top where the first things to go on.  I wanted those on first so I could position the blades of grass around it.  At first I was going to put the number "2" on the cake drum, but I didn't like how it looked there, so instead I placed it on top of the cake.


For the colors I used Wilton Sky Blue for the fondant covering the drum, Americolor Mint Green for the grass, and the Hobby Lobby brand Soft Pink for the bow, roses, and tops of the mushrooms.  For the lettering I used Fmm Tappit cutters, the 2 cm Art Deco font set, and the Block font set in upper and lower case.  For the Tinkerbell-ish glitter topper, I used my Cricut Air Explorer.


So another cake out the door.   I hope Sophia's mom likes it.


Happy Decorating,

Carol

Sunday, October 31, 2021

Bloody, Oozing Zombie Head Cake - So Gross

How gross is this!!!  It is a Zombie Head Cake with bloody, oozing brains, a dangling eyeball, chomping teeth, and a swollen protruding tongue.  I think this is the most hideous cake I have every made.  And 5 year old Jaxx LOVED IT.  Happy Birthday, Jaxx!

Here is a view of the brains...

Yuck!!  The main focus of this cake was the zombie head, and because I'm not a very good sculptor, I made the head using a mold. 

<< Disclosure: We are a participant in the Amazon Services LLC Associates Program, an affiliate advertising program designed to provide a means for us to ear fees by linking to Amazon.com and affiliated sites.>>

The Walking Dead Zombie mold  is described as a gelatin mold, but it worked fine with fondant.  I tinted some Wilton white fondant with some Juniper Green food gel.   I mixed the fondant with LOTS of Tylose Powder/Gum-Tex Powder so the fondant would harden into a rock hard mask.  I also dusted the mold with corn starch to make sure the fondant wouldn't stick to the plastic. 

Once everything was dusted in corn starch, I firmly pressed the wad of fondant into the mold.  I used my thumb and fingers to make sure the fondant was pressed deeply into all the indentation.  Then after two days of drying time, I popped the fondant mask out of the mold.  This is what I got - Yikes!


I didn't think the eyes of the mask were big and icky enough, so I added white, blue and black fondant to make a huge eyes. The second eye was going to be dangling from the face so I didn't add an eye there.  I also added bigger white teeth on top of the teeth of the mold.  I wanted those pearly-whites BIG.


For the cake itself, I frosted it in a brownish American Buttercream, and then for the lumpy texture I dabbed on super soft frosting with a wadded up piece of plastic wrap.  On top of the cake you can see an acrylic disk covered in Glad Press N' Seal.  I use these Cake Safe disks to get the sides of my cake super straight and the top flat.  You can read more about it HERE.


To help support the open cavity of the zombie's brain (and to help secure the head to the cake) I used a 5" half sphere cake under the head. 


Here is the zombie head attached to the cake.  I added some more green fondant to the lower portion of the skull.  The open portion will be covered with the brains.  You can also see that I attached the second eye.  I made the eyeball out of gum paste and attached it to a wire.  Once the eyeball was dry, I secured the wire to the inside of the skull and covered the wire with lumps of white, black, and red fondant.  I also dusted the green fondant of the face with brown, black, yellow, and green petal dust.  The colored dust just gives the flesh a more realistic look. (If you consider zombies real.)


After this I just added the pink fondant for the brains.  I also mixed a little red petal dust with some piping gel and applied it to the brain.  The tinted piping gel gave the brains a slimy look.  I also added some black, stringy fondant hair and some red candy melt blood to finish off the look.  I went a little overboard with the blood, and I had to chip some of the candy blood off of the cake once it hardened.


So what do you think?  Is it totally gross?  


And so the party wasn't a total gross-fest, I made some cute-ish brainy skull cookies to go with the cake.  See, exposed zombie brains can be cute.


Happy Decorating,

Carol


Sunday, October 10, 2021

Easy Baby Bottom Cake - Feet made with cookie cutters

This baby bottom cake came together easier than I thought it would.  A baby bottom, two chubby feet, and a baby blue blanket.  This cake was a piece of cake to make.  LOL  


<< Disclosure: We are a participant in the Amazon Services LLC Associates Program, an affiliate advertising program designed to provide a means for us to ear fees by linking to Amazon.com and affiliated sites.>>

I started with a half sphere cake and a three layer 9" cake.   For the half sphere I used the Wilton 3D 6" Sports Ball Pan.  I only used one of the two pans.  After the cake was baked and cooled, I cut the cake in half horizontally, added some filling between the two layers, crumb coated the outside of the sphere, and covered it with white fondant.  I used Renshaw fondant for this because it taste so much better than Wilton, and I figured people might actually eat the fondant.  The Renshaw also doesn't get cracked and wrinkly like Wilton or Satin Ice.  Below you can see that my finished baby bottom isn't very smooth, but I didn't worry about its appearance because the blanket and feet would cover most of it. 

Once covered, I placed the half sphere on the buttercream covered 9" round cake.

Next I made the baby's feet using a cookie cutter.  I suck at sculpting, so using a cutter is the path I usually take.  Below is the sketch I used to make the cookie cutter.     


I uploaded the sketch to CookieCad.com, downloaded a STL file and used my
 Creality Ender 3 v2 3D printer to actually print the cutter.  If you want to read an intro into 3D printers for cookie cutters you can read my post HERE.  So with the cutter ready I started on the feet.  In the upper left of the photo below you can see a foot that is finished.  In the lower right I am making the other foot.  Rather then pushing the cutter into the fondant (which gives a sharp edge and ragged sides to the cut fondant), I placed a piece of plastic wrap into the cutter and then push the fondant into the cutter.  This gives the outer edges of the foot and toes a soft, rounded look.


 Here I turned over the cutter to make sure I pushed the fondant into all the toes.

Next I just use the plastic wrap to pull the foot out of the cutter.  The foot on the left is just out of the cutter you can see it needs to be cleaned up a little.  I just pushed the extra bits of fondant where they belong.

And then I add creases into the foot to make it more realistic.  Aren't they too cute??


The little stubby legs came next.  I tapered the ends where they would go under the feet and against the body.  Don't worry about their shape too much.  Most of the legs will be hidden by the big feet and the blanket.


The legs and feet go onto the cake and snuggle up against the baby bottom.  The feet looked really wrinkly once I put them on the cake.  I hate how quickly Wilton fondant dries out!  But at least in this case the wrinkles and creases actually make it foot more life-like.


Next I put a fondant bow around the base of the cake.  It looks a little messy, but hey, the cake is just for family.  LOL.


Add some circles of fondant in 3 shades of blue, and add the lettering for "It's a boy" using FMM Tappit cutters.


And for the final touch the blanket covering the baby's bottom.  I used an impression mat to put a pattern on the fondant, cut it into a rough circle, and crimped the edge to give it a more finished look.


Then I just draped the blanket on the baby's bottom, and called it DONE!  


See how easy that was!


Happy Decorating,

Carol


Monday, October 4, 2021

Bridal Shower Naked Cake with Drip and Roses

I'm going to say it again, "I hate naked cakes."  In theory they should be easy, but they are so much harder to frost then regular cakes.  The sides of the cake need a to have a nice carnalized skin on the outside, and the side need to bake straight and even with no shrinkage away from the pan.  My cakes just don't do that!!  So here is my latest attempt at a naked cake.  The only thing I can say is that it is better than the last one.

But I did like the gum paste roses, they came out nice.  Colors are wine, pink, and white.


Happy Decorating,

Carol

Wednesday, September 29, 2021

Welcome Autumn Rosette Cake

 Simple rosette cake to welcome the first day of autumn.  


With cookies too.


The hardest part of this cake was mixing the colors.  I mixed the colors based on a Pretty Autumn Color Palette blog post by Sweet SugarBelle.  The darker colors in the piping bag (the orange and brown) look like they are separating a bit, but the icing on the cake looked okay.  I'm not sure why some of the colors separate like this.  I have read that it happens when you put too much gel color in the buttercream, but I'm not positive.  Maybe it was the heat, maybe it was the humidity.  The first day of fall calendar-wise does not mean the temperature won't reach 90 degrees F.


So any buttercream experts have any tips to keep this from happening???  


Happy Decorating,

Carol

Sunday, September 26, 2021

Multicolored Highland Cow Cake

Highland Cow Cakes are the thing right now.  I'm seeing them everywhere.  Here is one I made for my sister-in-law's niece.

It started as a 9"x13" red velvet cake sheet cake.  I cut the sheet cake in half making two 9"x6.5" cakes that I stacked (with filling between the two layers) to give me a cake about  3-1/2" tall.  I then carved the cake into a rough head shape, cutting shallow depressions for the eyes and building the forehead and nose bridge a little higher.  The carving process didn't leave me with many cake scraps, so I had to make the ears by piecing smaller scraps together.   I didn't worry too much about the carving right because everything was going to be covered in fondant strings/ropes.  I just wanted the general shape.


Here is the pattern I used for the cake.

Once the cake was carved crumb coat and chilled, I then covered the cake in a thin layer of white chocolate ganache which gives a firmer base for the fondant.


<< Disclosure: We are a participant in the Amazon Services LLC Associates Program, an affiliate advertising program designed to provide a means for us to ear fees by linking to Amazon.com and affiliated sites.>>

I made the horns from white fondant mixed with Tylose Powder.  The Tylose power (also called Gum-Tex and CMC) causes the fondant to harden and allows it to keep its shape without flopping over.  The more Tylose you add to the fondant the harder the fondant will become.  This is a cheaper alternative to using gum paste.  

For the cow's nose I used Wilton Chocolate fondant.   I cut the nostrils out of the chocolate brown fondant and backed the area with some black fondant.  For the lower jaw, I used the same brown fondant mixed with Tylose so it would hold its shape.

For the eye, I started with a brown oval shape then added a white circle of fondant and then a black circle of fondant.  I added some white fondant highlights to the black part of the eye, and added some thin strips of brown fondant for the eyelids.

I attached the nose and lower jaw to the cake.  I also added a thin piece of black between the nose and lower jaw to cover the white area.

The eye went on and then the pink tongue.  

Then came the time consuming part: putting on all the stands of hair.  I tinted a bunch of fondant in shades of orange, yellow, red, pink, purple, blue and green.  Then used my Ace food safe extruder to make long strands of fondant.  I covered all the strands with plastic wrap to keep the fondant from drying and getting cracked.  FYI: you could also just roll the stands of hair by hand.  I started doing this in the end because it was so time consuming to use the extruder.

I cut pieces from the long strands to match the size of the area where the hair was being placed and started positioning the hair.


When I reached the top of the head I added the horns and added more hair around them.

As a final touch I added some brown eyelashes to the eye, and a flower in the cow's mouth.  In hindsight I should have added the second eye peaking through the strands of hair.  I think that would have looked better.  Oh well....

But regardless, Hanna loved it.  Happy Birthday, Hanna!


Happy Decorating,

Carol