Sunday, August 27, 2017

Gunging 2 - Sugar Spackle For Your Less Than Perfect Fondant Cakes

For her 17th birthday my niece requested a 2 tier cake with turquoise and white roses.  Sadly her cake just wasn't meant to be.  I didn't finish the gumpaste roses, one of the cakes collapsed in the oven, and the new fondant I was trying out had some serious issues.  Everything went wrong with this cake, so my frustration level was off the chart.  In the last 30 minutes I threw this together.  Nothing Pin-worthy, but good enough for family.


Beyond the collapsing cake, the biggest issue with this week's attempt was the fondant.  It was just released in the USA, and I had serious problems with it right from the start.  I finally contacted the company, and they agreed that there was a problem and offered to send me a new bucket.

But silly me I went ahead and used the "messed up" fondant.  Big mistake, cause this is what I got!!  


But actually I didn't worry too much about the TEN gaping holes in the fondant, because I had a secret weapon.  A secret weapon called Gunge.  Gunge is essentially sugar spackle for your cake.  With it you can cover up any imperfection with a quick dab of your finger and a swipe of your wrist.

The first step in this magical fondant cure is mixing up a batch of gunge ...
(Note: recipe is at the bottom of the post.)


Fill the holes in your fondant with a big dollop of the sticky paste...


And then scrape it off...


Easy Peasy.  You may have to do this a few times, but when you are finished, the hole is completely gone.   Can you even see where the original crater was??


What a difference a little gunge makes...


Disclosure:We are a participant in the Amazon Services LLC Associates Program, an affiliate advertising program designed to provide a means for us to earn fees by linking to Amazon.com and affiliated sites.


Gunge (recipe from  Kaysie Lackey at Innovative Sugar Works)

Ingredients:
 
200 grams  Fondant
15 grams  Whole Milk  (Soy Milk works too)
15 grams  Vodka

Directions:
  • Start out mixing 100 grams of the fondant will all of the liquid.  I use an electric hand mixer fitted with a whisk.  Be patient, this takes a while.
  • When the original 100 g of fondant gets incorporated into the liquid, slowing start adding pieces of the remaining 100 grams of fondant until the mixture starts to look like stiff peak royal icing.  You don't need to add all the remaining fondant; just add enough till the consistency look right. 

Tools Used:
  • Sugar Smoother/Scraper by  Innovative Sugar Works - This tool is great for scraping the gunge from the cake.  It is light and thin, but super strong.  The scrapper has other uses, but it is the go-to tool for gunge repairs.  You can get Smoothers with a ruler inked on the side or Ink Free.
  • Sugar Shapers are another great tool to use with gunging.  If you have a gap between your stacked tiers, you can pip the gunge in the gap and smooth it out using the Sugar Shapers.
  • An the best tool of all the the TurnTable Expander.  When draping the fondant over the cake, my regular turntable is not large enough to hold all the extra fondant that pools at the base.   The TurnTable Expander gives you an extra 8 inches of working space. The Expander fits my Cake Boss Turntable perfectly, but Innovative Sugar Works now sells their own turntable.
  • And, No, I don't work-for or have any relationship with Innovative Sugar Works.  As a hobby baker I just love their products.

Note 1: You can also half or quarter this recipe.

Note 2: If you use just water or just vodka as the liquid, the gunge patch will have a shiny appearance and stand out from the fondant around it.  The milk is used because the fat in the milk gives the gunge patch a matte finish that will make the repaired area blend seamlessly into the surrounding fondant. I have also used Soy Milk and it works just as well as the whole milk.

Note 3: The vodka is used because it quickly evaporates when exposed to air so it helps the repaired area dry quickly and lose its stickiness.  If you use water, the gunge will stay sticky for a much longer period.

So when your fondant is less than perfect - just  GUNGE  IT and forget it!!


Happy Decorating,

Carol


Sunday, August 20, 2017

Wizard of Oz Themed Birthday Cake


Man-oh-Man this was a tough one.  
So many little pieces-parts.  
So many things that could and did go wrong.


This cake was for my first cousin's grand daughter.  (What does that make the birthday girl?  My first cousin twice removed????)  Anyway, this cake was a doozie.  I spent weeks  making all the little objects out of gumpaste.

Out of all the little pieces-parts, I think the house is my favorite.  The porch, door and window are "broken" looking because hey -- the house fell from the sky.  I like the witch's legs poking out from underneath too.  You can't really see it, but I have some broken siding at the bottom where the witch's body cracked the wooden boards in half.  I was going to put a flower box under the window, but I thought it might be a little over kill.


Toto, Dorthy's basket, and the ruby slippers are there too...


Glinda's crown and wand...


The doodads for the Tin Man (ax, heart, and funnel hat), the Scarecrow (diploma), and the Cowardly Lion (medal of courage) are on the other side.  And poppies too, don't forget about the poppies.


I didn't like the "witch's" section as much.  The broom and hat came out okay, but there was just something missing from the final arrangement.  There was a void between the flying monkey and the sign that I couldn't fill.  (FYI:  The sign says "Follow the yellow brick road".)  Nothing seemed to work, so I just left it alone.  I think if I had put the monkey a little closer to the sign it could have been okay, but once I stuck him on the cake, there was no moving him.


The rainbow had some issue too.  I wanted it to be sparkly, but nothing I tried seemed to work.  The sanding sugar wouldn't stick, and the luster dust wasn't visible at all.  Oh well, no sparkly rainbow for the birthday girl.


This cake was a huge learning experience in my cake decorating adventures.  I just hope the cake makes it to the party okay (I'm not going to the party so I couldn't deliver it.)  My cousin picked it up on Saturday and drove it 50 miles to her home (actually I met her half way).  That drive didn't worry me because the cake was ice cold and rock hard.  But on Sunday the cake has to be driven another 100 miles to the party location.  The cake wouldn't fit into my cousin's refrigerator so I made her this nifty insulated cake box to help the thing stay cool.  The box even has a pouch that I loaded with dry ice!!!

So fingers crossed that the cake makes it to the party in good shape.


<< Disclosure: We are a participant in the Amazon Services LLC Associates Program, an affiliate advertising program designed to provide a means for us to earn fees by linking to Amazon.com and affiliated sites.>>
 
The supply list for this cake were pretty normal.  Gumpaste to make all the doodads.  14" Wilton cake drum for the base.  On this cake I used round Foam Core Boards under the cakes instead of the regular cardboard dividers.  I have been having problems with the cardboard dividers soaking up moisture and going limp (which in turn caused the cake to sag), so I decided to give the foam core boards a try.  And they worked great.  The form core is much stronger and more rigid than cardboard, but still soft enough to get a center dowels to pass through without pre-drilling.  You can also get the foam core in a 1/2 inch thickness so if your cake isn't quite tall enough you can boost it up with the form core.  But sadly the form core is also much more expensive, so I'll only use them when I know the cake is going to travel long distances, or the cake is taller than 2 tiers.

For the brick road I used a PME Brick Design Impression Mat, and I used Wilton's Color Mist to paint some of the objects: Silver for Glinda's hat and wand and the Tin Man's ax and hat, Black for the witch's hat, and Green for the Emerald City.   I used Color Pops powder food color on the house, Toto, the basket, some shadowing on the Emerald City, and the witch's broom.  I love using the powder color; it gives everything a more life-like look than just tinting the gumpaste with a single color.


For the sparkling gold color of the Lion's medal of courage I used  Alan Tetreault's edible luster dust.  I mixed the dust with a little vodka and just painted it on. Shiny...


Making the straw bristles of the broom gave me a frustrating 20 minutes till I had an Ah-Ha moment that totally changed the way I cut out gumpaste.  I was having trouble cutting the soft, sticky gumpaste into individual straw-like strands, so I sandwiched the gumpaste between inside a Reynolds Wax Paper Sandwich Bag and cut through all three layers at once.  The wax paper of the baggie is very, very thin (much thinner than regular wax paper) so the x-acto knife cut though the wax paper and gumpaste like a hot knife through butter.  Once cut, I just pealed the wax paper away and I had ultra thin bristles for my broom.  After this breakthrough I started cutting all my gumpaste between the wax paper baggies.


After I finished all my doodads, I arranged ever thing on Styrofoam cake dummies to see how they all looked together.  In all honesty I had to remake a few things because the proportions weren't right.  In fact I made the witch's hat three times before it looked good next to the broom.


The fondant I used on this cake is a new brand called Mona Lisa.  The fondant works great in high humidity, but I had other issues with the fondant that almost had me tossing it out the back door.  Look for the review of Mona Lisa fondant in the next few weeks.

So this ends my Wizard of Oz cake making adventure.  Now I just have to wait to see the Dorthy (oops, I mean the cake) makes it safely home.  But if the cake collapes along the way, at least I have a "Before" picture.


Happy Decorating,

Carol

Update:  My cousin just let me know that the cake made it to the party without a single problem.  The birthday girl loved it, so I'm a happy baker.


Sunday, August 6, 2017

Oreo Quadruple Stuf Cookie Cake

The Oreogasm Cake made famous by Delish has become a family favorite (they keep asking for it again and again).  But the standard Oreogasm Cake doesn't give me much opportunity to practice my decorating skills, so this time I decided to make the Oreogasm Cake into a (drum roll please) ...

Oreo Quadruple Stuf Cookie Cake!!!


It is like the Oreo Double Stuf Cookie, only with more "Stuf".  Get it... double the double Stuf is quadruple Stuf.  That's a lot of Stuf.

For the cookie top and base I baked two 9" round shortbread cookies.  I guess I should have made them chocolate shortbread, but hey, maybe next time.


To make the cookies black, I just brushed them with dark cocoa powder.  Here is the cookie that will form the bottom of the cake getting a dusting of cocoa powder.


Next I started making the iconic "Oreo" design out of fondant and arranging it atop the second cookie.


Here is the finished cookie top with all its do-dads.  Yes, I should have tinted the fondant black, but in the beginning I planned on just dusting it with cocoa powder.  That didn't work (the cocoa powder didn't completely obscure the white color) so in the end I had to paint each piece of white fondant with black food color.  What a time consuming PITA.


Last touch for the cookie top was a dusting of cocoa powder.


Ta Da,  The finished cookie top...


Next the stacking of the cake...
The finished cake.  How cool is that!!


And the inside was just Oreogasmic.  The shortbread cookie was pretty good too.


Happy Decorating,

Carol

Monday, July 31, 2017

Fantasia Fondant Review - Oh So Marshmallowy


Like The Neverending Story, this is The Nevernding Fondant Review. For my 14th review I'm doing Fantasia Fondant.  This fondant in made in Italy by Laped and distributed in the US by Vardanyan Enterprises.

Fantasia Fondant


In my non-expert analysis of these various fondants, I use ten different criteria: Taste, Texture, Rolling, Coverage, Draping/Smoothing, Cutting/Trimming, Drying Time, Tinting, The Final Look, and a recently added criteria: Humidity/Refrigeration/Moisture test.


Taste - If I had to describe the taste of Fantasia Fondant in one word it would be Marshmallowy.  That is what is tastes like, feels like, and smells like.  If you like the taste of marshmallows this is the fondant for you!

The mouth-feel of the Fantasia is soft, fluffy, and melts in your mouth.  It is also has a stretchy feel that reminds me of soft taffy.   After swallowing the fondant it leave a faint marshmallow taste in the mouth.   


Texture – Out of the foil wrapper this fondant is very soft and stretchy. You can pinch off pieces with no effort. When you first take the fondant out of the package it is a little sticky and damp, but after working it for a few minutes it loses most, but not all, of the tackiness.


 Disclosure: We are a participant in the Amazon Services LLC Associates Program, an affiliate advertising program designed to provide a means for us to earn fees by linking to Amazon.com and affiliated sites.

The fondant is very easy to knead, roll, and shape; and like the Renshaw, Fat Daddio and Dream fondant I reviewed a few weeks ago, it easily picks up textures from leaf veiners, impression mats, or even paper towels.


The Fantasia fondant is also very elastic and stretchy.  It almost acts like warm taffy.


I like these stretchy fondants because they don't rip as easily when covering the cake.  Another positive thing about this fondant is that it doesn't seems to gouge as much as other super soft brands.  The Renshaw and Via Roma fondants had this same non-gouging quality.  Maybe it is the stretchiness of the fondant that keep the marks from showing?? 


Rolling – Because the Fantasia fondant is so soft it is very, very easy to roll.  I would call it a breeze to roll.  You definitely won't get a workout rolling out this fondant.  The Fantasia also didn't produce any air bubbles inside the fondant when rolling.  <<Happy, Happy Dance >>   But I did notice some air bubble forming between the fondant and The Mat below.  Not a big deal though because once you lift the fondant from The Mat the air bubble disappears.

Another plus with the Fantasia is that its elasticity keeps the edges soft and smooth as it is rolled larger and larger.  No split, cracks, or ragged edges with this fondant.  Everything stays smooth and even.


And the Fantasia didn't stick to the plastic mat that I use to roll out the fondant.  It pulled off without any problems.   The fondant also had a very shiny appearance when I pulled it from the mat.  It almost glistened like it was rubbed with oil.


Coverage – In all the fondant tests I've conducted, I use 5 ounces of fondant and roll to 1/8” thick.  For the Fantasia I was able to roll the 5 oz to a little over 11 inches round.  For coverage, this is one of the better fondants I've tested. 


In fact you can roll this fondant even thinner than 1/8".  My 5oz could actually be rolled to 13 inches or more.  I was able to cover a 7x4" cake and a 8x4" cake with just 11 ounces of this fondant.   Wow!!   And even with the fondant that thin, I had no problems with the fondant ripping when I covered the cakes, and after covering I had no problems with the fondant becoming transparent due to the thinness. This fondant gets 5+ stars in the coverage department.


Draping/Smoothing - This Fantasia fondant forms A LOT of drapes and folds when placed on the cake (especially when you roll it really thin).  It was a little time consuming smoothing out the folds, but it wasn't too difficult. The fondant did get a little tacky while I was working with it (humidity was running about 90% that day), and because of the tackiness I couldn't use a plastic fondant smoother because it kept sticking to the fondant.  In the end I just used my hands to do all the smoothing, and it came out fine.   But one big advantage of the slightly tacky surface is NO ELEPHANT SKIN.  The surface of the fondant didn't dry out, so the fondant didn't get that ugly puckered look. (Sorry I forgot to take a picture of the draping with the white fondant on the "dummy" cake, so here is the draping on a real cake.)


Notice the difference in the sheen of the fondant when comparing the picture above and below?  In the picture above, the fondant (purchased pre-colored) was placed on a buttercream cake (1/2 butter, 1/2 crisco).  Notice how the blue fondant above is shinier and tackier than the white fondant pictured below (which is layer directly atop a metal pan).  I guess the Fantasia fondant (especially the tinted fondant) soaks up moisture from the cake and frosting layered under the fondant.


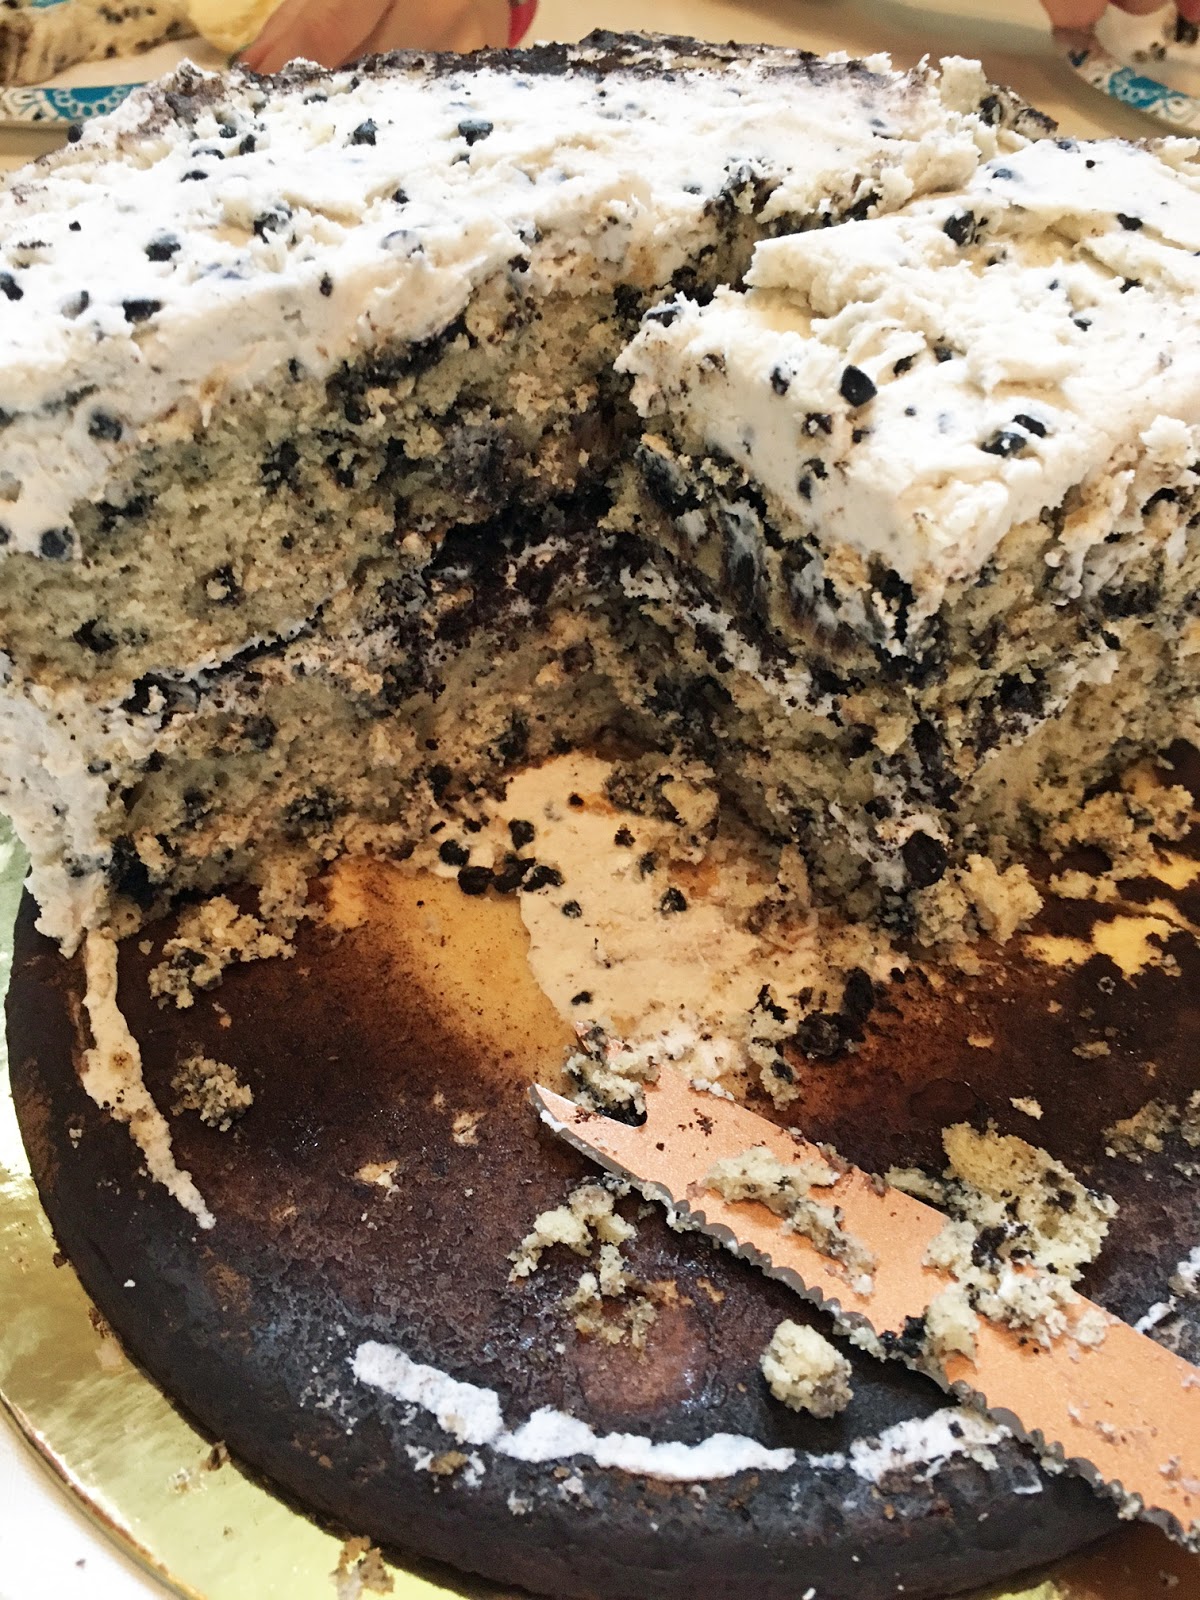
Cutting/Trimming – The fondant cuts easily with no major edge problems.  Even with my dull blade it slices nice and clean. 


Drying Time – As I tested this Fantasia fondant I noticed a lot of similarities between it and the Renshaw fondant.  Another similarity is how it dries - or doesn't dry.  The fondant almost forms a thin outer crust of dried fondant, but under that thin shell the fondant stays soft and malleable.   Below is a rectangle piece of fondant that is 1/4" thick.  It is freshly rolled and cut, yet it still holds it shape and doesn't sag too much when suspended over the side of the turntable.


And after over 36 hours of air drying, the fondant was still soft and tender under the hard shell.  I was able to squish the rectangle back into a ball and re-roll it.  The Renshaw fondant had this same quality.


Tinting – No major problems with tinting.  The Fantasia took the Wilton food color gels without any problems.  Even the troublesome burgundy looked true.


Most of the Americolor tints also works as well.  The only problems I noticed were with the Americolor mauve and burgundy.  The mauve came out brown (second from the right in the picture below) and the burgundy came out a little too purple (far right).


The tinted Fantasia fondants also stayed vibrant.  Even after a few days there was no fading.  But like most of the super soft fondants, adding a lot of color made the fondant much stickier and more susceptible to humidity and moisture leaching from the cake into the fondant.


Final Look – Overall the finished look of the Fantasia fondant was very nice.  No blemishes, sages, or gouges.  The bottom cut was a little wonky, but I think my cutting blade is getting a little dull.


Humidity/Refrigeration/Moisture Test

Humidity and Heat is a big problem in my neck of the woods so I wanted to document how the fondant react to refrigeration and humidity.  The moisture test is actually to test how the fondant reacts to the underlying frosting be it buttercream or ganache.

The test cake below shows two tiers covered in Blue Fantasia fondant after they were refrigerated overnight and then taken out and set on the counter. The top tier has ganache under the fondant and the bottom tier has buttercream under the fondant. It looks fine at this point.  It was just a little tacky to the touch, but nothing major.


Then I let the cake sit in an insulated box for about 3 hours so the cake would come to room temperature.  Sadly the fondant didn't handle the New Orleans summer humidity very well.  The fondant got very damp looking and was extremely sticky to the touch.  Just look how it shines.


The upper tier had ganache under the fondant. My ganache didn't come out as thick and sturdy as normal -- guess I put too much cream in it???   And my crumb coat of chocolate buttercream was a little thicker than normal.  But even with all the frosting problems, cutting through the fondant didn't make too much of a mess.  The soft, tacky fondant pulled a bit with the knife, but it wasn't unmanageable.


In fact the cut piece didn't look bad at all.


The bottom tier had buttercream under the fondant, and the Fantasia fondant had some serious problems with that (in combinations with the New Orleans humidity).  There was some major pulling of the fondant during slicing.


Not pretty at all....


Summary

So in summary, some of the big pluses with this Fantasia fondant include: 1) it was super easy to handle and roll, 2) it didn't rip or tear as I worked with it on the cake, 3) it didn’t form any “elephant skin” as it dried, 3) it didn't show many marks or gouges from my fingernails, and even when I did accidentally mark the fondant, the marks were easy to smooth out because the fondant is so elastic and stretchy, 4) the ability of this fondant to dry on the outside but not on the inside is really helpful if you need to remove and re-roll your fondant, 5) the taste was pretty good - if you like marshmallow, and 6) it can be rolled very thin so a 1.1 lb brick is more than enough to cover two smallish cakes.   

The only issue I had with the fondant was the way the Fantasia fondant handle humidity and the moisture leaching from the cake.  Even with ganache under the fondant, the fondant became sticky and shiny .  If you live in a dry climate this fondant is probably a great choice, but if the humidity is running in the 85-100% range this fondant my turn sticky. 


If you want to read my other fondant reviews you can find them here:  The original  7 fondant comparison, the Via Roma review, the Cake Craft review, the Carma Massa review, the Dream review, the Fat Daddio review, and the Renshaw review.

Happy Baking (and Decorating),

Carol