Monday, September 23, 2019

Coco Cake - Inspired by the Movie

This is a cake that I made for a friend with a theme of Coco (from the Movie).  It is not my favorite cake but I guess it is okay.  The lamp post look a little too tall and wonky, and some of the light globes aren't quite round.  I also should have put more yellow in the globes to make them stand out more against the white and pale blue background.  The birthday girl's name, Maeve, should have been in a different color - it doesn't stand out enough against the cobblestone textured board.  But I do like the ribbon roses on top.


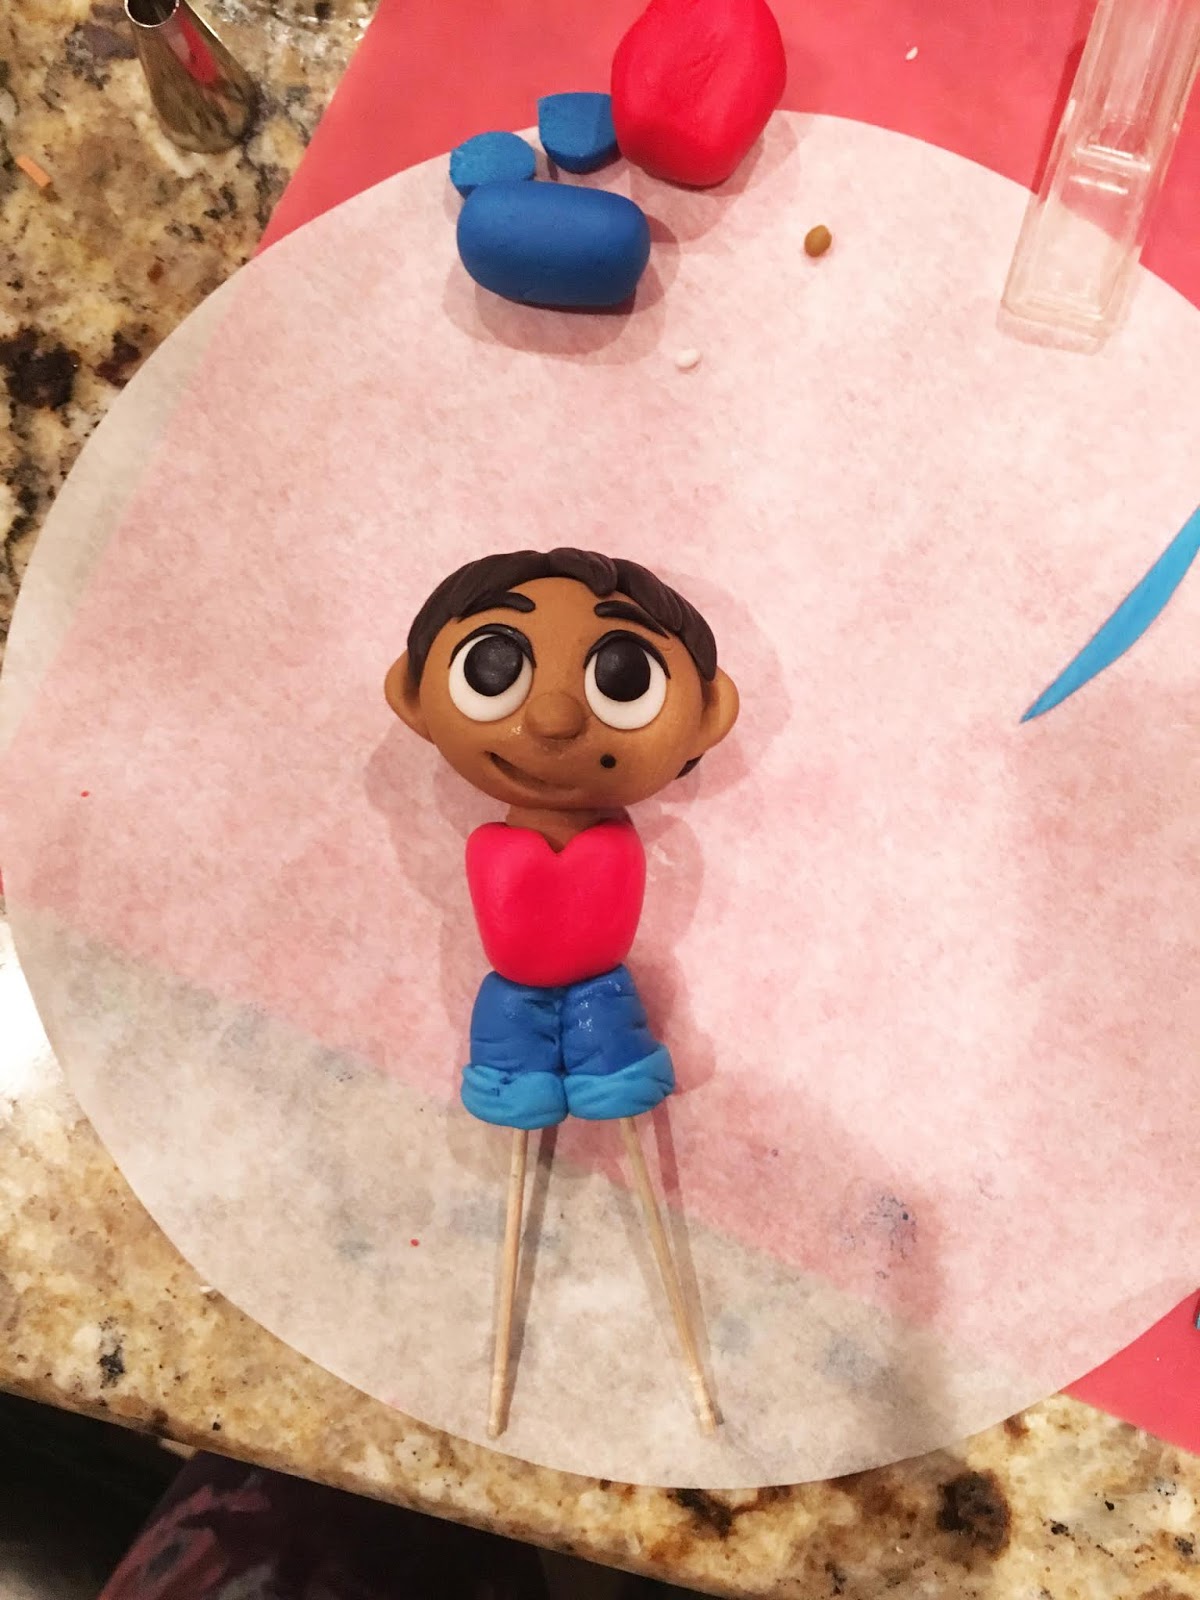
I made the Miguel figure from fondant mixed with tylose power.  I modeled the figure after the Funko version of Miguel.  I'm not very good at sculpting figures and the Funko version looked the easiest. 

I started with the face...


And then moved onto the body.  Once the body was on I placed his gum paste guitar in front of him and fitted his arms around the guitar.


For the COCO emblem, I cut the letters using a paper template, and used petals from a daisy cutter to make the narrow ovals on the "Os".


I put the COCO letter on the top tier, and added some easy ribbon roses on the top of the cake.  I made the leaves from fondant in several shades of yellow, orange, and red.


I cut the houses out by hand.  I used a strip cutter to cut the yellow molding around the door, and used a texture mat to give the roof some relief.


For the flags I used floral wooden stamps and then used a square cutter to cut the shape.


The lamp post went on last.


And then I placed Miguel in front.  I made his dog, Dante, too, but he looked so bad I didn't put him on the cake.  Like I said- I'm not very good at making figures.  

To give the cake some extra height I made a topper to mimic the swags of flags on the cake.  I cut the flags in the topper using my Cricut Explorer, hung the flags between two bamboo skewers, and added some ribbon. To match the rest of the cake the ribbon should have been darker shades of red and orange but all I had in my stash of ribbon were the paler colors.

So here is the finished cake.  I hope my friend likes it.


Happy Decorating,

Carol

<< Disclosure: We are a participant in the Amazon Services LLC Associates Program, an affiliate advertising program designed to provide a means for us to ear fees by linking to Amazon.com and affiliated sites.>>

Supply List: 

Funko Mini Miguel - guide for make my fondant Miguel
Knit Weave Impression Mat - to give texture on the roof tops
PME #3 Strip Cutter - for the trim around the doors and windows of the houses
Wooden Stamp Set - to make the impression on the fondant flags
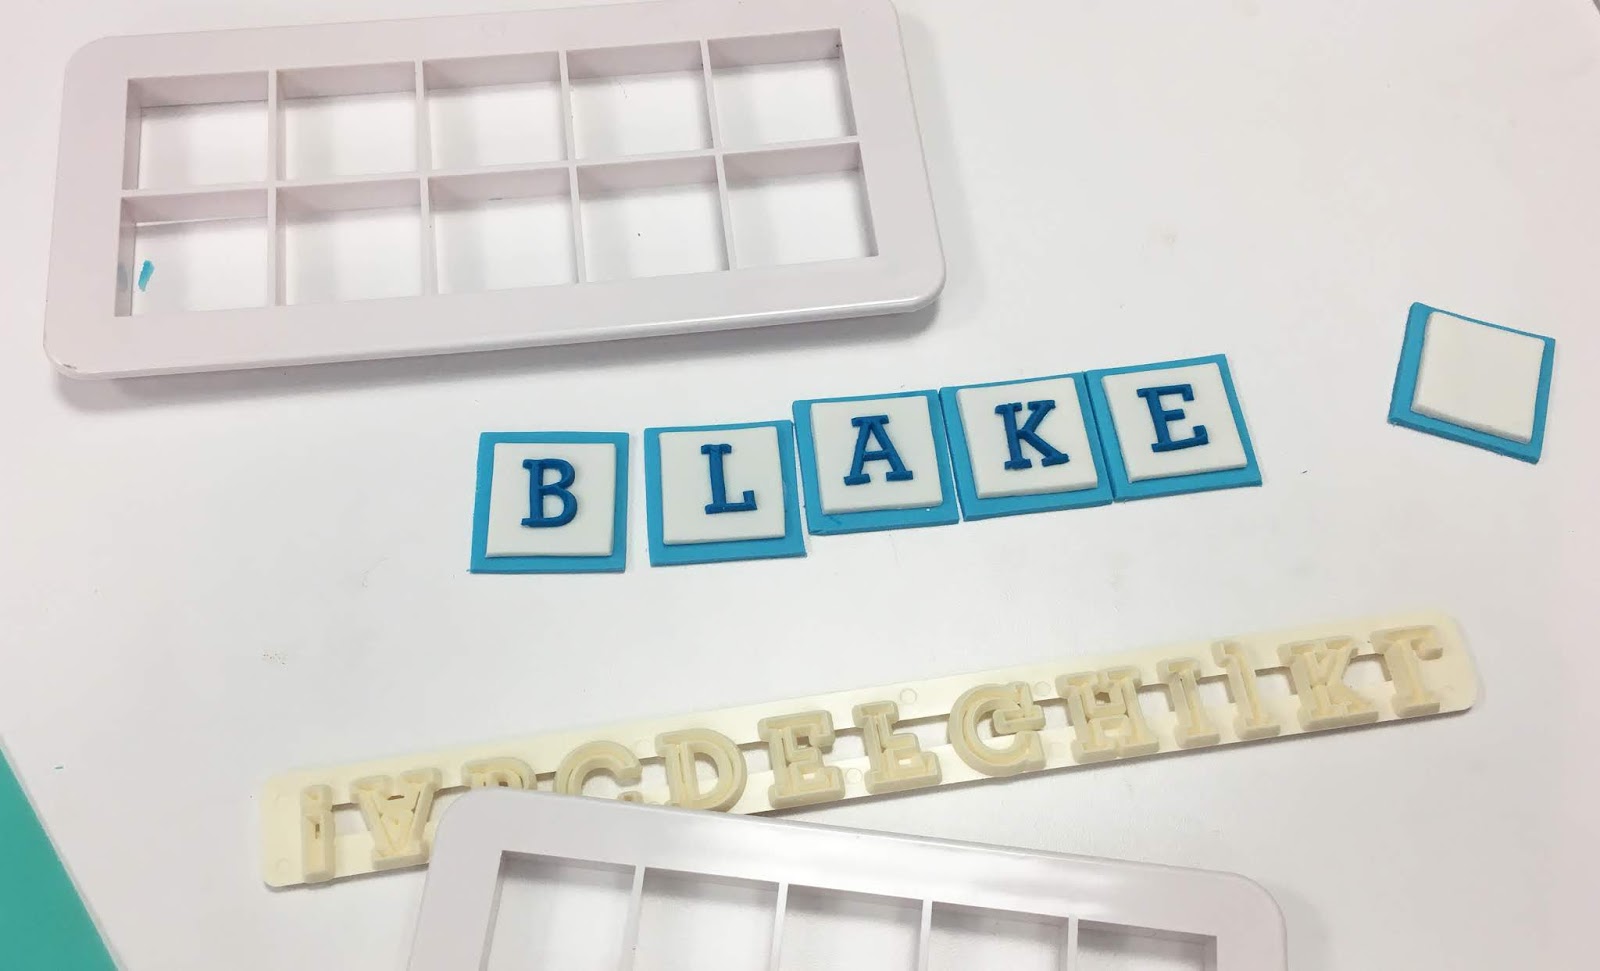
FMM Uppercase Funky Alphabet
14" Cake Drum
Cricut Explorer 2 - to cut the flags of the topper


Sunday, September 22, 2019

"Oh Baby" Drip Baby Shower Cake - Why can't I get my drips to look right?

Sigh--- I just can't get my drips to look right.  My cake looks more like a tall, melted candle than a pretty drip cake.  I guess my chocolate is still to thin, and my drips too close together and there are too many of them.  I tried to fix the drips but they ended up looking worse.  I even scraped the front drips off and tried again, but that still they looked like shit.   Oh well - the mom-to-be didn't seem to care.


But the top of the cake looked nice with its macaroons, meringues, and sugar cookies.  And my Cricut cut topper came out nice.


The gum paste shoes and block added the finishing touch.  You can't see it, but the letters on the block spell out the baby's name: Blake.  The mom-to-be loved that.


 So another cake finished, but still a lot to learn. I will master the drip technique one of these days.


Happy Decorating,

Carol

<< Disclosure: We are a participant in the Amazon Services LLC Associates Program, an affiliate advertising program designed to provide a means for us to ear fees by linking to Amazon.com and affiliated sites.>>

Supply List: 

Multi Cutter Square Fondant Cutter - To cut the sides of the baby block
FMM Alphabet Tappits - Upper and Lower Case - For letters on baby block
Knit Weave Impression Mat - To give texture to fondant baby blanket
Fondant Crimper Set - To finish the edge of the baby blanket with the ruffled look
14" Cake Drum
Cricut Explorer 2 - To cut "Oh Baby" topper
Clear Lollipop Sticks - to attach to "Oh Baby" topper


Monday, September 2, 2019

Woodland Animal Cake - Animals made with Cookie Cutters

I'm not an artist or a sculptor, and I struggle to make anything 3D.  My 3D figures always look a little scary, oldly shaped, and usually downright ugly.  I wanted to make a Woodland Animal cake for a friend's baby shower, so I was thrilled when I found some cake examples using cookie cutters to form the animals.


<< Disclosure: We are a participant in the Amazon Services LLC Associates Program, an affiliate advertising program designed to provide a means for us to ear fees by linking to Amazon.com and affiliated sites.>>

For most of the figures I used Ann Clark's Woodland Animal Cookie Cutter Set to get the main shape of the animal.  I then used other random cookie cutters to make the details.  For the fox I cut out the body using some orange-ish fondant.


And then I used heart shaped cookie cutters and tiny heart shaped plunger cutter to form the inside of the ears and the white patches of fur on the face.  Before placing the heart shapes on the checks I cut off the lower 1/3 which helped to define the shape of the face.  I made this cut using oval cutters from Sugarbelle.


For the white tip of the tail, I cut out the shape using the fox cookie cutter, and then I cut a random pattern from the bottom using a flower gum paste cutter. (I think is was a tulip cutter.)


Then I just added a white rectangle for his stomach fur, some rectangles for legs, black feet, eyes, and a nose.  In just a few minutes he was done.  How easy is that?

Note, to make the bird I used two different sized paisley cookie cutters.


For the Raccoon I used the same fox cookie cutter (I flipped the cutout so the tail would face the opposite direction), but embellished it a little differently to make it look like a raccoon.  To make his "mask" I used an oval cutter, stretched it out a little more and then cut the V shaped notches with the tip of a heart cutter.


Next I made a frog.  I used a cutter from the  Wilton 50 cookie cutter set to cut out the entire frog in the light green, then used the oval cutter to cut off his legs. (Frog legs anyone?)  I cut another frog from the darker green and cut off the top portion of the frog's body.  Then I just placed the light green on top of the darker green to give the frog the 3D look.  I placed his eyes and a few dots cut from a #5 piping tip and called him done.  (I planned on placing a white oval of fondant on his chest, but I forgot to do it.)  The mouth was made in a roundabout way.  First I made the mouth from a thin piece of black fondant and placed it on the green fondant.  After a little while I decided the black fondant mouth was too harsh looking so I took it off (intending to replace it with green), but the black fondant had stained the green fondant.  I thought it looked fine so I just left it like that.


I also made a squirrel but I didn't like the way his looked so I stuck him on the back of the cake.


The owl cake toppers I made ahead of time using a mixture of fondant and Tylose Power.  I got a little more complex with the layering of the topper, but it is the same technique as the examples above.


I used Ann Clark Owl cutters  for both the small and the large owl.  I cut out the owl shape and then trimmed off the wings using an oval cutter.  I also pushed a wooden skewer into the main body of the owl, and secured it with a little bit of water.   I cut out another fondant owl and trimmed off the head so I was only left with the wing section.   I textured the wings using a random leaf texturer I had, and then stuck the two pieces together with a little bit of water. 


Next I textured some white fondant and then cut out an oval shape for the white breast of the owl.  At the top end of the oval I cut out circles, and then placed a thicker white circle into the opening.  I used a thicker piece of fondant for the eye area because I wanted them to stand out move.  Note: I texture the fondant before you cut it out so it doesn't get distorted.


Next I added the eyes using circle cutters and piping tips to get the sizes exactly the same.


As a final step I added the yellow beak and feet.  I also added a few more touches (triangle inside the ears and another oval cut out around the white breast.)  For the apple tree I used a cookie cutter I found on Etsy.  I let all three pieces dry for a few days so they would be nice a hard when I placed them on the cake.


So here is my Woodland Animal Cake made with cookie cutter animals.  Kind of cute, huh??  Using cookies cutters to form the animals is so much easier than sculpting them my hand.  Give it a try!


Happy Decorating,

Carol

<< Disclosure: We are a participant in the Amazon Services LLC Associates Program, an affiliate advertising program designed to provide a means for us to ear fees by linking to Amazon.com and affiliated sites.>>

Supply List: 

Ann Clark Woodland Cookie Cutters
Heart Shaped Cookie Cutters
Heart Shaped Plunger Cutter
Sugarbelle Oval Cutters
Paisley Cutters
Wilton Cookie Cutter Set
Tylose Power
Ann Clark Owl Cutter Set
12" Cake Drum

Sunday, August 25, 2019

Bows Are My Super Power - JoJo Siwa Inspired Cake

This is a JoJo Siwa inspired cake that I made for my 1st cousin's daughter.  Kinley is JoJo crazy so she asked for BOWS on her cake - lots and lots of BOWS.  Apparently Bows are a Super Power.


Even the back of the cake got a little bow loving.


I thought this cake was going to be easy, but it never seems works out that way for me.  I had a horrible time getting the bottom tier smooth.  Every time I passed my bench scraper over the buttercream it pulled away from the cake.  Grrrrr, I think I spent 2 hours trying to get that sucker smooth.  I had no trouble smoothing the top tier, but the bottom one had me in tears.

But after I got the cake stacked, the decorating went pretty fast.  The rainbow heart was the only piece I had to think about.  I started with a gum paste base cut with a 4" heart shaped cookie cutter, and then I tinted some fondant in shades of purple, blue, green, orange, yellow, and pink.  Note: I used a gum paste base, because I thought just plain white fondant would pull out of shape as I worked with it.


I covered half of the heart with pink fondant, and then started layering the other colors in a curved shape.


After all my colors were in place, I flipped the heart over and used the cookie cutter to cut off the excess.


And here is the final heart.


Once I placed the heart on the cake, I outlined the edge of the heart with white fondant.


Another item on the cake was the number 5.  I used a paper template to cut out the number and a JoJo heart swirl from my pink fondant, and then put that on top of some gum paste.  I cut the gum paste to fit the number and heart swirl, and then let it dry flat.


The many bows on the cake are made from satin ribbon.  I thought about making the bows from fondant to keep with the "all edible" thing, but the fondant bows just didn't give me the sparkle, shimmer, and floppiness I wanted.  So I just made some quickie ribbon bows.

So Happy Birthday, Kinley, and enjoy the JoJo concert next week.


Happy Decorating,

Carol

<< Disclosure: We are a participant in the Amazon Services LLC Associates Program, an affiliate advertising program designed to provide a means for us to ear fees by linking to Amazon.com and affiliated sites.>>

Supply List: 

Top Tier Color: Wilton Teal mixed with a little Sky Blue (they sky blue keeps the teal from looking too green)
Bottom Tier Color: Wilton Pink mixed with Ivory (the ivory softens the pink and keeps it from looking too bright)
White 14" Cake Drum
Sixlet Spring Shimmer Chocolate Flavored Candies
Wilton Tylose Powder
Satin Ice Gum Paste
Wilton 4" Heart Cookie Cutter
FMM Funky Alphabet Cutters
Razor Slicer
ACE Food Safe Extruder

Sunday, August 11, 2019

Aloha Baby Shower Cake

The is an Aloha Baby Shower Cake that I made for a friend of my niece.  I was a little disappointed in the overall look of the cake and especially in the pink ombre effect.  The blending just didn't look right. 


I don't know where I went wrong.  I stacked my different shades of pink.


And then scraped and blended everything with my bench scraper.  I kept adding color and taking it away, but it just didn't look right.  I guess I should have airbrushed the cake to get the look I was after.


But I did like the baby sandals that I made.  They came out kind of cute.


I just found a pattern and used it to cut out the gum paste.  Super easy to make.


So not my best cake, but not my worst.

Happy Decorating,

Carol

Wednesday, August 7, 2019

Picket Fence Flower Cake

My Mom is an avid gardener and flowers are her special love, so for her 85th birthday I made her a cake covered in flowers.  FYI: My Mom's name is Daphne.


If you don't count the many hours that went into making the gum paste flower, then this cake was a snap to put together.  I slapped a rough layer of buttercream onto a 10", 8" and 6" cake and then stacked the three tiers.  I didn't worry about straight edges or flat tops because I knew everything would be hidden with fence pickets and flowers.  Win-Win.

<< Disclosure: We are a participant in the Amazon Services LLC Associates Program, an affiliate advertising program designed to provide a means for us to ear fees by linking to Amazon.com and affiliated sites.>>

To make the pickets for the fence I mixed some tylose power with white fondant, rolled the fondant to 1/8", used a wood grain impression mat to emboss the pattern onto the fondant, cut the fondant into 1/2" wide strips, and then used the top of a star cookie cutter to make the angled cut on the top of the picket.  How easy is that?


I made a LOT of pickets.  I also dusted them with some brown powder food color to bring out the texture of the wood grain.


The first step in construction of the picket fence was to place three horizontal rails around each cake. 


After the rails were in position I started placing the individual pickets.


It was soooo easy... until I ran out of pickets and had to stop and make more.  I thought I had calculated the number of pickets I needed, but I was never very good at math.  After all the pickets were in position, I started placing the flowers.  I had tons of gum paste flowers, but like the pickets I miss-calculated and had to use a few silk flowers to fill in the blank spaces.

In addition to the cake, I also baked and made a lot of sweets for a Candy/Sweet Buffet.  I had pralines, sugar cookies, and chocolate dipped Oreo cookies, strawberries, shortbread cookies, and pretzels.  I also had cake pops, candy, and lollipops.  I had little paper bags that people could fill and take their treats home.  By the end of the party, the Candy/Sweet Bar was wiped clean.


The party was a huge hit.  Happy 85th Birthday, Mom.


Happy Decorating,

Carol

Supply List: 

Mona Lisa Fondant
Wilton Tylose Powder
Wood Grain Impression Mat
Wilton Ribbon/Strip Cutter
Brown Powder Food Color
Wilton's Buttercup Yellow Gel Color